Introduction
A well-designed wardrobe plays a central role in bedroom organization and overall interior balance. It combines storage efficiency with visual structure, making it a key element in modern home decor planning. This article presents practical Pinterest ideas that focus on functionality, aesthetic appeal, and beginner friendly DIY approaches for creating wardrobe designs that suit different spaces and needs.
Readers will learn how to plan, design, and execute wardrobe concepts using accessible materials and step by step methods. Each idea focuses on realistic solutions that support organization, maximize space, and maintain a clean, modern design. These creative ideas offer inspiration for transforming any bedroom into a structured and visually appealing environment.
Why This Idea Is Trending or Useful
Wardrobe design has become a major focus in Pinterest ideas because of increasing demand for efficient storage and minimalist style interiors. Modern homes often require smart organization solutions that reduce clutter while maintaining a clean visual layout. Wardrobes are no longer limited to storage units; they now function as integrated design elements within bedroom spaces.
The popularity of DIY wardrobe tutorials is driven by accessibility and cost control. Many users prefer budget ideas that allow customization without professional installation. This approach supports creative project flexibility while remaining beginner friendly. With the rise of small-space living, wardrobe designs that maximize vertical and hidden storage have gained strong relevance.
Additionally, aesthetic presentation plays a key role. Organized wardrobes contribute to visual calm and structured living. Pinterest inspiration often highlights neutral tones, symmetrical layouts, and functional compartments, making wardrobe projects both practical and visually aligned with modern design trends.
Materials and Preparation
Before starting any wardrobe project, proper planning ensures efficient execution. Basic materials typically include plywood or MDF boards, screws, brackets, hinges, sliding rails, and finishing materials such as laminate or paint. For open or lightweight designs, metal frames and fabric panels may also be used.
Essential tools include a measuring tape, drill machine, screwdriver, level tool, and cutting equipment. Accurate measurements are critical to ensure the wardrobe fits the available bedroom space without disrupting movement or layout balance. Planning should also consider door clearance, storage requirements, and accessibility.
Preparation involves mapping internal sections such as hanging space, shelves, drawers, and compartments. Sketching a layout helps visualize the final structure and prevents design errors. It is also important to define the style direction, whether minimalist, modern, or decorative, to maintain consistency throughout the project. Organized planning reduces material waste and ensures a smoother DIY process.
Idea 1: Minimalist Sliding Door Wardrobe
How to Create
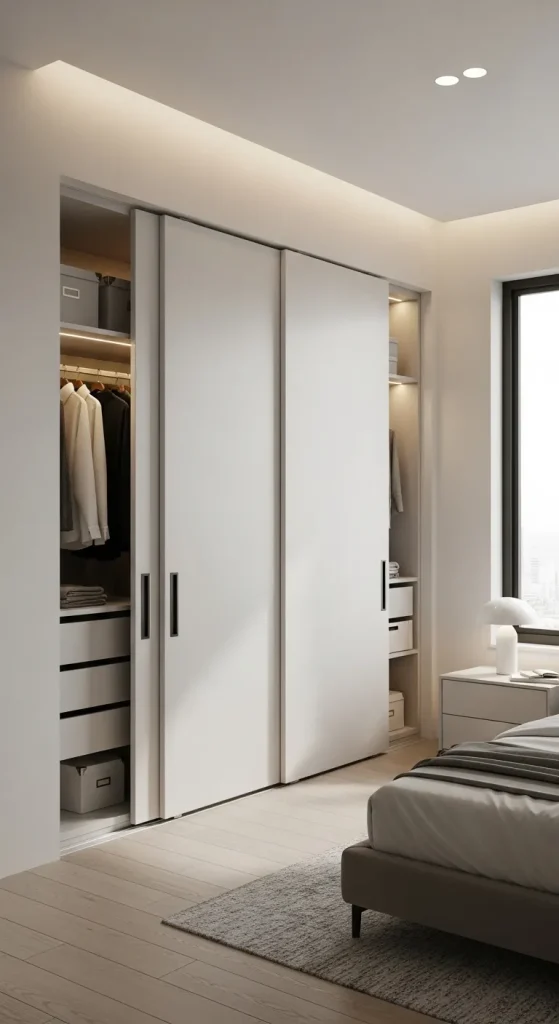
A minimalist sliding door wardrobe focuses on clean lines and efficient space usage. This design eliminates the need for outward-opening doors, making it ideal for compact bedrooms. The exterior typically features flat panels with neutral tones such as white, beige, or grey, supporting a modern design approach. Sliding systems enhance accessibility while maintaining a clutter-free visual appearance.
Internally, the structure is divided into sections for hanging clothes, folded items, and accessories. The emphasis is on symmetry and balanced spacing. This type of wardrobe aligns with Pinterest inspiration due to its simple aesthetic and functional organization. It works well in both small and medium-sized bedrooms, offering a structured and refined look without excessive decoration.
Step-by-Step Guide
Begin by measuring the available wall space and determining the wardrobe width and height. Install a base frame using plywood or MDF panels. Attach vertical dividers to create sections for storage. Next, install sliding door tracks at the top and bottom of the frame, ensuring proper alignment for smooth movement.
Attach sliding panels using lightweight boards or laminated sheets. Ensure the panels overlap slightly to prevent gaps. Add internal shelves and hanging rods according to the planned layout. Finish the surface with paint or laminate for a polished appearance. This DIY tutorial focuses on precise measurements and stable installation to ensure durability and smooth functionality.
Idea 2: Open Concept Wardrobe System
How to Create
An open concept wardrobe removes doors entirely, creating a visible and accessible storage system. This design emphasizes organization and encourages maintaining neat arrangements. It is commonly used in minimalist style interiors where visual simplicity and functionality are prioritized.
The structure typically includes vertical frames with evenly spaced shelves and hanging rods. Materials such as wood or metal are often used to create a lightweight and modern look. This wardrobe design is suitable for individuals who prefer quick access to clothing and a visually structured setup. It also enhances room openness by reducing bulky elements.
Execution Process
Start by installing a sturdy vertical frame against the wall. Use brackets or metal supports to secure shelves at different heights. Install hanging rods for clothing sections, ensuring proper spacing for longer garments. Add smaller shelves or boxes for accessories and folded items.
To maintain organization, group items by category and color. This approach supports both functionality and aesthetic appeal. Optional additions include fabric baskets or drawer units for concealed storage. This easy project requires consistent organization habits to maintain its clean and structured appearance over time.

Idea 3: Built-In Wall Wardrobe
How to Create
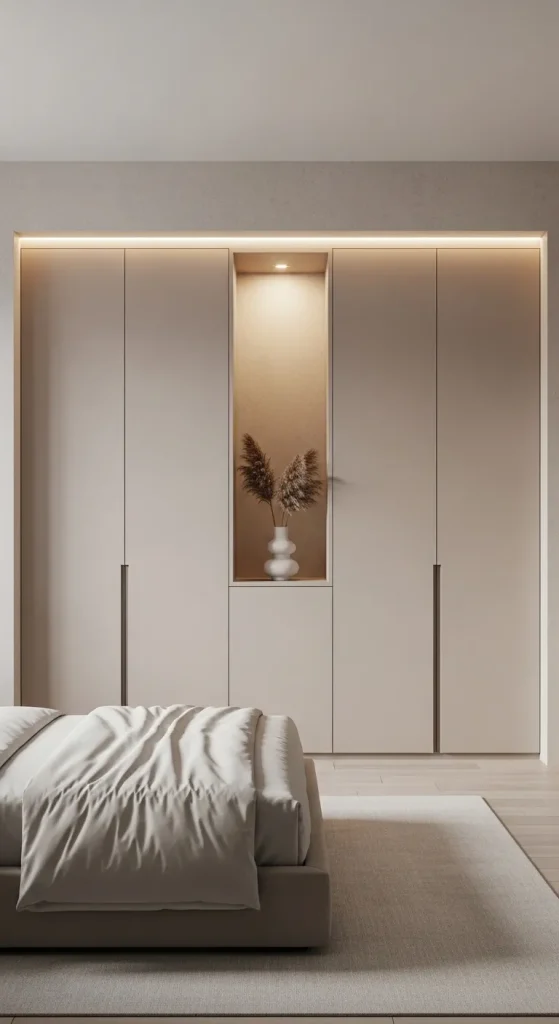
A built-in wall wardrobe is designed to integrate seamlessly into the bedroom structure. It maximizes space by utilizing the full height and width of a wall. This design creates a cohesive look, making the wardrobe appear as part of the room rather than a separate unit.
The exterior often features flush panels that blend with wall colors, supporting a minimalist and modern design. Internally, it includes customized compartments tailored to storage needs. This wardrobe is highly efficient for long-term use and is widely featured in Pinterest ideas due to its clean and structured appearance.
Setup Method
Measure the wall dimensions carefully and create a frame that fits precisely within the space. Install base panels and vertical supports to form the internal structure. Add shelves, drawers, and hanging rods according to the planned layout.
Attach front panels or doors that align with the wall surface. Use concealed hinges or sliding mechanisms for a seamless finish. Ensure all edges are properly finished to maintain durability. This project requires careful planning but results in a highly organized and visually integrated wardrobe solution.
Idea 4: Corner Wardrobe Design
How to Create
A corner wardrobe utilizes unused room corners, making it an efficient solution for small bedrooms. This design transforms awkward spaces into functional storage areas. It often features angled or L-shaped structures that fit neatly into corners.
The design focuses on maximizing storage while maintaining accessibility. It includes shelves, hanging sections, and sometimes rotating racks for better reach. This creative project is ideal for optimizing space without overcrowding the room.
Step-by-Step Guide
Start by measuring the corner area and determining the depth of each side. Build an L-shaped frame using sturdy materials. Install shelves and rods along both sides, ensuring balanced spacing.
Add doors or keep the design open depending on preference. For better functionality, include rotating or pull-out racks. Finish the surface with paint or laminate to match the room decor. This DIY wardrobe idea is practical and enhances space utilization effectively.

Idea 5: Glass Panel Wardrobe
How to Create
A glass panel wardrobe combines transparency with modern design. It creates a visually open feel while showcasing organized clothing. This design is popular in aesthetic bedroom setups where presentation is important.
The structure typically includes a wooden or metal frame with glass panels as doors. Frosted or tinted glass can be used for partial visibility. This wardrobe adds sophistication while maintaining functionality.
Execution Process
Construct a standard wardrobe frame with internal compartments. Install glass panels within door frames using secure fittings. Ensure the glass is properly supported to prevent damage.
Add internal lighting for enhanced visibility and presentation. Organize items neatly to maintain a clean look. This design requires careful handling of materials but delivers a refined and modern appearance.

Idea 6: Modular Wardrobe System
How to Create
A modular wardrobe consists of separate units that can be rearranged based on needs. This flexible design allows customization and easy expansion. It is ideal for evolving storage requirements.
Each module includes specific functions such as shelves, drawers, or hanging sections. This approach supports organization and adaptability, making it a popular choice in modern homes.
Step-by-Step Guide
Select or build individual modules using uniform dimensions. Arrange them according to available space and storage needs. Secure the units together to maintain stability.
Adjust the layout as needed over time. This system allows easy modifications without major reconstruction. It is a practical and beginner friendly approach to wardrobe design.

Idea 7: Wardrobe with Integrated Study Desk
How to Create
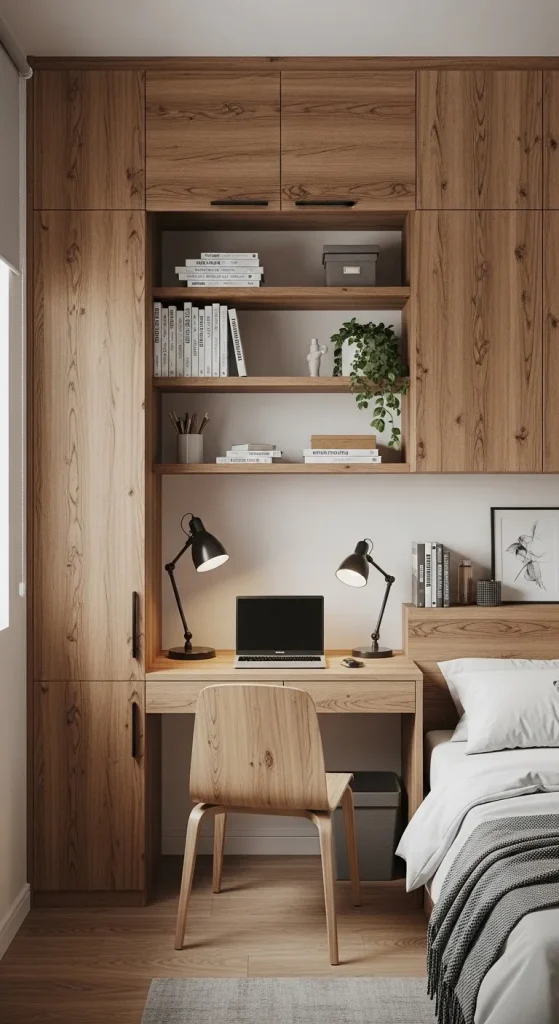
This design combines a wardrobe with a study desk, making it suitable for compact bedrooms. It supports multi-functional use of space while maintaining organization.
The wardrobe section includes standard storage compartments, while the desk is integrated into the structure. This design enhances efficiency and reduces the need for additional furniture.
Execution Process
Design a layout that includes both wardrobe storage and desk space. Build the wardrobe frame first, then attach a desk panel at an appropriate height.
Ensure proper support for the desk area. Add shelves above the desk for additional storage. This design is practical for small rooms and supports organized living.
Idea 8: Walk-In Wardrobe Setup
How to Create
A walk-in wardrobe provides a dedicated storage area separate from the main bedroom space. It offers extensive organization and accessibility.
The design includes multiple sections for clothing, shoes, and accessories. It focuses on clear categorization and spacious layout.
Setup Method
Allocate a separate area or partition within the bedroom. Install shelves, rods, and drawers along the walls. Ensure proper lighting and ventilation.
Organize items systematically for easy access. This setup requires more space but offers high functionality and structured organization.

Idea 9: Mirror Door Wardrobe
How to Create
A mirror door wardrobe combines storage with reflective surfaces. It enhances room brightness and creates an illusion of larger space.
The design includes mirrored panels on wardrobe doors, supporting both functionality and aesthetic appeal.
Step-by-Step Guide
Build a standard wardrobe frame and attach mirror panels to the doors. Ensure proper alignment and secure installation.
Use protective backing for safety. This design is practical and improves overall room appearance.

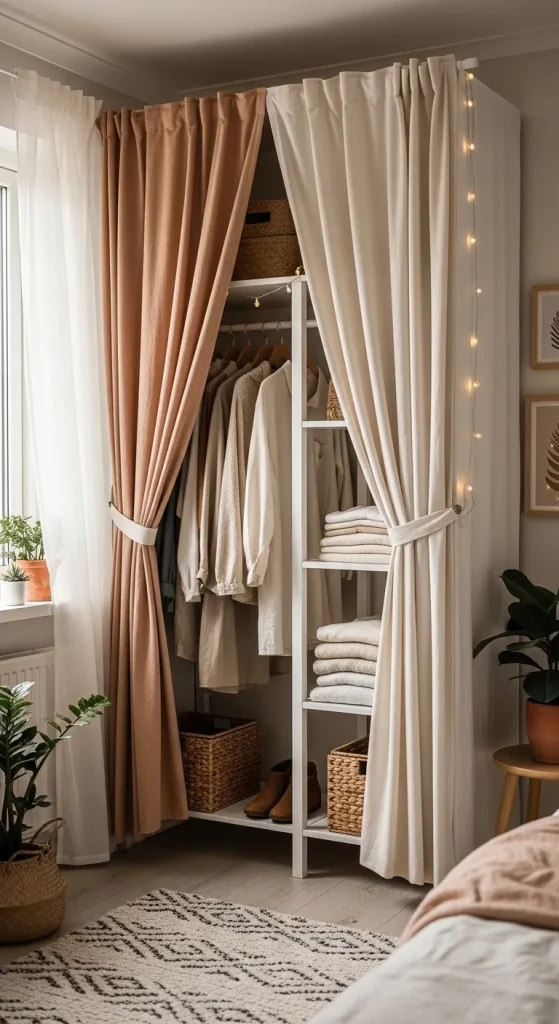
Idea 10: Fabric Curtain Wardrobe
How to Create
A fabric curtain wardrobe is a budget friendly and easy project. It replaces traditional doors with curtains, offering flexibility and simplicity.
This design is suitable for temporary setups or low-cost solutions.
Execution Process
Install a basic wardrobe frame or open rack. Attach a curtain rod at the top and hang fabric panels.
Choose durable and easy-to-clean materials. This approach is simple and effective for quick organization solutions.
Common Beginner Mistakes and How to Avoid Them
One common mistake is inaccurate measurement, which leads to poor fitting and wasted materials. Always measure multiple times before cutting or assembling components. Another issue is overloading the wardrobe without proper structural support, which can cause instability. Using appropriate materials and secure fittings prevents this problem.
Ignoring internal layout planning is another frequent error. Without defined sections, organization becomes difficult. It is important to plan compartments based on actual storage needs. Additionally, poor finishing can reduce durability and visual appeal. Applying proper paint or laminate ensures long-term use and a polished look.
Practical Tips for Better Results
Using consistent materials improves structural stability and visual harmony. Always align shelves and rods evenly to maintain balance. Proper lighting inside wardrobes enhances usability and visibility.
Labeling or categorizing sections helps maintain organization over time. Regular maintenance, such as cleaning and rearranging, keeps the wardrobe functional. Following a clear tutorial and step by step approach ensures smoother execution and better results.
Styling, Presentation, or Organization Ideas
Arrange clothing by type and color to create a visually structured layout. Use storage boxes or baskets for smaller items. Keep frequently used items within easy reach.
Neutral tones and clean lines enhance the aesthetic appeal. Avoid overcrowding shelves to maintain a neat appearance. Proper styling contributes to both functionality and overall bedroom design.
Budget or Time Planning
Set a clear budget before starting the project. Choose materials that balance cost and durability. Planning purchases in advance helps avoid unnecessary expenses.
Allocate time for each stage, including measurement, construction, and finishing. Breaking the project into smaller steps improves efficiency. Budget ideas and time management ensure successful completion without delays.
Creative Expansion and Advanced Inspiration
Advanced wardrobe designs can include lighting systems, automated doors, or hidden compartments. These features enhance functionality and modern appeal.
Experimenting with textures, colors, and layouts adds uniqueness to the project. Combining different design ideas creates customized solutions. Continuous exploration of Pinterest inspiration supports creative growth and improved design outcomes.


Leave a Reply