Introduction
Pink background ideas have become a central focus in modern Pinterest inspiration, especially within DIY and home decor projects. This article explains practical and creative ways to design pink-themed landscape backgrounds using simple materials and step by step methods suitable for beginners.

Readers will learn how to plan, create, and style pink background concepts for decoration, photography, or aesthetic spaces. Each idea focuses on realistic execution, clear materials, and structured processes, making every concept easy to apply as a creative project with strong visual impact.
Why This Idea Is Trending or Useful
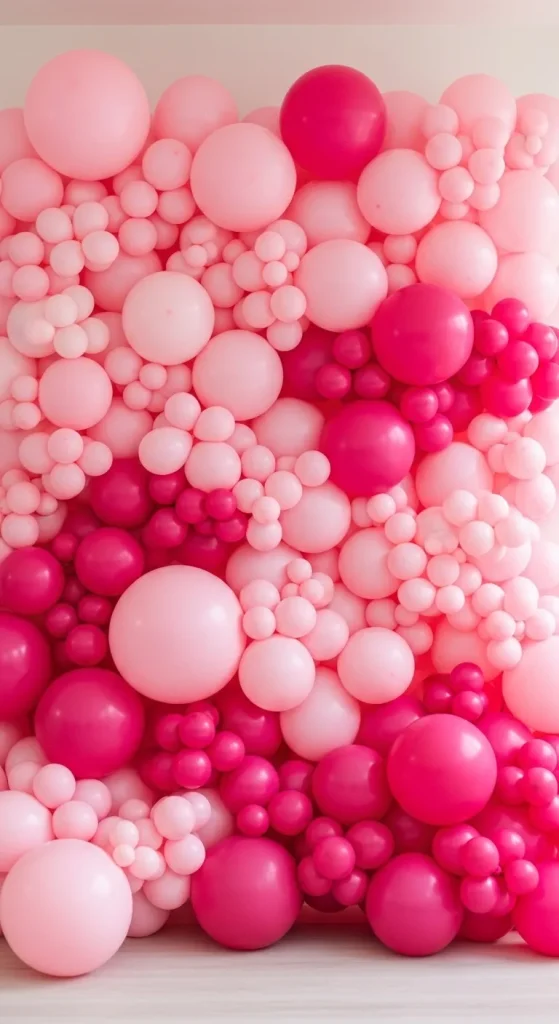
Pink background designs are widely used in Pinterest ideas because they provide a clean, aesthetic base for visual content, home decor, and creative DIY projects. The color pink is associated with softness, balance, and visual warmth, making it suitable for modern design and minimalist style concepts. Landscape-style backgrounds expand this further by adding depth, dimension, and layered visual interest, which enhances both decorative and functional applications. These designs are commonly used for photography setups, wall decoration, event styling, and workspace organization, making them highly practical.
The growing popularity of handmade and budget ideas has also contributed to the rise of pink background concepts. Many of these creative ideas require simple materials such as paper, fabric, paint, or foam boards, making them accessible for beginners. The step by step approach allows users to experiment without advanced skills, while still achieving professional-looking results. This combination of affordability, visual appeal, and versatility makes pink landscape backgrounds a trending and useful creative project.
Materials and Preparation
Creating pink background landscapes requires basic planning and organized preparation to ensure consistent results. Common materials include colored paper, acrylic paint, foam boards, fabric sheets, glue, scissors, and brushes. Additional elements such as artificial flowers, textured materials, or printed patterns can be used to enhance depth and variation. Tools like rulers, cutting mats, and adhesive tapes help maintain accuracy during the process. Selecting the right shades of pink, from pastel to bold tones, is an important step in achieving a balanced and visually appealing design.
Preparation involves planning the layout before starting the project. Sketching the background structure helps define layers, shapes, and placement of elements. It is also important to decide the purpose of the background, whether it is for decoration, photography, or organization. Cleaning the workspace and arranging materials in advance improves efficiency and reduces errors. Proper planning ensures that each step of the tutorial flows smoothly, making the project beginner friendly and easier to execute.
Idea 1: Soft Gradient Pink Landscape
How to Create
A soft gradient pink landscape focuses on smooth color transitions that create depth without complex elements. This idea uses multiple shades of pink blended together to form a calming and aesthetic background. The gradient effect mimics natural landscapes such as skies or distant horizons, making it suitable for minimalist style decoration or photography setups. This concept is widely used in Pinterest ideas because it creates a clean and modern design without requiring advanced artistic skills. The key element in this approach is color balance, ensuring that each shade blends seamlessly into the next without harsh lines.
To create this effect, start by preparing a flat surface such as a canvas or foam board. Apply a base layer of light pink paint and gradually add darker shades using a blending technique. Use a soft brush or sponge to merge the colors smoothly in horizontal strokes. Allow each layer to dry slightly before adding the next to avoid uneven textures. Maintain consistent pressure while blending to achieve a uniform gradient. This step by step method ensures a polished result, making it an easy project for beginners.

Idea 2: Layered Paper Landscape
How to Create
A layered paper landscape uses cut-out shapes to create depth and dimension. This design involves stacking multiple layers of pink paper in different shades to simulate hills, waves, or abstract forms. It is a highly visual and structured DIY concept that aligns with modern design trends. The layered approach creates shadows and highlights naturally, adding a three-dimensional effect without complex tools. This method is ideal for creative ideas that focus on handmade decoration and aesthetic presentation.
To execute this idea, cut several curved or abstract shapes from different shades of pink paper. Arrange them in layers, placing darker tones at the bottom and lighter ones on top to create contrast. Attach each layer using foam tape or glue, leaving slight gaps between layers to enhance depth. Ensure alignment is consistent across all layers to maintain a clean appearance. This setup method allows flexibility in design while keeping the process simple and beginner friendly.

Idea 3: Pink Fabric Flow Background
How to Make
A pink fabric flow background uses soft materials to create a natural and fluid landscape effect. This idea focuses on texture rather than structure, making it suitable for aesthetic photography or decorative setups. The folds and drapes of the fabric create organic patterns that resemble flowing landscapes. This approach is popular in Pinterest inspiration due to its simplicity and elegant appearance.
To create this design, select lightweight pink fabric and attach it to a wall or frame. Arrange the fabric in loose folds, allowing it to flow naturally. Secure key points using pins or clips to maintain the shape. Adjust the folds until a balanced composition is achieved. This step by step process requires minimal materials and provides a flexible and reusable background solution.

Idea 4: Painted Abstract Landscape
Step-by-Step Guide
An abstract painted landscape uses freeform shapes and brush strokes to create a unique pink background. This idea focuses on artistic expression while maintaining a structured color palette. It works well for modern home decor and creative projects that require a bold yet cohesive design.
Begin by sketching a simple layout on your surface. Use different shades of pink to paint abstract shapes, ensuring each section blends naturally. Apply paint in layers, allowing textures to develop gradually. Use brushes of varying sizes to create contrast. This method allows customization while remaining beginner friendly.

Idea 5: Foam Board Cut Landscape
Execution Process
A foam board cut landscape creates a structured and durable background using solid materials. This idea is ideal for long-term use in decoration or organization setups. The rigid structure allows precise cutting and layering, resulting in a clean and professional look.
Cut foam boards into landscape shapes and paint them in different shades of pink. Arrange them in layers, attaching each piece securely. Maintain spacing between layers to create depth. This setup method ensures stability and consistent results.
Idea 6: Floral Pink Landscape
How to Create
A floral pink landscape combines artificial flowers with a pink base to create a decorative background. This idea adds texture and visual interest while maintaining a cohesive color scheme. It is commonly used in aesthetic decoration and event styling.
Attach artificial flowers to a pink background, arranging them in clusters to mimic natural landscapes. Use adhesive or pins to secure each element. Ensure even distribution to avoid overcrowding. This process creates a balanced and visually appealing design.

Idea 7: Textured Paint Landscape
How to Make
A textured paint landscape uses thick paint to create raised patterns. This idea adds depth and tactile quality to the background, making it suitable for modern design concepts.
Apply thick paint using a palette knife to form textured shapes. Layer different shades of pink to enhance contrast. Allow each layer to dry before adding new textures. This method creates a unique and durable finish.

Idea 8: Paper Collage Landscape
Step-by-Step Guide
A paper collage landscape combines various paper textures and patterns to create a dynamic background. This idea is versatile and allows creative experimentation.
Cut different paper types into shapes and arrange them on a base surface. Overlap pieces to create depth and variation. Secure each piece with glue, ensuring alignment. This approach offers flexibility and strong visual impact.

Idea 9: Minimalist Pink Line Landscape
How to Create
A minimalist pink line landscape uses simple lines to represent landscape elements. This idea focuses on clean design and is suitable for modern and minimalist style projects.
Draw or paint thin lines in varying shades of pink on a light background. Maintain consistent spacing and alignment. This method creates a subtle yet effective design.

Idea 10: Layered Fabric Panels
Setup Method
Layered fabric panels use multiple fabric pieces to create a structured landscape effect. This idea combines texture and layering for a sophisticated look.
Attach fabric panels in layers, using different shades of pink. Secure each panel evenly and maintain spacing. Adjust alignment to ensure consistency. This setup creates a balanced and reusable background.

Common Beginner Mistakes and How to Avoid Them
One common mistake is using too many shades of pink without proper balance, which can make the design look inconsistent. Limiting the color palette and planning the layout in advance helps maintain harmony. Another issue is improper layering, where elements overlap unevenly, reducing the overall aesthetic. Ensuring consistent spacing and alignment improves the final result. Beginners also tend to skip preparation, leading to errors during execution. Organizing materials and following a step by step approach prevents these issues and ensures a smoother creative process.
Practical Tips for Better Results
Using high-quality materials improves durability and appearance. Testing colors on a small surface before applying them ensures better consistency. Maintaining clean edges during cutting and layering enhances the overall design. Working in good lighting conditions helps identify imperfections early. Following a structured tutorial and practicing basic techniques increases accuracy and confidence.
Styling, Presentation, or Organization Ideas
Styling plays an important role in maximizing the visual impact of pink backgrounds. Positioning the background in a well-lit area enhances color vibrancy. Combining the background with neutral elements creates contrast and balance. Organizing decorative elements around the background ensures a cohesive presentation. Using simple props can further enhance the aesthetic without overwhelming the design.
Budget or Time Planning
Most pink background ideas can be completed using affordable materials, making them suitable for budget ideas. Planning the project in advance reduces unnecessary expenses. Allocating time for each step ensures better results and prevents rushed work. Simple designs can be completed in a few hours, while more detailed projects may require additional time.
Creative Expansion and Advanced Inspiration
Advanced variations include combining multiple techniques such as layering and texture to create more complex designs. Experimenting with different shades and materials allows unique results. Expanding the project into larger installations or themed decorations increases its versatility. Continuous practice and exploration lead to improved skills and more refined creative ideas.

Leave a Reply