Introduction
Whimsical home decor transforms everyday living spaces into visually engaging environments filled with charm, personality, and imagination. This Pinterest-inspired approach focuses on playful details, creative combinations, and unexpected design elements that enhance both comfort and visual appeal. It blends functionality with artistic expression to create a balanced and inviting atmosphere.

This article explains ten practical and beginner friendly whimsical decor ideas supported by clear step by step methods. Each concept includes materials, preparation guidance, and execution details. Readers will learn how to design aesthetic spaces using DIY techniques, modern design principles, and budget ideas while maintaining organization and creative consistency throughout the home.
Why This Idea Is Trending or Useful
Whimsical home decor continues to gain attention across Pinterest ideas because it offers a flexible approach to personalizing interiors without requiring professional expertise. This style encourages creative freedom while maintaining practical usability, making it suitable for small apartments, family homes, or single-room makeovers. The focus on handmade elements and DIY projects makes it accessible to beginners who want to experiment with decoration without large financial commitments.
The popularity of whimsical decor also comes from its ability to combine modern design with playful aesthetics. It allows individuals to incorporate color, texture, and unexpected shapes while still maintaining a minimalist style if desired. Many trending ideas emphasize budget-friendly materials, repurposing items, and simple step by step tutorials that anyone can follow. This balance between creativity and practicality makes whimsical decor both visually appealing and easy to implement, especially for those exploring home decor for the first time.
Materials and Preparation
Preparing for whimsical home decor projects requires basic planning and organization to ensure consistent results. Common materials include acrylic paints, adhesive hooks, decorative paper, fabric scraps, LED lights, small furniture pieces, and recycled objects. Tools such as scissors, glue guns, measuring tapes, paintbrushes, and utility knives are often sufficient for most DIY tasks. Selecting materials in advance helps avoid interruptions during the creative process.
Planning involves identifying the area to decorate, choosing a color palette, and determining the overall aesthetic direction. It is useful to sketch simple layouts or gather Pinterest inspiration boards before starting. Cleaning and preparing surfaces ensures that paint, adhesive, or decorative elements apply properly. For beginners, starting with small projects allows gradual improvement while maintaining confidence. Organizing materials in a dedicated workspace also improves efficiency and keeps the creative project manageable and structured.
Idea 1: Floating Storybook Shelves
How to Create
Floating storybook shelves create a visually engaging display by turning books into decorative elements. This idea blends organization with whimsical storytelling, making it ideal for living rooms, bedrooms, or reading corners. Books appear to float on the wall, creating a clean yet imaginative aesthetic. The concept works well with colorful covers, illustrated books, or themed collections that enhance visual interest while maintaining a minimalist style.
To create this setup, install hidden or L-shaped brackets securely into the wall using anchors. Stack books horizontally so the brackets remain concealed beneath the bottom book. Arrange books by color, theme, or size for a cohesive look. Use a level to ensure straight alignment. Adding small decorative items such as miniature figurines or plants enhances the display without overcrowding. This step by step approach results in a functional and aesthetic storage solution that supports both organization and creative home decor.

Idea 2: Painted Ceiling Accents
Step-by-Step Guide
Painting ceiling accents introduces unexpected visual interest and transforms overlooked spaces into design features. This whimsical idea uses color and pattern to create depth and personality without altering furniture or layout. Soft pastels, geometric shapes, or cloud-like patterns can produce a calming or playful effect depending on the chosen design. This approach works particularly well in bedrooms or creative spaces.
Begin by cleaning the ceiling surface and applying painter’s tape to define the design area. Use a primer if necessary, then apply paint in thin, even layers using rollers or brushes. Allow each layer to dry before adding details. Simple patterns such as stripes or abstract shapes are beginner friendly and require minimal tools. This DIY project enhances the room’s overall aesthetic while maintaining a controlled and organized process.

Idea 3: Whimsical Gallery Wall
How to Make
A whimsical gallery wall combines artwork, photographs, and decorative objects to create a personalized focal point. Unlike traditional arrangements, this style allows varied frame shapes, colors, and sizes, resulting in a more dynamic and creative composition. It reflects individual personality while maintaining visual balance through careful placement and spacing.
Start by selecting frames and artwork that share a common theme or color palette. Lay out the arrangement on the floor before mounting to test spacing and alignment. Use removable adhesive hooks or nails to secure each piece. Begin with a central anchor piece and build outward. Mixing textures such as fabric art, prints, and small mirrors enhances depth. This step by step method ensures a cohesive yet playful wall design.

Idea 4: Hanging Fabric Canopy Corners
Execution Process
Fabric canopy corners add softness and a whimsical atmosphere to any room. This idea uses lightweight fabric to create a cozy and visually appealing space, especially in bedrooms or reading areas. The flowing material introduces movement and texture, contributing to a relaxed and inviting environment.
Attach ceiling hooks securely and drape sheer or lightweight fabric across them. Allow the fabric to cascade naturally to create a soft canopy effect. Adjust length and layering to achieve the desired look. Neutral tones create a minimalist style, while bright colors enhance a playful aesthetic. This DIY setup requires minimal tools and provides an easy project for beginners seeking creative home decor inspiration.

Idea 5: Decorative Ladder Displays
Setup Method
Decorative ladder displays combine storage and decoration in a unique and space-efficient way. Leaning a wooden ladder against a wall allows for hanging blankets, lights, or small decor items. This approach adds vertical interest and supports organization without permanent installation.
To create this display, choose a sturdy ladder and position it at a slight angle against the wall. Secure it if necessary for safety. Add decorative elements such as string lights, fabric pieces, or small baskets. Maintain balance by distributing weight evenly. This step by step setup transforms a simple object into a functional and aesthetic home decor feature.

Idea 6: Painted Furniture Details
How to Create
Painting small furniture details introduces subtle yet effective whimsical accents. Adding patterns or color to drawer fronts, table legs, or chair backs enhances visual interest without overwhelming the space. This idea supports budget-friendly updates using existing furniture.
Clean and sand the surface before applying primer and paint. Use stencils or freehand techniques for patterns. Allow each layer to dry before sealing with a protective finish. This DIY method is beginner friendly and allows gradual experimentation with color and design. The result is a refreshed piece that contributes to a cohesive and creative interior.

Idea 7: Mini Indoor Garden Displays
Step-by-Step Guide
Mini indoor gardens combine natural elements with decorative presentation. Using small pots, glass containers, or hanging planters creates a whimsical and refreshing atmosphere. This idea supports both aesthetic and functional benefits, including improved air quality and visual calmness.
Select low-maintenance plants and arrange them in containers of varying heights. Place them on shelves, windowsills, or hanging structures. Ensure proper lighting and watering conditions. Adding decorative stones or colored soil enhances visual appeal. This easy project integrates nature into home decor while maintaining organization and simplicity.

Idea 8: Creative Mirror Arrangements
How to Make
Creative mirror arrangements enhance light and create the illusion of larger spaces. Using mirrors in varied shapes and sizes introduces a playful yet functional design element. This idea works well in entryways, living rooms, or bedrooms.
Arrange mirrors on the wall in a balanced layout before installation. Use adhesive strips or hooks to secure them. Combine round, square, or irregular shapes for a dynamic composition. Ensure alignment while maintaining spacing consistency. This step by step process results in a visually engaging and practical decor solution.

Idea 9: Themed Corner Displays
Execution Process
Themed corner displays transform unused spaces into purposeful and aesthetic areas. Creating a reading nook, art corner, or relaxation zone adds functionality while maintaining a cohesive design theme. This approach supports organization and creative expression.
Choose a theme and select items that align with it, such as cushions, rugs, or decorative objects. Arrange furniture and accessories to define the space clearly. Maintain color consistency to avoid visual clutter. This DIY project provides a structured way to enhance both usability and style within the home.

Idea 10: Light-Based Wall Decor
How to Create
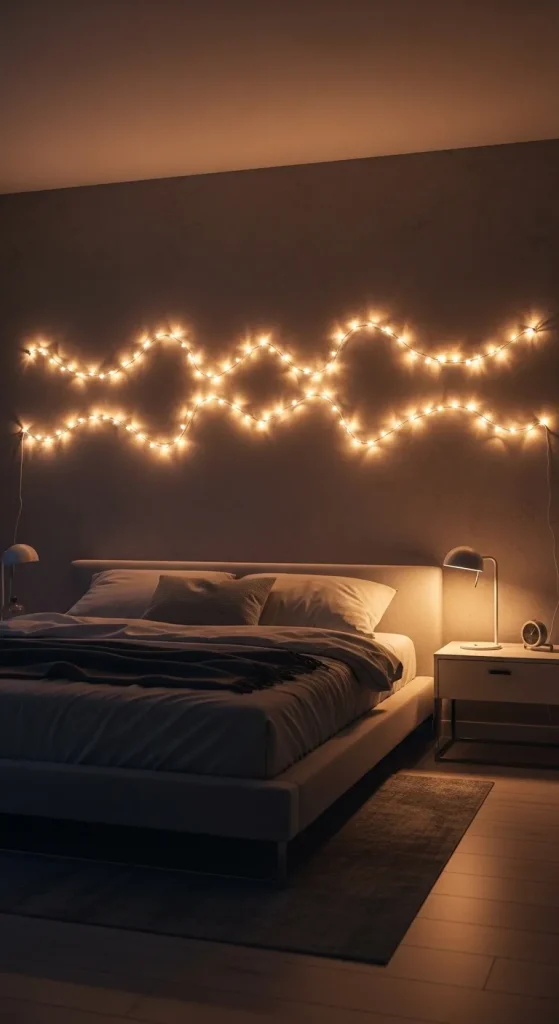
Light-based wall decor uses LED strips or string lights to create patterns and shapes on walls. This idea introduces a soft glow that enhances ambiance while serving as a decorative feature. It works well in bedrooms, living spaces, or creative studios.
Plan the design layout before installation. Attach lights using adhesive backing or clips. Create simple shapes such as waves or geometric patterns. Ensure wiring is organized and safely positioned. This step by step method results in a visually appealing and functional lighting solution that complements modern design.
Common Beginner Mistakes and How to Avoid Them
A common mistake in whimsical home decor is overloading spaces with too many elements, which reduces visual clarity and disrupts organization. Beginners often combine excessive colors, textures, and objects without a clear plan, leading to cluttered results. Another issue is skipping preparation steps such as cleaning surfaces or measuring spaces accurately, which affects the final outcome. Using incompatible materials or tools can also reduce durability and overall quality.
To avoid these issues, focus on one idea at a time and maintain a consistent color palette. Measure spaces carefully before installation and test layouts before committing to permanent placement. Select materials that are suitable for the intended purpose and follow step by step methods closely. Keeping designs simple and balanced ensures that each element contributes to the overall aesthetic without overwhelming the space.
Practical Tips for Better Results
Achieving better results in DIY home decor requires attention to detail and consistent execution. Start with small projects to build confidence and gradually move to more complex designs. Using quality tools improves precision and reduces errors. Maintaining a clean workspace also enhances efficiency and prevents damage to materials.
Testing colors, patterns, or arrangements before final application helps avoid mistakes. Use painter’s tape, temporary adhesives, or sample pieces to preview designs. Consistency in spacing, alignment, and proportions ensures a professional appearance. Taking time between steps allows materials to set properly, resulting in a durable and polished finish.
Styling, Presentation, or Organization Ideas
Styling plays a critical role in enhancing whimsical decor. Arranging items with intention creates balance and improves visual flow. Grouping similar objects together or using a consistent color scheme helps maintain cohesion. Combining textures such as wood, fabric, and metal adds depth without overwhelming the design.
Presentation can be improved by using layers and varying heights. Placing larger items at the back and smaller items in front creates dimension. Keeping frequently used items accessible while storing others neatly supports organization. Incorporating lighting elements enhances the overall aesthetic and highlights key features within the space.
Budget or Time Planning
Effective budget and time planning ensures that home decor projects remain manageable. Setting a clear budget helps prioritize essential materials and avoid unnecessary expenses. Using recycled or repurposed items reduces costs while maintaining creativity. Planning projects in stages allows gradual progress without overwhelming resources.
Time management involves breaking tasks into smaller steps and scheduling them realistically. Allowing time for drying, curing, or adjustments ensures better results. Preparing all materials in advance reduces interruptions and improves efficiency. This structured approach supports consistent progress and successful completion of each project.
Creative Expansion and Advanced Inspiration
Expanding on whimsical decor ideas involves combining multiple concepts to create layered and dynamic spaces. Integrating lighting, texture, and color in a coordinated way enhances visual impact. Advanced inspiration can include custom-built furniture, mixed media art, or interactive decor elements that respond to lighting or movement.
Experimenting with themes such as nature, abstract art, or storytelling adds depth to the design. Combining DIY techniques with modern design principles allows continuous improvement and personalization. Exploring new materials and techniques keeps the creative process engaging while maintaining a cohesive and organized home environment.


Leave a Reply