Introduction
Open floor kitchen layout plans have become a central element in modern home design. These Pinterest ideas focus on combining cooking, dining, and living areas into one cohesive space. This approach improves movement, visibility, and functionality while creating a unified aesthetic that supports daily living and social interaction.
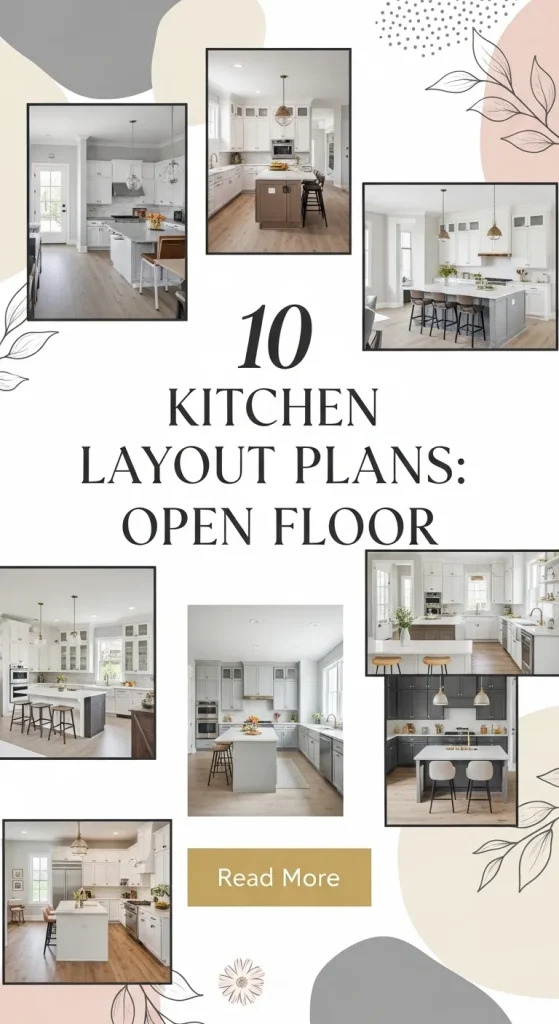
This article explains 10 practical kitchen layout plans designed for open floor concepts. Readers will learn step-by-step methods, materials, and planning strategies to create efficient and visually balanced spaces. These ideas offer DIY-friendly solutions that support organization, modern design, and realistic implementation for beginners and experienced planners alike.
Why This Idea Is Trending or Useful
Open floor kitchen layouts are widely used because they improve spatial efficiency and visual continuity within a home. These layouts remove unnecessary walls and create a seamless transition between areas. This design allows natural light to spread evenly, improving overall brightness and reducing the need for artificial lighting. It also enhances visibility, making it easier to monitor activities across the space.
From a practical perspective, these layouts support better organization and workflow. Cooking, serving, and cleaning become more efficient when areas are interconnected. This concept is also highly adaptable, making it suitable for both small apartments and large homes. Pinterest inspiration highlights how these layouts can be customized using DIY methods, making them accessible for beginners. The combination of aesthetic appeal, functionality, and flexibility makes open floor kitchen plans a trending and useful design choice.
Materials and Preparation
Before starting an open floor kitchen project, proper planning and preparation are essential. Begin by identifying the available space and measuring dimensions accurately. This helps in selecting the right layout and ensuring proper movement between zones. Basic materials include cabinets, countertops, lighting fixtures, flooring, and storage units. Tools such as measuring tapes, levelers, and layout markers are also necessary for accurate setup.
Preparation involves defining functional zones such as cooking, prep, dining, and storage areas. Consider workflow efficiency by placing key elements like the stove, sink, and refrigerator in a practical arrangement. Planning also includes selecting a consistent design theme, such as minimalist style or modern design. Budget planning and timeline estimation should be completed before starting. Proper preparation ensures that the project remains organized, cost-effective, and achievable for a beginner-friendly DIY process.
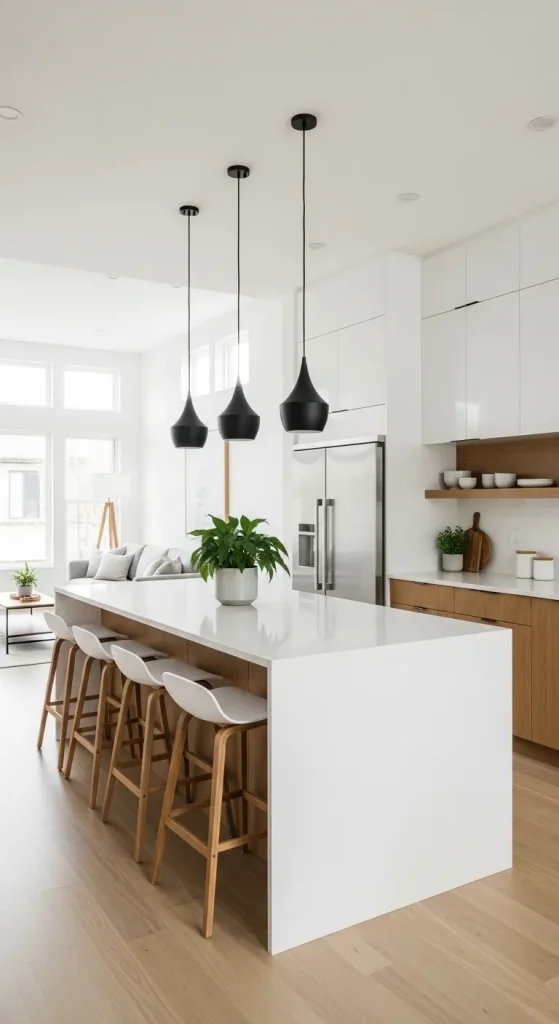
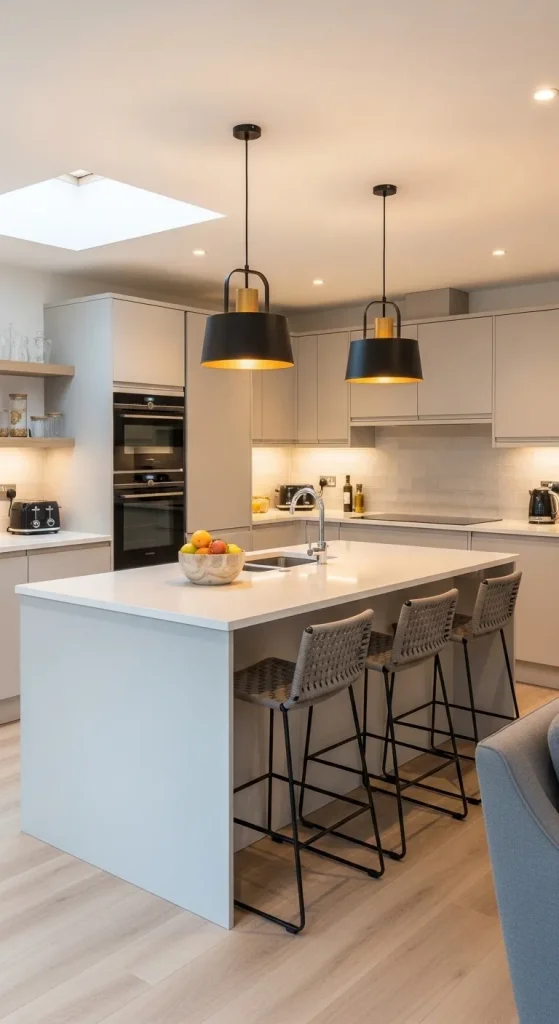
Idea 1: Island-Centered Open Kitchen
How to Create
This layout focuses on a central kitchen island that acts as the main workspace and visual anchor. The island defines the kitchen zone while maintaining openness with surrounding areas. It allows for cooking, prep work, and casual dining in one place. This design improves accessibility and encourages interaction between different areas of the home. The island can also serve as additional storage, making it a functional centerpiece.
To create this layout, start by positioning the island in the center of the available space. Ensure enough walking clearance on all sides for smooth movement. Install base cabinets and a countertop for the island. Add seating if needed for dining purposes. Arrange appliances like the stove and sink around the island to maintain an efficient workflow. Use consistent materials and finishes to maintain a cohesive look across the open floor.
Idea 2: L-Shaped Kitchen with Open Flow
Step-by-Step Guide
The L-shaped layout uses two connected walls to create a functional kitchen space while leaving the rest of the floor open. This design maximizes corner space and allows for a smooth transition into living or dining areas. It is especially suitable for smaller homes, as it creates a clear boundary without blocking openness.
Begin by installing cabinets and countertops along two adjacent walls. Place essential appliances within easy reach to maintain workflow efficiency. Keep the open side free for movement and integration with other areas. Add a small dining table or island if space allows. This layout supports organization while maintaining a clean and modern design that aligns with Pinterest inspiration.
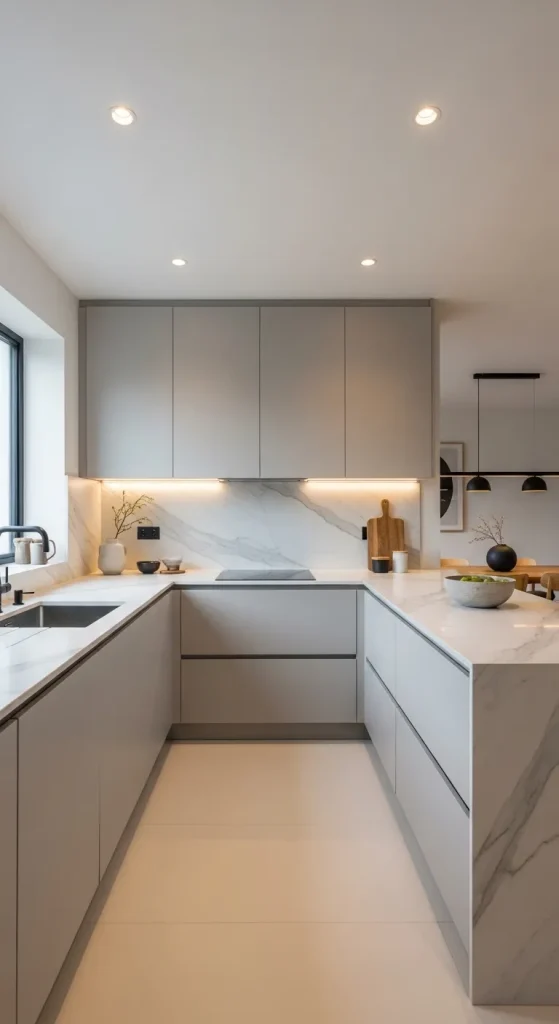
Idea 3: U-Shaped Kitchen with Open Entry
How to Make
This layout uses three walls for kitchen functions while keeping one side open. It provides maximum storage and workspace while maintaining access to the rest of the home. The U-shape is ideal for those who need more counter space and efficient organization.
To create this design, install cabinets and countertops along three connected walls. Leave one side open to connect with the living or dining area. Arrange appliances strategically to create a functional work triangle. Use uniform materials to maintain visual consistency. This setup balances efficiency and openness, making it a practical DIY solution.
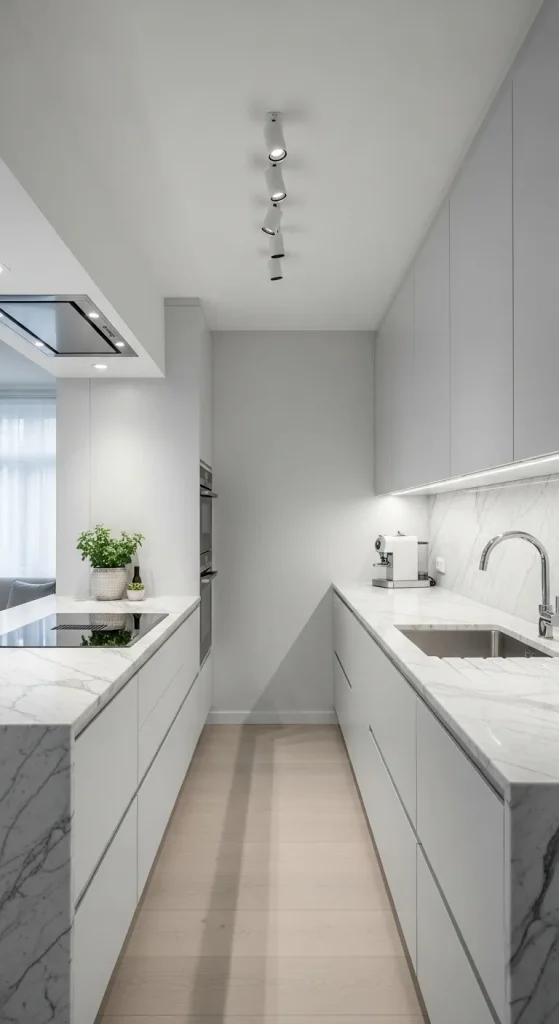
Idea 4: Galley Kitchen with Open Ends
Execution Process
A galley layout features two parallel counters with open ends connecting to other spaces. This design is efficient and space-saving, making it suitable for narrow areas. The open ends ensure that the kitchen does not feel enclosed.
To build this layout, install cabinets and countertops on opposite sides. Keep pathways clear to allow easy movement. Place appliances along both sides for balanced functionality. Ensure proper lighting to enhance visibility. This layout supports organization and efficient workflow while maintaining an open floor concept.
Idea 5: Peninsula Kitchen Layout
Setup Method
A peninsula layout extends from a wall or cabinet, creating a partial divider between the kitchen and other areas. It provides additional workspace while maintaining openness. This design is ideal for homes that require subtle separation without full walls.
Start by extending a countertop from an existing cabinet line. Use the peninsula for prep work or seating. Ensure enough space around it for movement. Integrate storage solutions underneath for better organization. This layout combines functionality with aesthetic appeal, making it a popular Pinterest idea.
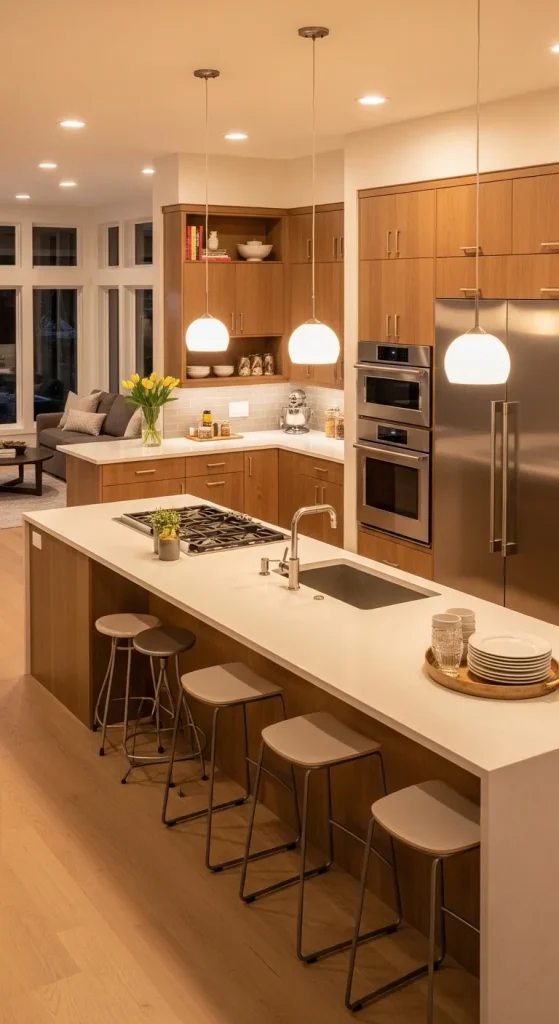
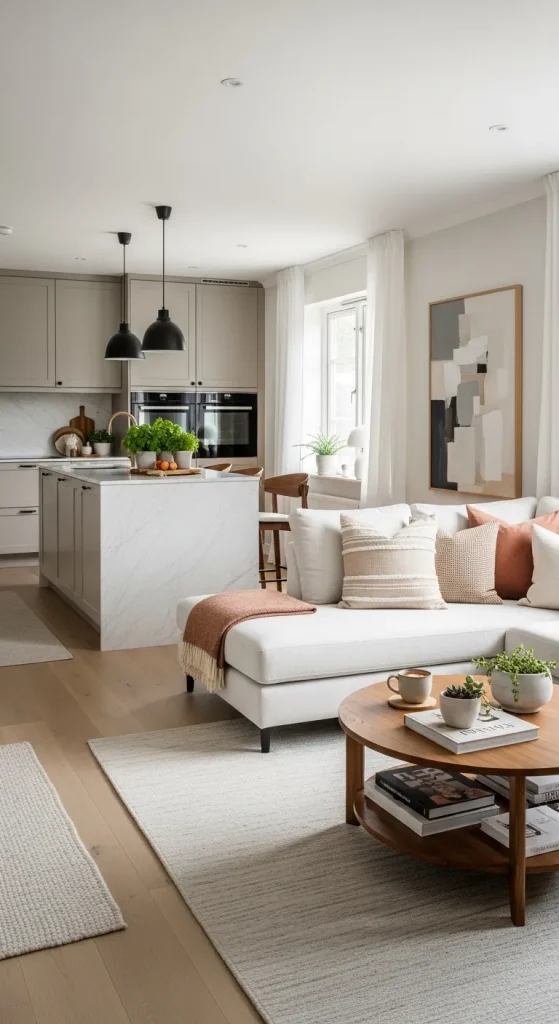
Idea 6: Open Kitchen with Dining Integration
How to Create
This layout merges the kitchen and dining area into one continuous space. It improves accessibility and creates a unified design. The dining table acts as an extension of the kitchen, supporting both cooking and serving.
To implement this design, position the dining table near the kitchen workspace. Use matching materials and colors to create visual harmony. Ensure proper spacing for movement between areas. Add lighting fixtures to define the dining zone. This setup enhances usability and creates a cohesive environment.

Idea 7: Minimalist Open Kitchen Layout
Step-by-Step Guide
A minimalist layout focuses on simplicity, clean lines, and clutter-free organization. It emphasizes functionality while maintaining a modern design. This approach is ideal for those who prefer a clean and aesthetic space.
To create this layout, use simple cabinets and neutral colors. Limit decorative elements and focus on essential items. Keep countertops clear to maintain a tidy appearance. Use hidden storage solutions to reduce visual clutter. This design supports easy maintenance and aligns with modern Pinterest inspiration.

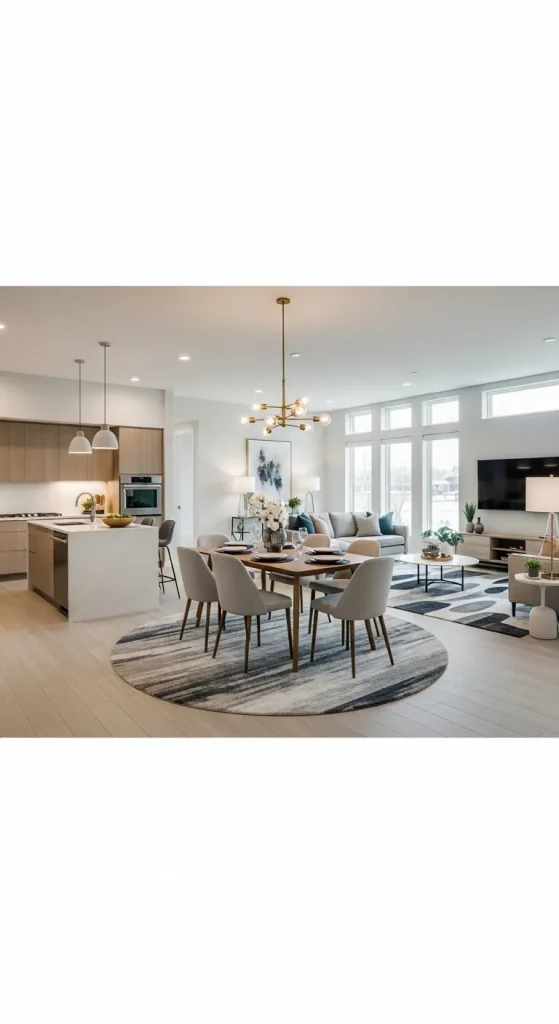
Idea 8: Open Kitchen with Living Room Connection
How to Make
This layout integrates the kitchen directly with the living room. It creates a shared space that supports social interaction and efficient use of space. The design eliminates barriers and promotes a seamless flow.
To achieve this layout, arrange kitchen elements along one side of the room. Use furniture placement to define zones. Add rugs or lighting to separate areas visually. Maintain consistent materials to unify the design. This layout is practical and beginner friendly.
Idea 9: Zoned Open Kitchen Layout
Execution Process
A zoned layout divides the open floor into functional areas without using walls. Each zone serves a specific purpose while maintaining visual continuity. This design improves organization and workflow.
To create zones, use furniture, lighting, or flooring variations. Define cooking, dining, and living areas clearly. Ensure smooth transitions between zones. Maintain consistent design elements to avoid visual clutter. This approach enhances both functionality and aesthetics.
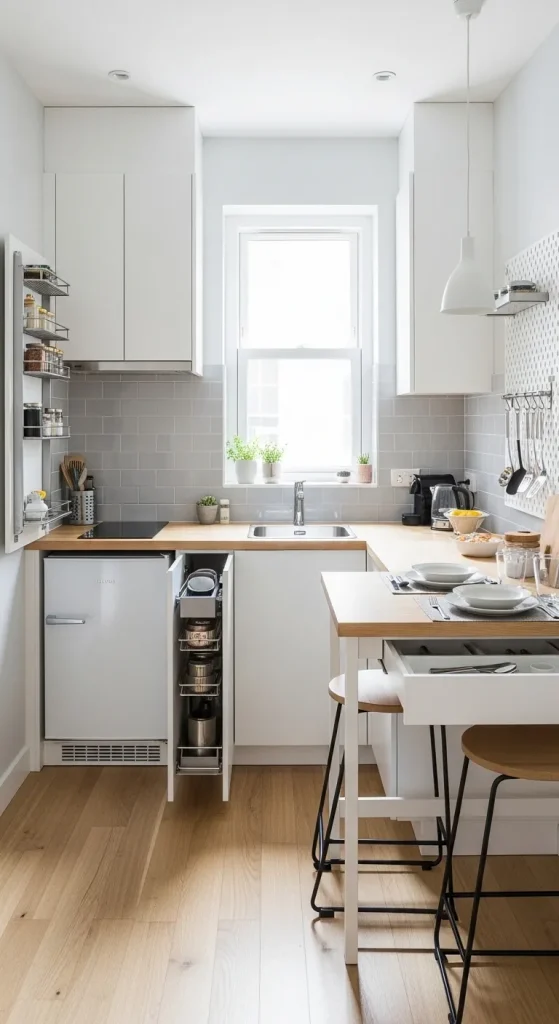
Idea 10: Compact Open Kitchen Layout
How to Create
This layout is designed for small spaces while maintaining an open concept. It focuses on efficient use of space and smart storage solutions. The goal is to maximize functionality without overcrowding.
To implement this design, use compact appliances and multi-functional furniture. Install vertical storage to save space. Keep the layout simple and organized. Use light colors to create a sense of openness. This layout is ideal for budget ideas and beginner-friendly DIY projects.
Common Beginner Mistakes and How to Avoid Them
One common mistake is poor planning of space and workflow. Placing appliances too far apart reduces efficiency and increases movement. Another issue is overcrowding the space with furniture or storage units, which disrupts the open concept. Ignoring lighting can also lead to uneven visibility across the area. Beginners often overlook proper measurements, leading to misalignment of cabinets and fixtures.
To avoid these mistakes, start with accurate measurements and a clear layout plan. Focus on maintaining balance between functionality and openness. Use appropriate lighting to define different zones. Avoid adding unnecessary elements that create clutter. Ensure that all components work together to support both design and usability. Careful planning helps achieve a successful and organized result.
Practical Tips for Better Results
Using consistent materials and color schemes helps create a unified design. Neutral tones and simple textures work well for maintaining a modern aesthetic. Proper lighting placement enhances both functionality and visual appeal. Task lighting for work areas and ambient lighting for general illumination are essential.
Another useful tip is to prioritize storage solutions that keep the space organized. Hidden storage and multi-functional furniture improve efficiency. Maintain clear pathways to ensure easy movement. Regularly review the layout during the project to ensure alignment with the original plan. These practical steps improve the overall quality and usability of the design.
Styling, Presentation, or Organization Ideas
Styling plays a key role in enhancing the appearance of an open floor kitchen. Use coordinated decor elements such as matching utensils, containers, and textiles. Open shelving can be used to display items while maintaining organization. Decorative elements should remain minimal to avoid clutter.
Presentation can be improved by defining zones using rugs, lighting, or furniture placement. Keep countertops clean and organized for a polished look. Use plants or simple decorative items to add visual interest. A consistent design theme across all areas ensures a cohesive and aesthetically pleasing result.
Budget or Time Planning
Budget planning is essential for completing an open floor kitchen project efficiently. Start by listing all required materials and estimating costs. Prioritize essential elements such as cabinets, countertops, and appliances. Allocate funds for unexpected expenses to avoid delays.
Time planning involves setting realistic deadlines for each stage of the project. Break the process into smaller steps, such as preparation, installation, and finishing. This approach helps maintain progress and reduces stress. Efficient planning ensures that the project remains manageable and cost-effective.
Creative Expansion and Advanced Inspiration
Once the basic layout is complete, additional enhancements can improve functionality and design. Consider adding smart storage solutions or integrated lighting systems. Advanced layouts may include multi-level islands or custom-built furniture for better space utilization.
Creative ideas can also involve experimenting with textures, materials, or color contrasts. Expanding the design to include outdoor connections or additional zones can further enhance usability. Continuous exploration of Pinterest ideas provides inspiration for future improvements and creative projects.
Leave a Reply