Introduction
White oak kitchens have become a central focus in modern home decor due to their clean appearance and natural texture. This article explores practical Pinterest ideas that show how to use white oak effectively. Readers will learn structured DIY approaches, design concepts, and step-by-step methods for creating a balanced and functional kitchen space.

This guide provides clear inspiration, covering materials, planning, and execution. It focuses on beginner friendly techniques while maintaining a modern design approach. Each idea is explained in detail to help create an aesthetic and organized kitchen. The goal is to transform creative ideas into a practical and achievable home decor project.
Why This Idea Is Trending or Useful
White oak kitchens are widely featured in Pinterest ideas because they combine durability with a neutral and adaptable aesthetic. The wood grain offers a natural texture that works well in minimalist style interiors, making it suitable for both small and large spaces. This versatility allows it to fit into various design themes without requiring complex adjustments. The growing interest in organic materials has also contributed to its popularity, as homeowners look for ways to create calm and balanced environments using natural elements.
From a practical perspective, white oak is known for its strength and resistance to wear, making it ideal for kitchen use where surfaces experience frequent activity. It supports DIY projects because it is relatively easy to cut, finish, and maintain. Beginners can experiment with simple installations such as shelves or cabinet panels without needing advanced tools. The accessibility of materials and the ability to achieve a clean, modern look with minimal effort make white oak a strong choice for trending ideas that are both functional and visually consistent.
Materials and Preparation
Before starting any white oak kitchen project, proper planning and material selection are essential. Common materials include white oak boards or plywood, wood adhesive, screws, brackets, and finishing products such as sealants or natural oils. Tools typically required include a measuring tape, saw, drill, sandpaper, and level. Accurate measurements ensure that each component fits correctly, especially when working with cabinets, shelving, or paneling.
Preparation begins with defining the layout and identifying the purpose of the project, whether it is storage, decoration, or full kitchen renovation. Surfaces should be cleaned and leveled before installation. Sanding the wood ensures a smooth finish and improves the absorption of protective coatings. Planning also includes determining color balance, as white oak pairs well with neutral tones like white, grey, or matte black. Careful preparation reduces errors, improves durability, and ensures the final result aligns with the intended aesthetic and functional goals of the project.
Idea 1: White Oak Open Shelving
How to Create
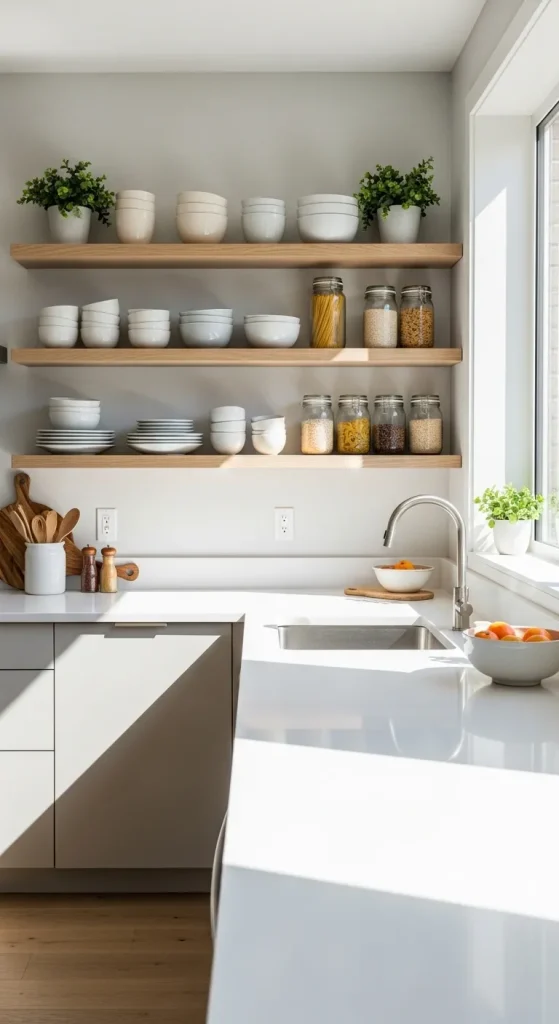
White oak open shelving is a practical way to combine storage with visual simplicity. This concept focuses on replacing upper cabinets with exposed wooden shelves, creating an open and airy kitchen layout. The natural grain of white oak adds texture while maintaining a clean appearance. This approach supports minimalist style design by reducing visual clutter and allowing essential items to become part of the decoration. It works well in small kitchens because it creates the illusion of more space while keeping frequently used items easily accessible.
To create this setup, start by measuring the wall space and determining the number of shelves needed. Cut white oak boards to the desired length and sand them for a smooth finish. Apply a protective sealant to enhance durability. Install sturdy brackets or hidden supports, ensuring they are aligned and securely attached to the wall studs. Place the shelves evenly and check with a level for accuracy. Once installed, arrange kitchen items such as dishes, jars, or plants in an organized manner. This step-by-step method ensures a balanced and functional shelving system that aligns with modern design principles.
Idea 2: White Oak Cabinet Fronts
How to Create
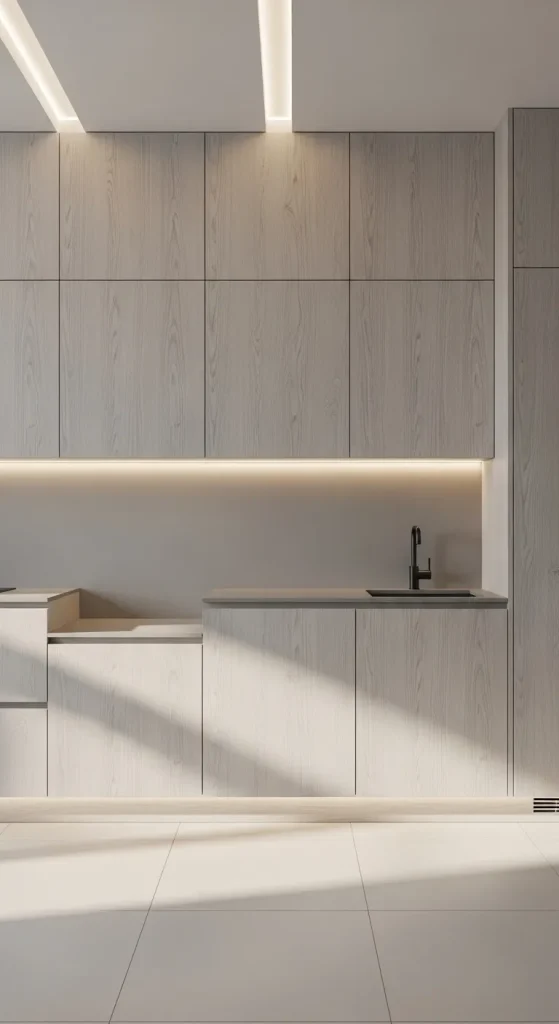
White oak cabinet fronts provide a simple way to upgrade an existing kitchen without replacing the entire structure. This idea focuses on attaching new white oak panels to current cabinets, creating a fresh and cohesive look. The natural wood tone enhances the aesthetic while maintaining a neutral palette. It is a beginner friendly DIY project that delivers noticeable results with limited structural changes.
Start by removing existing cabinet doors and measuring their dimensions accurately. Cut white oak panels to match the size of each door. Sand the surfaces and apply a finish to protect the wood. Attach hinges and handles before reinstalling the doors onto the cabinet frames. Ensure alignment is consistent for a clean appearance. This method allows for customization in handle placement and finish type. The result is a modern kitchen upgrade that combines durability with a refined, handmade feel.
Idea 3: White Oak Kitchen Island
How to Create
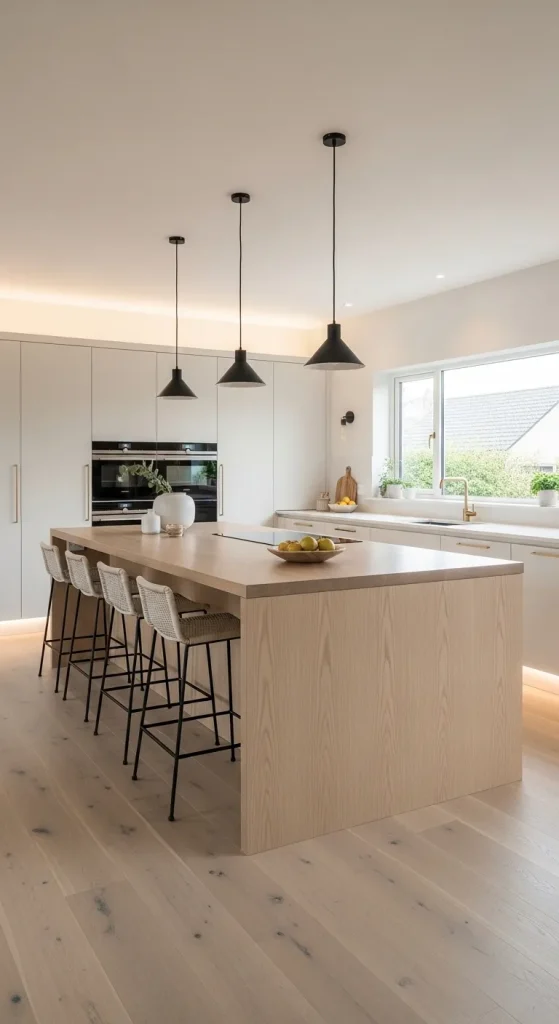
A white oak kitchen island serves as a central feature that combines workspace, storage, and design. This idea focuses on building or cladding an island with white oak panels to create a focal point. The wood texture contrasts effectively with stone or laminate countertops, enhancing the overall aesthetic without overwhelming the space.
Begin by constructing a basic island frame using sturdy materials. Measure and cut white oak panels to cover the sides and front of the structure. Sand the panels and apply a protective finish. Secure the panels using screws or adhesive, ensuring edges are aligned. Install a countertop that complements the wood tone. This setup method creates a durable and visually balanced island that supports both functionality and organization in the kitchen.
Idea 4: White Oak Backsplash Panels
How to Create
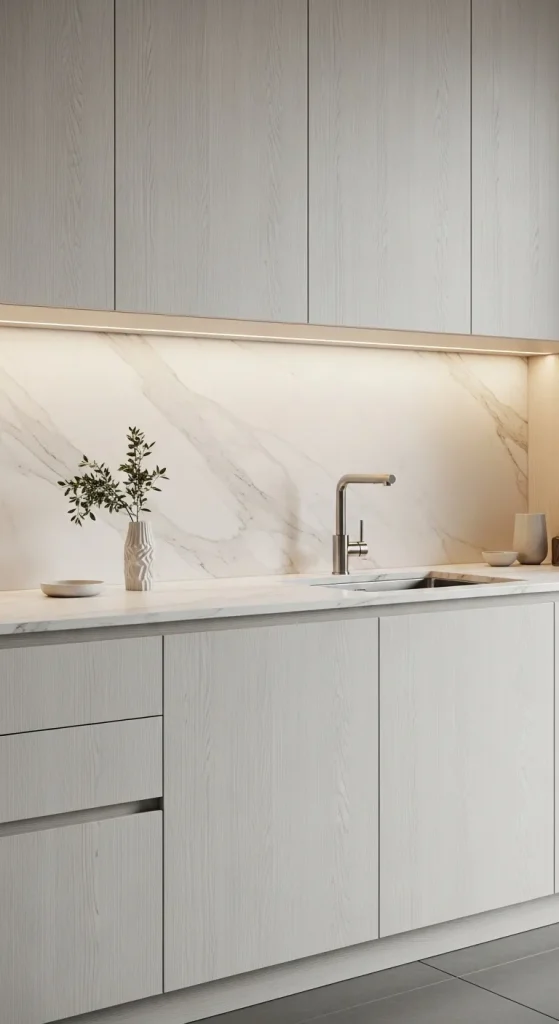
White oak backsplash panels offer an alternative to traditional tile surfaces. This idea introduces warmth and continuity by extending wood elements vertically along the wall. It works well in minimalist kitchens where simplicity and texture are key design elements.
To implement this, measure the backsplash area carefully and cut thin white oak panels to size. Sand the panels and treat them with a moisture-resistant sealant. Attach them to the wall using adhesive or screws, ensuring tight alignment between pieces. Proper sealing is essential to protect against humidity. This approach creates a cohesive and natural backdrop that enhances the overall kitchen design.
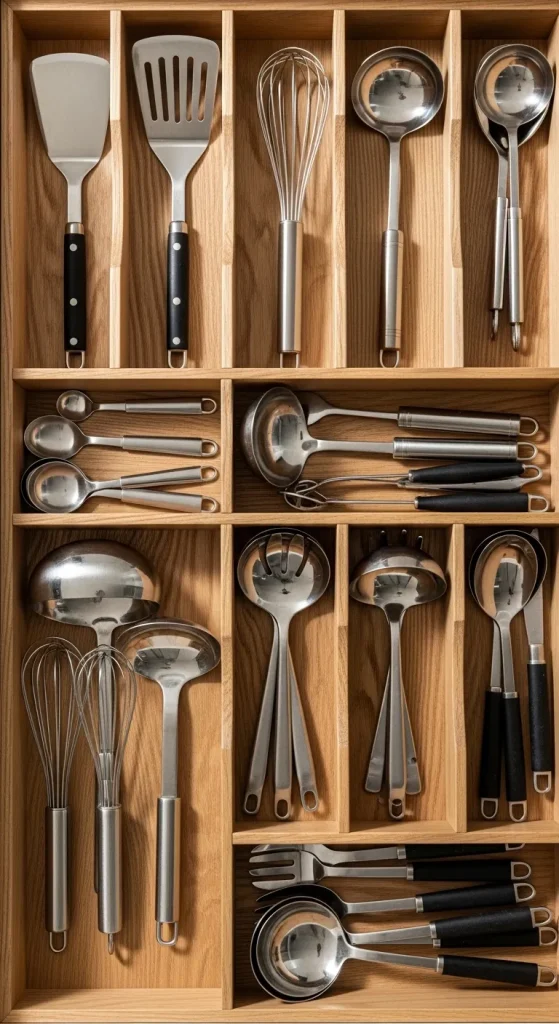
Idea 5: White Oak Drawer Inserts
How to Create
White oak drawer inserts improve organization while maintaining a consistent material theme. This idea focuses on dividing drawer space into sections for utensils, tools, and accessories. The use of white oak ensures durability and visual harmony.
Measure the interior dimensions of each drawer and design a layout for compartments. Cut thin white oak strips and assemble them into a grid structure. Sand the edges and fit the insert inside the drawer. No permanent attachment is required, allowing flexibility. This easy project enhances organization and supports efficient kitchen use.
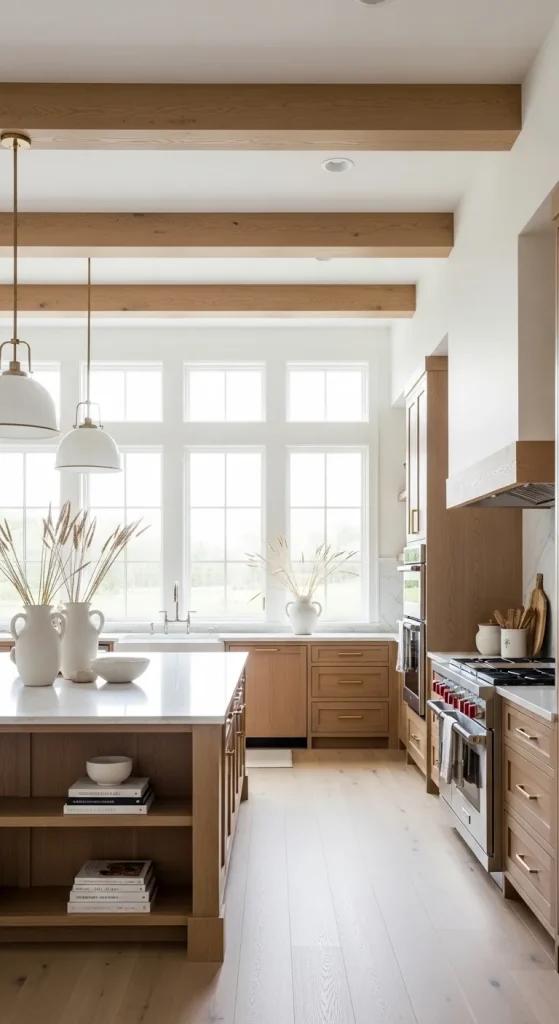
Idea 6: White Oak Ceiling Beams
How to Create
White oak ceiling beams add architectural interest and depth to the kitchen space. This idea focuses on installing decorative beams to create a structured and cohesive design. It works particularly well in open-plan kitchens.
Measure the ceiling and determine beam placement. Use lightweight white oak or hollow beam structures for easier installation. Secure the beams to ceiling joists using brackets or screws. Ensure alignment and spacing are consistent. This setup method enhances visual balance and adds a natural design element without major construction.
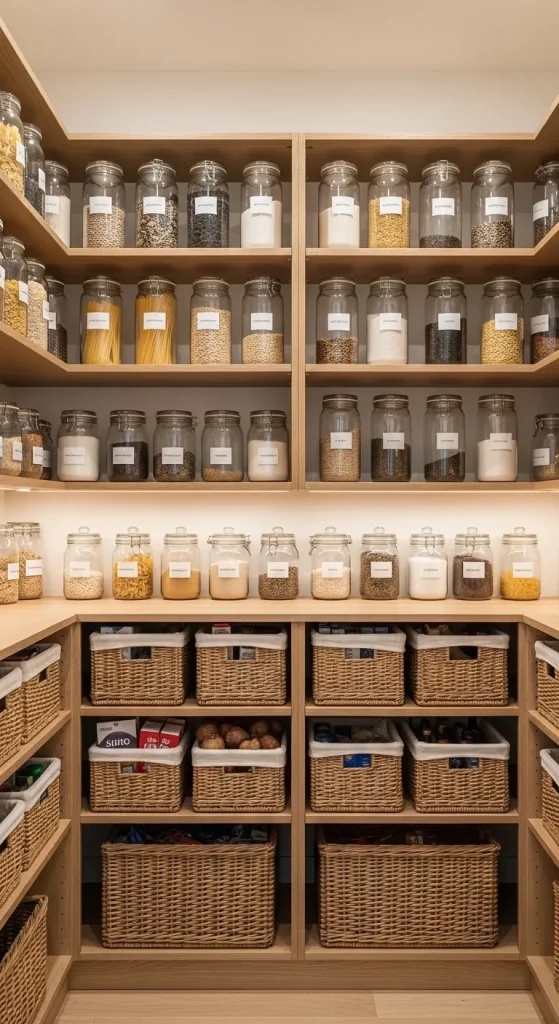
Idea 7: White Oak Pantry Storage
How to Create
White oak pantry storage emphasizes organization and durability. This idea involves building shelves or storage units using white oak to create a cohesive system. It supports efficient use of space and easy access to stored items.
Measure the pantry area and plan shelf placement. Cut white oak boards and sand them for smoothness. Install supports or brackets and secure the shelves in position. Arrange items in labeled containers to maintain order. This practical solution improves functionality while maintaining a clean aesthetic.
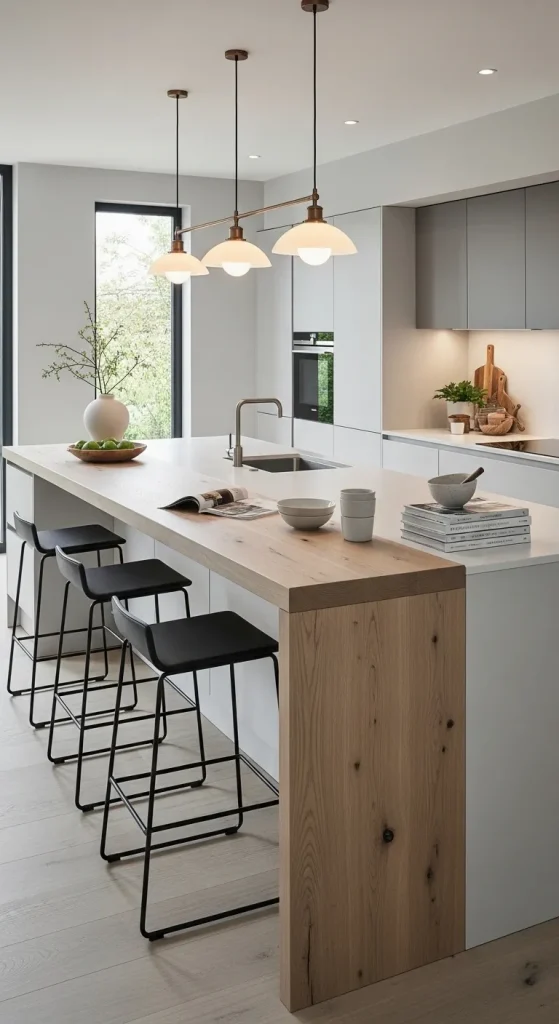
Idea 8: White Oak Bar Counter Extension
How to Create
A white oak bar counter extension provides additional seating and workspace. This idea focuses on extending an existing counter with a wooden surface, creating a functional and social area within the kitchen.
Measure the extension area and cut a white oak slab to fit. Sand and finish the surface to ensure durability. Attach the slab using brackets or support legs. Ensure the height matches the existing counter. This step-by-step method creates a stable and visually appealing extension suitable for everyday use.
Idea 9: White Oak Wall Panels
How to Create
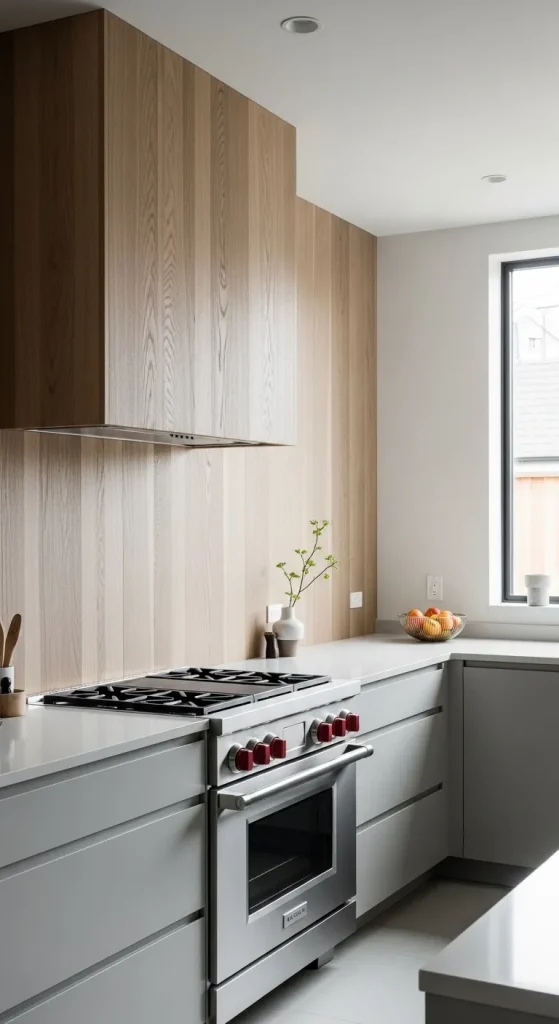
White oak wall panels enhance the overall kitchen design by adding texture and depth. This idea focuses on covering a feature wall with wooden panels to create a cohesive and modern look.
Measure the wall and cut panels to size. Sand and finish the wood before installation. Attach panels using adhesive or nails, ensuring alignment. Maintain consistent spacing for a uniform appearance. This approach transforms a plain wall into a design element.
Idea 10: White Oak Minimalist Handles
How to Create
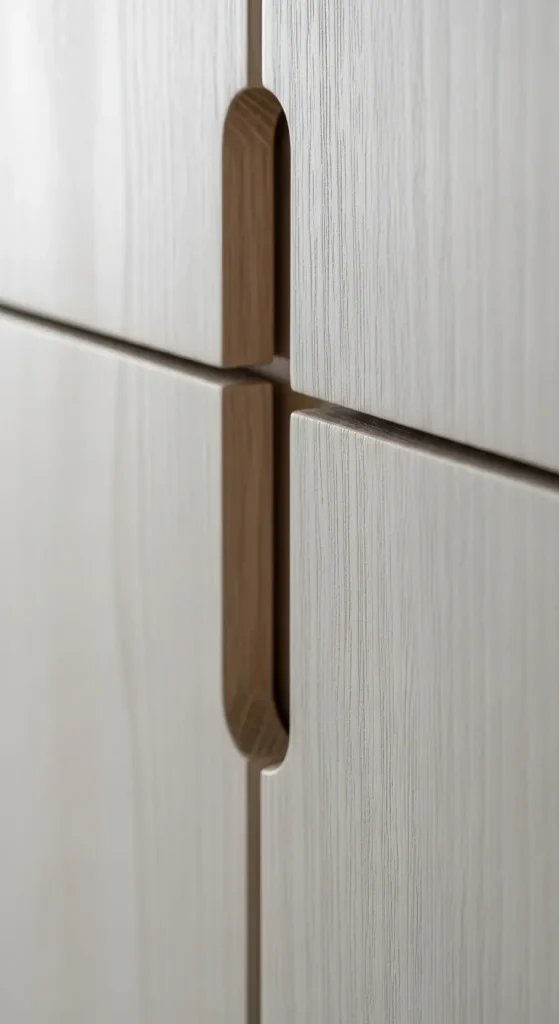
White oak minimalist handles provide a subtle and integrated design detail. This idea focuses on creating custom handles from wood instead of using metal hardware. It supports a clean and seamless aesthetic.
Cut small white oak pieces into handle shapes and sand them carefully. Drill holes for screws and attach them to cabinet doors. Ensure alignment and spacing are consistent. This simple project enhances the overall design while maintaining a cohesive material theme.
Common Beginner Mistakes and How to Avoid Them
One common mistake is skipping proper measurement, which leads to misaligned installations and wasted materials. Accurate planning ensures that each component fits correctly and reduces errors during assembly. Another issue is neglecting surface preparation. Sanding and cleaning wood before applying finishes improves durability and appearance. Beginners often underestimate the importance of sealing white oak, especially in areas exposed to moisture. Without proper protection, the wood can absorb water and become damaged over time.
Using incorrect tools or low-quality materials can also affect the final result. It is important to select appropriate screws, brackets, and finishes for each project. Rushing the process often leads to uneven surfaces and weak connections. Taking time to follow each step carefully improves overall quality. Avoiding these mistakes ensures a smoother workflow and a more professional outcome.
Practical Tips for Better Results
Consistent measurement and alignment are essential for achieving a clean and organized look. Always use a level to ensure shelves, panels, and installations are straight. Applying thin, even coats of finish improves the appearance and durability of white oak surfaces. Allow sufficient drying time between coats to prevent uneven textures.
Working in a well-lit space helps identify imperfections during sanding and finishing. Pre-drilling holes before inserting screws reduces the risk of wood splitting. Keeping tools organized and accessible improves efficiency during the project. These practical tips help maintain accuracy and produce a polished final result that aligns with modern design standards.
Styling, Presentation, or Organization Ideas
Styling a white oak kitchen involves balancing natural textures with simple color schemes. Neutral tones such as white, grey, and black complement the wood and create a cohesive appearance. Open shelves can be arranged with evenly spaced items to maintain visual order. Using matching containers for storage improves organization and enhances the overall aesthetic.
Incorporating small decorative elements such as plants or ceramics adds subtle variation without overwhelming the design. Keeping surfaces uncluttered supports a minimalist style. Proper arrangement ensures that each element contributes to the overall presentation, creating a functional and visually balanced kitchen environment.
Budget or Time Planning
Planning the budget for a white oak kitchen project involves identifying essential materials and prioritizing key elements. Smaller projects such as shelves or drawer inserts require fewer resources and can be completed quickly. Larger installations like islands or wall panels require more time and careful planning.
Breaking the project into stages helps manage both cost and time effectively. Purchasing materials in advance ensures consistency in color and texture. Allocating time for preparation, installation, and finishing prevents delays. This structured approach allows the project to progress efficiently while maintaining quality.
Creative Expansion and Advanced Inspiration
White oak kitchen projects can be expanded by combining multiple ideas into a cohesive design. For example, integrating open shelving with wall panels creates a unified visual theme. Advanced variations include mixing white oak with contrasting materials such as metal or stone to enhance depth and texture.
Experimenting with different finishes, such as matte or natural oil, can change the overall look without altering the structure. Adding lighting elements beneath shelves or cabinets highlights the wood grain and improves functionality. These creative ideas allow for continuous improvement and adaptation, making the kitchen both practical and visually engaging.


Leave a Reply