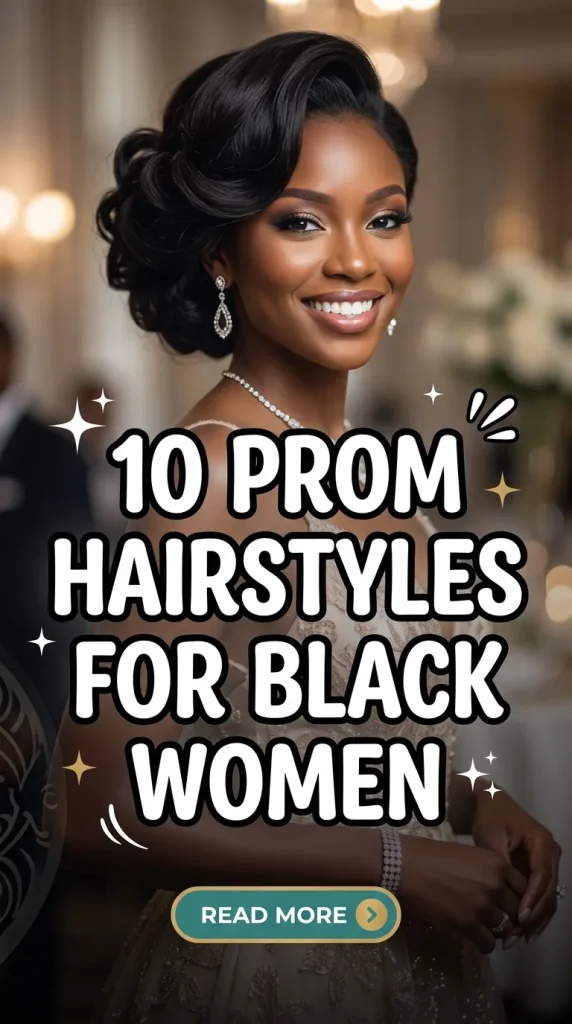
Introduction
Prom hairstyles for Black women reflect creativity, versatility, and strong personal style. From protective styling to sculpted updos, these Pinterest ideas combine elegance with practical execution. This article explains structured approaches, materials, and step by step methods to create polished, long-lasting looks suitable for formal events and photography.
This guide presents ten detailed hairstyle ideas designed to be beginner friendly and achievable with clear planning. Each style includes a tutorial-style breakdown, focusing on preparation, technique, and finishing details. The goal is to provide reliable inspiration and actionable methods that support confident styling for prom night.
Why This Idea Is Trending or Useful
Prom hairstyles for Black women are widely shared Pinterest ideas because they combine beauty with function. Many styles protect natural hair while allowing creative expression through braiding, sculpting, or curling techniques. This makes them practical for events that require long wear, minimal maintenance, and strong hold throughout the evening.
These hairstyles also align with modern design trends that focus on individuality and texture. From minimalist sleek buns to voluminous curls, each style adapts to different hair types and lengths. The DIY appeal is strong because many looks can be achieved at home using basic tools and accessible materials. This accessibility allows beginners to experiment with creative ideas while maintaining control over their final look.
Another reason for popularity is visual impact. Prom hairstyles are often photographed, so structured styles with defined shapes and smooth finishes perform well in images. Pinterest inspiration encourages users to replicate these looks using step by step methods, making the process approachable while still producing professional-level results.
Materials and Preparation
Before starting any prom hairstyle, proper preparation ensures smooth execution and long-lasting results. Begin with clean, conditioned hair. Hydration improves manageability and reduces breakage during styling. Detangle thoroughly using a wide-tooth comb or brush to create a smooth base for any technique.
Basic materials include sectioning clips, elastic bands, edge control products, styling gel, and a heat protectant if using hot tools. For braided or extended styles, additional hair may be required to achieve volume or length. A fine-tooth comb is useful for precise parting, while a soft brush helps refine edges for a polished finish.
Planning is essential for achieving balanced and symmetrical styles. Decide on the hairstyle in advance and review reference images for guidance. Section hair before starting to maintain organization and consistency. If heat styling is involved, adjust temperature settings based on hair type to prevent damage.
Allow enough time for the process, especially for intricate styles like braids or sculpted updos. Preparation reduces stress during styling and improves the overall quality of the final look.
Idea 1: Sleek Low Bun with Defined Edges
How to Create
This hairstyle focuses on a smooth, controlled base combined with precise detailing around the hairline. The sleek low bun is a minimalist style that emphasizes clean lines and symmetry. It works well for medium to long hair and complements formal outfits by maintaining a structured silhouette. The defined edges add a decorative element that frames the face and enhances the overall aesthetic.
To create this look, begin by parting the hair as desired, either in the middle or slightly to the side. Apply styling gel evenly to smooth the hair down toward the nape. Use a brush to eliminate bumps and create a polished surface. Secure the hair into a low ponytail using an elastic band. Twist the ponytail and wrap it into a bun, securing it with pins.
Next, apply edge control along the hairline and shape the edges using a fine brush. Focus on creating smooth curves and consistent patterns. Finish with a light holding spray to maintain the style throughout the event. This easy project is beginner friendly and delivers a refined, elegant result.
Idea 2: High Puff with Volume Control
Step-by-Step Guide
The high puff is a popular choice that highlights natural texture while maintaining a structured appearance. It creates volume at the crown, making it ideal for showcasing curls or coils. This hairstyle balances simplicity with impact, making it a reliable option for those seeking a bold yet manageable look.
Start by moisturizing the hair and gently stretching it if needed to enhance volume. Gather the hair toward the top of the head and secure it with a band, adjusting the tightness to achieve the desired puff size. Fluff the hair evenly to create a rounded shape.
Smooth the sides using gel and a brush to maintain a clean contrast between the sleek base and the textured puff. Use edge control to refine the hairline and add detail. This hairstyle requires minimal materials and works well as a DIY tutorial for beginners looking to achieve a stylish, natural look.
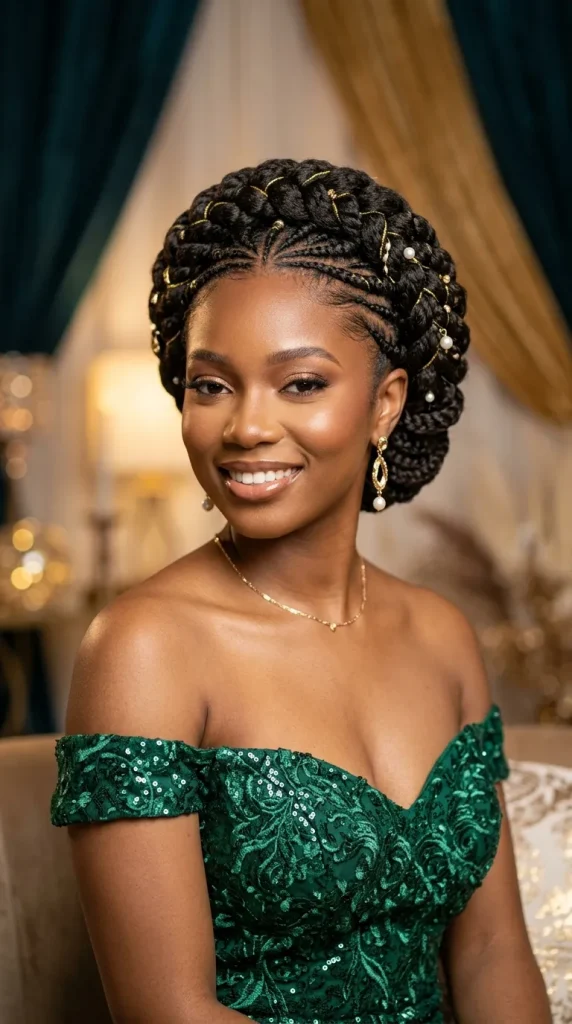
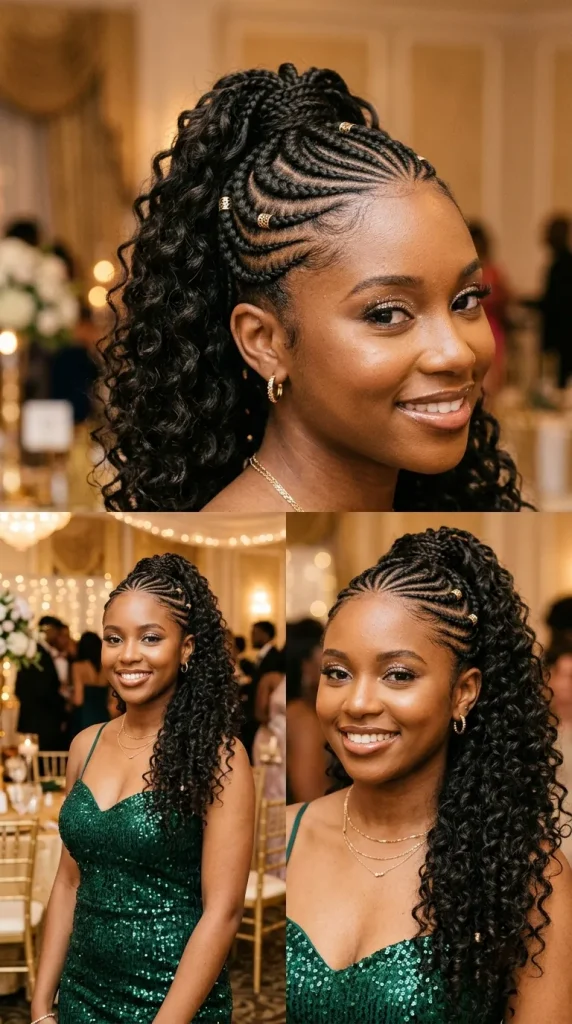
Idea 3: Braided Crown Updo
How to Make
The braided crown updo wraps braids around the head to create a regal, structured design. This style offers both protection and elegance, making it suitable for long events. It distributes tension evenly, reducing stress on individual sections of hair.
Divide the hair into sections and create braids along the perimeter of the head. The braids should be consistent in size to maintain balance. Once complete, wrap the braids around the head, positioning them like a crown. Secure them with pins while ensuring the shape remains symmetrical.
Tuck in loose ends neatly and apply a light holding product to maintain structure. This hairstyle combines traditional braiding techniques with modern design, offering both durability and visual appeal.
Idea 4: Curly Half-Up Half-Down Style
Execution Process
This hairstyle blends structure and movement by combining a secured top section with flowing curls. It is ideal for those who want both volume and control. The top section adds height, while the curls provide softness and texture.
Section the hair horizontally, separating the top portion from the bottom. Secure the top section into a small ponytail or bun. Curl the remaining hair using a curling tool or flexi rods to create uniform curls.
Adjust the curls for even distribution and shape. Smooth the top section and refine edges for a clean finish. This creative project balances casual and formal elements, making it versatile for different prom themes.
Idea 5: Box Braids with Decorative Parting
Setup Method
Box braids with decorative parting focus on precision and pattern. The parting design adds a visual element that enhances the overall hairstyle. This approach turns a classic protective style into a more detailed and customized look.
Begin by dividing the hair into small square sections. Use a fine-tooth comb to create clean, sharp parts. Braid each section evenly, maintaining consistent tension and size. Incorporate additional hair if needed for length.
Focus on the parting design by creating geometric patterns or curved lines. Secure the ends of the braids and apply a light oil for shine. This hairstyle is practical, long-lasting, and suitable for those seeking low-maintenance elegance.
Idea 6: Twisted Updo with Volume Layers
How to Create
The twisted updo uses layered twists to build volume and dimension. This style works well for medium-length hair and provides a structured yet soft appearance. The layered effect creates depth without requiring complex techniques.
Section the hair and create medium-sized twists. Once completed, gather the twists toward the back and begin pinning them in layers. Position each twist carefully to build volume and maintain balance.
Secure the twists firmly and adjust placement for symmetry. Smooth the edges and apply finishing products to hold the style. This beginner friendly tutorial provides a controlled approach to achieving a full, elegant updo.
Idea 7: Sleek Ponytail with Wrapped Base
Step-by-Step Guide
The sleek ponytail with a wrapped base offers a clean, modern design. It emphasizes length and smoothness while hiding the elastic for a refined finish. This style works well for straightened or stretched hair.
Gather the hair into a high or mid-level ponytail and secure it tightly. Take a small section of hair from the ponytail and wrap it around the base to conceal the band. Pin it securely underneath.
Smooth the ponytail using a brush and apply a light serum for shine. Use edge control to refine the hairline. This easy project creates a polished and professional appearance suitable for formal occasions.
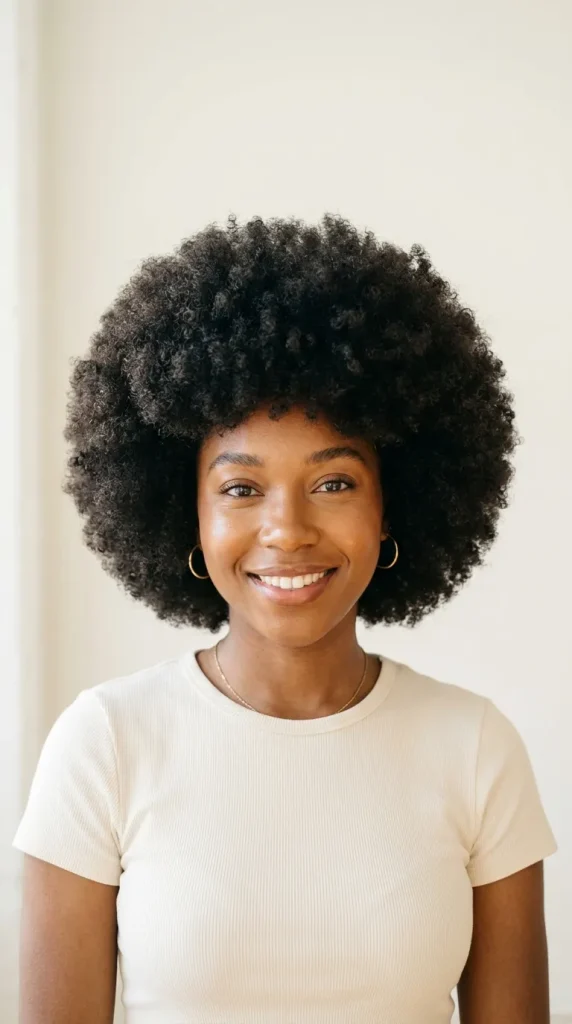
Idea 8: Afro with Defined Shape
How to Make
The shaped afro celebrates natural texture while maintaining a controlled silhouette. It focuses on even volume distribution and clean edges. This style is both expressive and structured.
Start by picking the hair gently to increase volume. Shape the afro using a comb, focusing on symmetry and balance. Define the edges using a light styling product to frame the face.
Trim uneven sections if necessary to maintain a consistent outline. This hairstyle highlights natural beauty while offering a strong visual presence, making it a popular Pinterest inspiration.
Idea 9: Cornrows with Curly Ends
Execution Process
This hairstyle combines the structure of cornrows with the softness of curls. It creates contrast and adds movement to the overall design. The style is both protective and decorative.
Create cornrows along the scalp, leaving the ends unbraided. Curl the loose ends using rods or a curling tool. Ensure the curls are consistent in size and shape.
Secure the ends and apply a holding product to maintain the curls. This creative idea blends two techniques into a cohesive and visually appealing hairstyle.
Idea 10: Low Twisted Bun with Side Part
How to Create
The low twisted bun with a side part offers a classic and balanced look. The side part adds dimension, while the bun maintains a clean structure. This style is suitable for various hair lengths.
Part the hair to one side and create two sections. Twist each section toward the back and combine them into a low bun. Secure with pins and adjust for symmetry.
Smooth the surface and refine the edges using styling products. This hairstyle is simple yet effective, providing a timeless option for prom styling.

Common Beginner Mistakes and How to Avoid Them
One common mistake is skipping proper preparation, which leads to uneven sections and poor hold. Clean, detangled hair is essential for achieving smooth results. Another issue is using excessive product, which can weigh down the hair and reduce volume. Apply products in controlled amounts and distribute them evenly.
Inconsistent sectioning often results in asymmetrical styles. Use clips and clear parting techniques to maintain organization. Rushing through the process can also affect the final outcome. Allocate enough time to complete each step carefully.
Avoid using incorrect tool temperatures, as this can damage the hair or create uneven curls. Always adjust heat settings based on hair type. By focusing on preparation, control, and patience, beginners can significantly improve their results.
Practical Tips for Better Results
Consistent sectioning improves accuracy and balance in all hairstyles. Always divide the hair evenly before starting. Use mirrors to check alignment from multiple angles. This ensures symmetry and enhances the final appearance.
Maintaining moisture throughout the process helps reduce breakage and improves flexibility. Apply light oils or creams as needed. Secure each section properly to prevent loosening during styling.
Practice simple styles before attempting more complex designs. This builds confidence and skill over time. Following a step by step tutorial approach helps maintain structure and clarity during execution.
Finishing touches such as edge control and light holding spray make a significant difference. These details refine the hairstyle and ensure it lasts throughout the event.
Styling, Presentation, or Organization Ideas
Presentation plays a key role in enhancing prom hairstyles. Clean parting, smooth finishes, and balanced shapes create a polished look. Accessories such as subtle pins or decorative clips can be used carefully to complement the hairstyle without overpowering it.
Organizing tools and materials before starting improves efficiency. Keep all items within reach to avoid interruptions. Work in sections to maintain control and consistency.
Lighting also affects how the hairstyle appears in photos. Ensure the style is evenly shaped and free of visible gaps. A well-organized process leads to a more professional result and improves the overall aesthetic.
Budget or Time Planning
Prom hairstyles can be completed efficiently with proper planning. Many styles use basic materials, making them suitable for budget ideas. Reusable tools such as combs, brushes, and clips reduce overall cost.
Time management is essential, especially for intricate styles. Allocate extra time for braiding or curling processes. Simpler styles such as buns or puffs require less time and are ideal for quick preparation.
Planning the hairstyle in advance prevents last-minute stress. Gather all materials beforehand and test the style if possible. This ensures a smooth and efficient styling process on the day of the event.
Creative Expansion and Advanced Inspiration
Once basic techniques are mastered, styles can be expanded with more complex variations. Combining braids with curls or twists creates layered designs. Experimenting with parting patterns adds uniqueness to each hairstyle.
Advanced inspiration includes incorporating multiple textures within a single style. For example, mixing sleek sections with voluminous curls creates contrast. Adding subtle accessories or color variations enhances visual interest.
Continuous practice allows for greater creativity and precision. Exploring new techniques and adapting them to different hair types leads to more personalized results. This approach transforms simple styles into detailed and expressive creative projects.


Leave a Reply