Introduction
Creating defined spaces within a room does not always require permanent walls or expensive installations. Affordable and flexible dividers offer a practical solution for separating areas while maintaining visual appeal. This article focuses on Dollar Tree pink divider ideas that combine functionality with aesthetic value. These creative ideas are designed to help organize living spaces, improve room structure, and enhance overall home decor using simple DIY methods.

Readers will learn how to transform low-cost materials into effective dividers that suit various needs, including small apartments, shared rooms, and workspace organization. Each concept provides clear guidance, allowing beginners to follow a step-by-step process without requiring advanced skills. The emphasis remains on practical execution, ensuring that each divider can be assembled using accessible tools and materials.
Pink tones are widely used in modern design due to their versatility and ability to create a calm, cohesive atmosphere. From soft pastel shades to brighter accents, pink dividers can blend seamlessly with minimalist style or bold decorative themes. This makes them suitable for a wide range of creative projects and interior arrangements.
Why This Idea Is Trending or Useful
Affordable room organization solutions have become increasingly popular as more people seek flexible living arrangements. Pink dividers made from Dollar Tree materials align with current Pinterest ideas because they combine budget-friendly construction with visually appealing results. These dividers provide a simple way to redefine spaces without structural changes, making them ideal for renters or temporary setups.
The DIY aspect adds to their popularity, as users can customize designs according to personal preferences. This level of personalization allows individuals to experiment with color tones, textures, and patterns while maintaining a consistent aesthetic. Pink, in particular, remains a trending choice due to its compatibility with modern design trends and its ability to soften interior spaces.
These projects are also beginner friendly, requiring minimal tools and straightforward assembly methods. The accessibility of materials ensures that anyone can attempt these creative ideas without significant financial investment. Additionally, the process encourages practical planning and hands-on creativity, making it both functional and engaging.
Materials and Preparation
Before starting any divider project, proper planning and preparation ensure better results and smoother execution. Most Dollar Tree pink divider ideas rely on basic materials such as foam boards, plastic tablecloths, adhesive hooks, wooden dowels, zip ties, and decorative paper. These items are widely available and easy to handle, making them suitable for beginners.
Essential tools may include scissors, glue guns, measuring tape, and utility knives. These tools help achieve accurate cuts and secure assembly, which is important for maintaining structure and durability. Preparing a clean workspace allows for efficient handling of materials and reduces the likelihood of errors during the process.
Planning considerations include measuring the area where the divider will be placed and determining the desired height and width. It is also important to select a consistent pink color palette to maintain a cohesive design. Sketching a simple layout before starting can help visualize the final result and guide the step-by-step process. Proper preparation ensures that the project remains organized and results in a stable, visually appealing divider.
Idea 1: Pink Fabric Panel Divider
How to Create
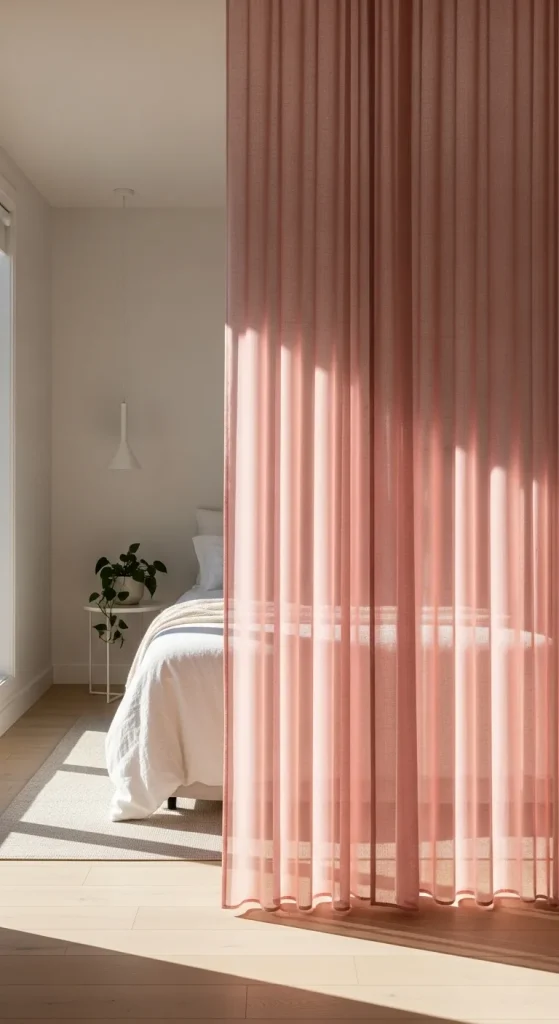
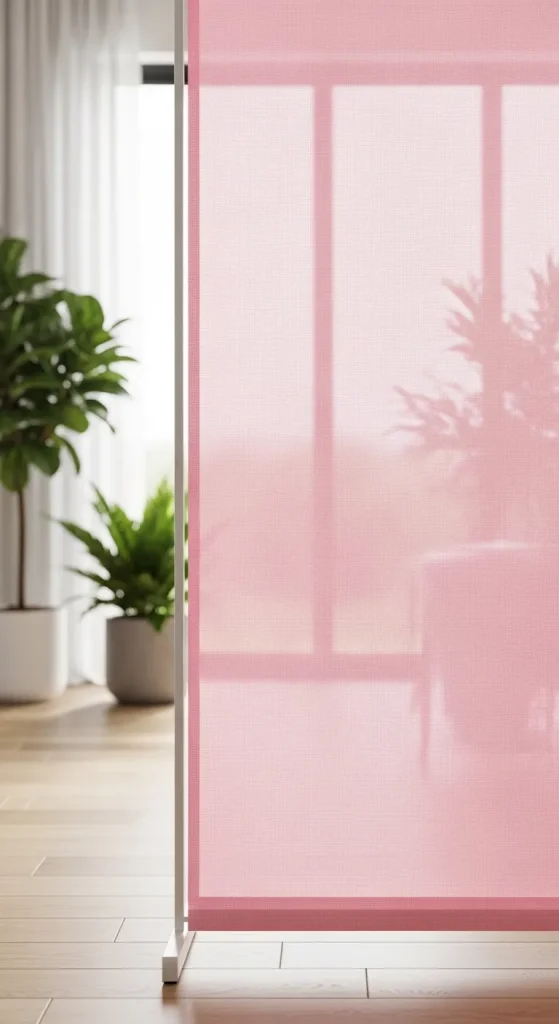
A pink fabric panel divider offers a soft and flexible way to separate spaces while maintaining a light visual presence. This design uses sheer or semi-opaque pink fabric to create a subtle barrier that allows light to pass through. It works well in bedrooms, studio apartments, or shared spaces where full privacy is not required. The fabric creates a flowing effect that enhances the aesthetic of the room while maintaining functionality.
The simplicity of this concept makes it suitable for minimalist style interiors. The use of lightweight materials ensures easy installation and removal, making it ideal for temporary setups. This divider also contributes to a calm environment, as the soft texture reduces visual clutter and blends smoothly with surrounding decor elements.
To create this divider, attach adhesive hooks to the ceiling or a sturdy surface. Thread a thin rod or string through the top edge of the fabric and hang it securely. Ensure the fabric length matches the floor height for a clean appearance. Adjust spacing between panels if multiple pieces are used. This step-by-step method requires minimal tools and allows easy customization through different shades of pink or layered textures.
Idea 2: Foam Board Grid Divider
Step-by-Step Guide
A foam board grid divider provides a structured and modern approach to space separation. This design uses lightweight foam boards arranged in a grid pattern to create a semi-open divider. The grid allows partial visibility while still defining separate areas, making it useful for workspaces or study zones.
The geometric structure adds a clean and organized appearance, aligning with modern design trends. Pink foam boards can be combined with white or neutral tones to create contrast and visual balance. This idea is especially effective for small rooms where maintaining openness is important.
To assemble, cut foam boards into equal rectangular sections and connect them using glue or zip ties. Arrange the pieces into a grid layout and secure the joints carefully to maintain stability. Once assembled, place the divider upright or attach it to a base for support. This easy project offers flexibility in size and layout, making it adaptable to different room dimensions.

Idea 3: Plastic Tablecloth Curtain Divider
How to Make
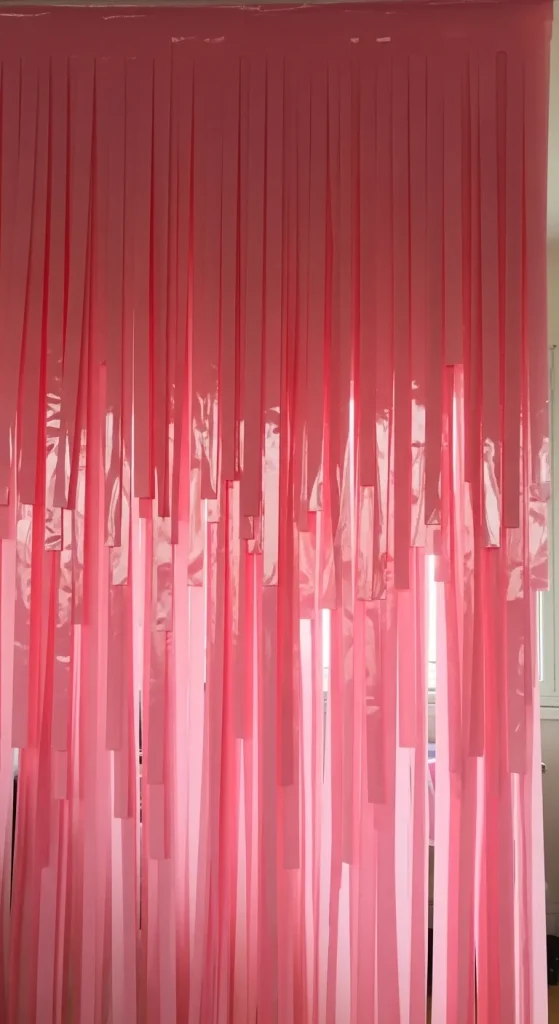
This divider uses pink plastic tablecloths to create a layered curtain effect that is both affordable and visually striking. The lightweight material allows for easy movement while still providing separation between spaces. This approach works well in casual settings or temporary arrangements.
The layered design creates depth and texture, adding visual interest without requiring complex construction. The glossy finish of plastic tablecloths also reflects light, making the space appear brighter. This makes it a practical solution for rooms with limited natural lighting.
To create, cut the tablecloths into vertical strips and attach them to a rod or string using clips or tape. Hang the rod securely across the desired area. Adjust the density of the strips to control privacy levels. This method requires minimal effort and allows quick installation, making it suitable for beginners.
Idea 4: Hanging Bead Divider
Execution Process
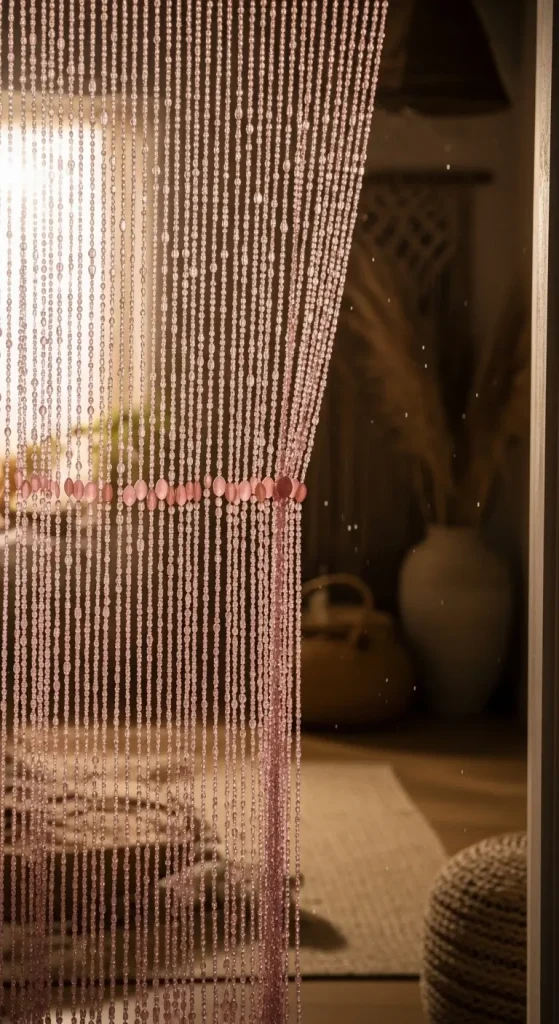
A pink bead divider introduces a decorative element while serving as a functional space separator. The beads create a semi-transparent barrier that allows airflow and light to pass through while adding texture and movement. This design is ideal for creative home decor setups.
The visual effect of hanging beads enhances the overall aesthetic, especially when combined with soft lighting. The movement of the beads adds a dynamic quality to the space, making it feel more engaging and lively.
To construct, thread pink beads onto strings or fishing line and secure them to a horizontal rod. Space the strands evenly to maintain a balanced appearance. Attach the rod to the ceiling or doorway for support. This DIY tutorial is simple and allows customization through bead size and arrangement.
Idea 5: Poster Board Folding Screen
Setup Method
A folding screen made from pink poster boards offers a portable and structured divider solution. This design mimics traditional folding screens but uses lightweight materials for easy handling. It is suitable for creating temporary partitions in shared rooms.
The folding mechanism allows for flexible positioning and easy storage. The use of poster boards ensures a smooth surface that can be decorated with patterns or textures to match the room’s theme.
To assemble, connect multiple poster boards using tape or hinges along the edges. Ensure the joints allow for folding movement. Stand the panels upright in a zigzag formation for stability. This step-by-step setup provides a functional divider that can be repositioned as needed.
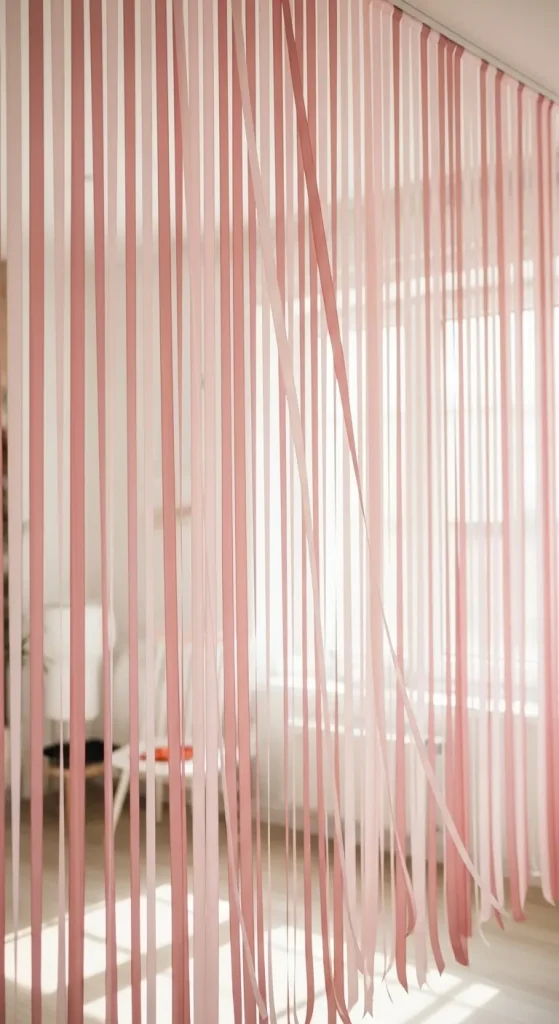
Idea 6: Ribbon Curtain Divider
How to Create
A ribbon curtain divider uses pink ribbons to form a soft and flexible partition. This design creates a light visual barrier while maintaining openness. It is particularly useful for decorative purposes in bedrooms or creative spaces.
The ribbons add texture and movement, enhancing the aesthetic appeal of the room. The simplicity of the design makes it easy to customize with different shades and lengths.
To create, cut ribbons to the desired length and attach them to a rod using knots or adhesive. Hang the rod securely across the space. Adjust spacing between ribbons to control coverage. This easy project requires minimal materials and provides a visually appealing result.
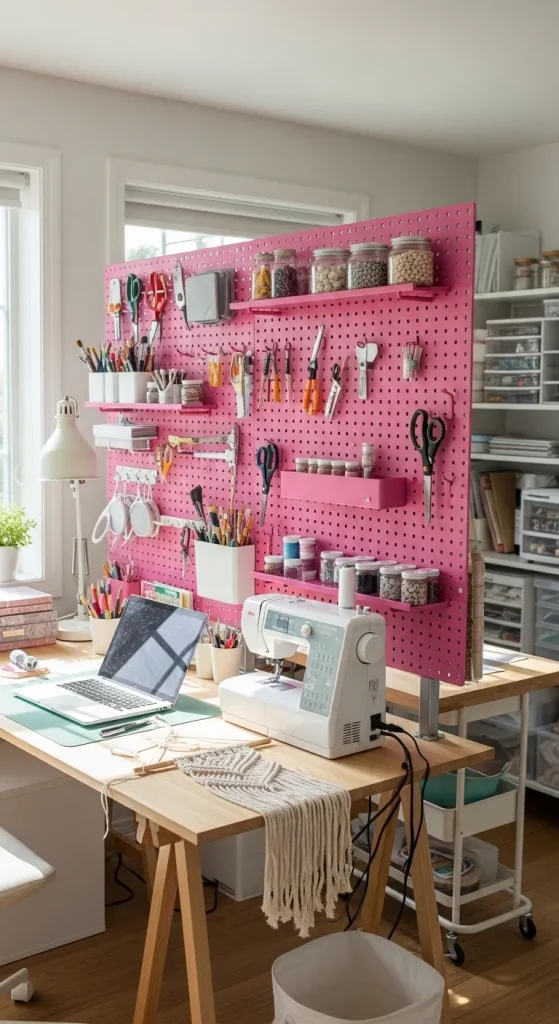
Idea 7: Pegboard Divider
Step-by-Step Guide
A pink pegboard divider combines functionality with organization. The pegboard surface allows for hanging small items, making it suitable for workspaces or craft areas. This design serves both as a divider and a storage solution.
The structured layout helps maintain order while separating spaces effectively. The pegboard can be painted in pink tones to match the overall aesthetic.
To build, mount the pegboard onto a frame or support structure. Secure it upright using brackets or a base. Add hooks and accessories for storage. This DIY tutorial offers a practical and organized solution for multi-purpose spaces.
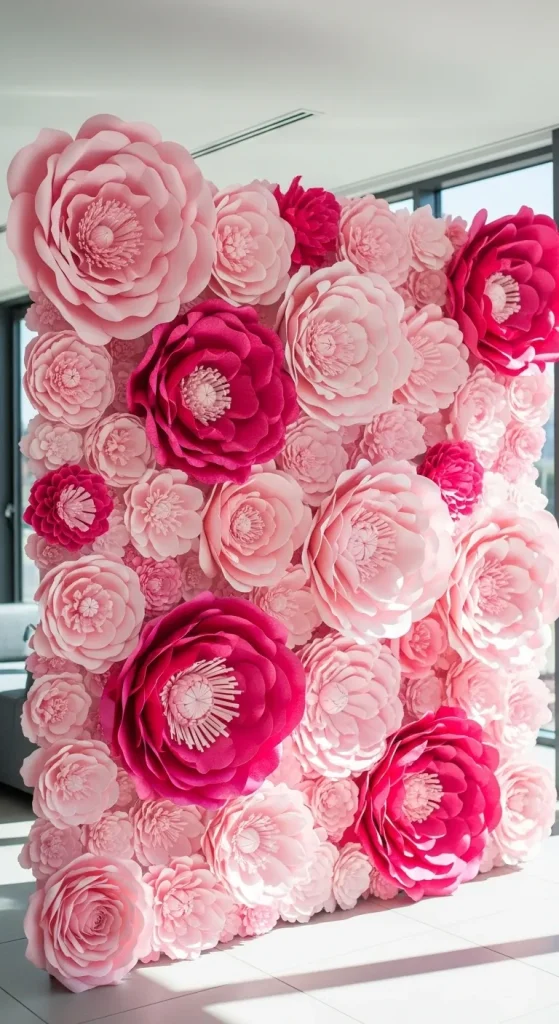
Idea 8: Paper Flower Wall Divider
How to Make
A paper flower wall divider uses handmade pink flowers to create a decorative partition. This design adds depth and texture while maintaining a lightweight structure. It is ideal for aesthetic-focused spaces.
The layered flowers create a visually rich surface that enhances the overall decor. The design can be customized with different flower sizes and arrangements.
To create, cut flower shapes from pink paper and assemble them using glue. Attach the flowers to a backing surface such as a mesh or board. Position the divider securely in the desired area. This creative project adds a unique decorative element.
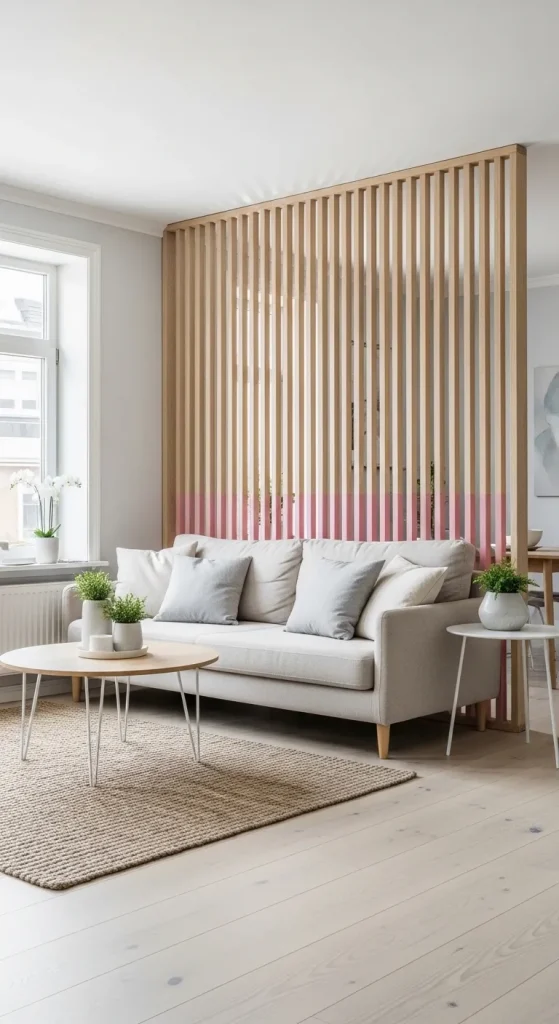
Idea 9: Wooden Dowel Frame Divider
Execution Process
A wooden dowel frame divider offers a minimalist structure with a modern appearance. The use of pink accents on the dowels creates a subtle yet effective design. This divider works well in contemporary interiors.
The open frame allows visibility while defining boundaries. The clean lines contribute to a neat and organized look.
To build, connect wooden dowels using joints or connectors to form a rectangular frame. Paint or wrap sections in pink for decoration. Secure the frame upright using a base. This setup provides a durable and stylish divider.
Idea 10: Mesh Panel Divider
Setup Method
A mesh panel divider combines transparency with structure. The pink mesh creates a soft barrier that maintains airflow and light distribution. This design is suitable for both decorative and functional use.
The mesh texture adds a subtle pattern that enhances visual interest without overwhelming the space. It is a practical solution for maintaining openness while organizing areas.
To create, attach pink mesh fabric to a frame using staples or adhesive. Ensure the fabric is stretched evenly for a clean finish. Position the frame securely in the desired location. This easy project offers a balance between structure and flexibility.
Common Beginner Mistakes and How to Avoid Them
One common mistake is failing to measure the space accurately before starting the project. Incorrect measurements can lead to dividers that do not fit properly or appear uneven. Using a measuring tape and planning dimensions in advance helps prevent this issue. Another frequent problem is using weak adhesives or unstable connections, which can cause the divider to collapse over time. Selecting appropriate materials and securing joints properly ensures durability.
Overloading the design with excessive decoration can also reduce functionality. Keeping the structure simple and balanced improves both appearance and usability. Beginners may also overlook the importance of color consistency, resulting in mismatched tones. Choosing a clear pink palette beforehand helps maintain a cohesive look. Proper planning and careful execution significantly improve the final outcome.
Practical Tips for Better Results
Maintaining consistency in materials and color tones enhances the overall aesthetic. Using similar shades of pink across all elements creates a unified design. Ensuring strong structural support is essential for stability, especially for freestanding dividers. Reinforcing joints and using sturdy bases improves durability.
Working in a clean and organized space allows for precise assembly and reduces errors. Taking time to align components properly results in a more professional finish. Testing the divider’s stability before final placement ensures safety and functionality. These practical steps contribute to better results and a more polished appearance.
Styling, Presentation, or Organization Ideas
Styling the divider according to the surrounding decor enhances its visual impact. Pairing pink dividers with neutral tones creates balance, while combining them with bold colors adds contrast. Incorporating lighting elements such as string lights can highlight the structure and create an inviting atmosphere.
Arranging furniture around the divider helps define zones within the room. For example, placing a desk behind a divider can create a dedicated workspace. Maintaining clean lines and avoiding clutter ensures the divider remains the focal point. Thoughtful presentation improves both functionality and aesthetic value.
Budget or Time Planning
Dollar Tree pink divider ideas are designed to be cost-effective, making them accessible for budget-conscious projects. Most materials are affordable, allowing multiple variations without significant expense. Planning the project in advance helps avoid unnecessary purchases and reduces waste.
Time management is also important for efficient completion. Breaking the project into smaller steps allows for steady progress without feeling overwhelming. Simple designs can often be completed within a few hours, while more detailed projects may require additional time. Proper planning ensures a smooth and efficient process.
Creative Expansion and Advanced Inspiration
Once basic divider projects are mastered, more advanced variations can be explored. Combining multiple materials, such as fabric and beads, creates layered designs with added depth. Experimenting with patterns and textures enhances visual complexity while maintaining functionality.
Advanced ideas may include integrating storage elements or lighting features into the divider structure. This approach increases practicality while maintaining aesthetic appeal. Exploring different shades of pink and combining them with complementary colors allows for unique and personalized designs. These creative expansions provide ongoing inspiration for future DIY projects.


Leave a Reply