Introduction
Air dry clay has become one of the most popular materials in the DIY world—and for good reason. It’s affordable, easy to use, and doesn’t require a kiln or special equipment. Whether you’re a beginner or someone who loves crafting, air dry clay opens the door to endless home décor possibilities.

What makes air dry clay so special is its versatility. You can mold it into almost any shape, texture, or design, allowing you to create unique décor pieces that perfectly match your style. From minimalist aesthetics to boho and modern designs, this material adapts beautifully to any theme.
Another major advantage is accessibility. You don’t need professional tools or skills to get started. With just a few basic materials and some creativity, you can transform simple clay into stunning decorative items that look store-bought.
In this blog, we will explore 10 easy air dry clay ideas for home décor, each explained in detail with materials, steps, and styling inspiration. These projects are beginner-friendly, budget-conscious, and perfect for adding a handmade touch to your home.
Materials Used for Air Dry Clay Projects
To start working with air dry clay, you’ll need a few essential materials. The main item is air dry clay, which is available in white, terracotta, or colored options. White clay is most popular because it can be painted easily.
Basic tools include a rolling pin, knife, sculpting tools, and a cutting board. These help you shape and refine your designs.
You’ll also need water to smooth surfaces and join pieces together. A small bowl of water and a sponge can help achieve a clean finish.
For decoration, use acrylic paints, brushes, and sealants. Paint allows you to customize your creations, while a sealant protects them and adds durability.
Optional materials include texture tools, stamps, lace, or leaves to create patterns on the clay.
How to Work with Air Dry Clay (Step-by-Step)
Start by kneading the clay to make it soft and easy to work with. This prevents cracks and ensures smooth shaping.
Roll out the clay to your desired thickness using a rolling pin. Use tools or cutters to shape your design.
Smooth the edges with your fingers or a damp sponge for a polished look.
Let the clay dry completely according to the instructions, usually 24–48 hours.
Once dry, sand any rough edges and paint or decorate your piece. Finish with a sealant for durability.
1. Minimal Clay Trinket Dishes
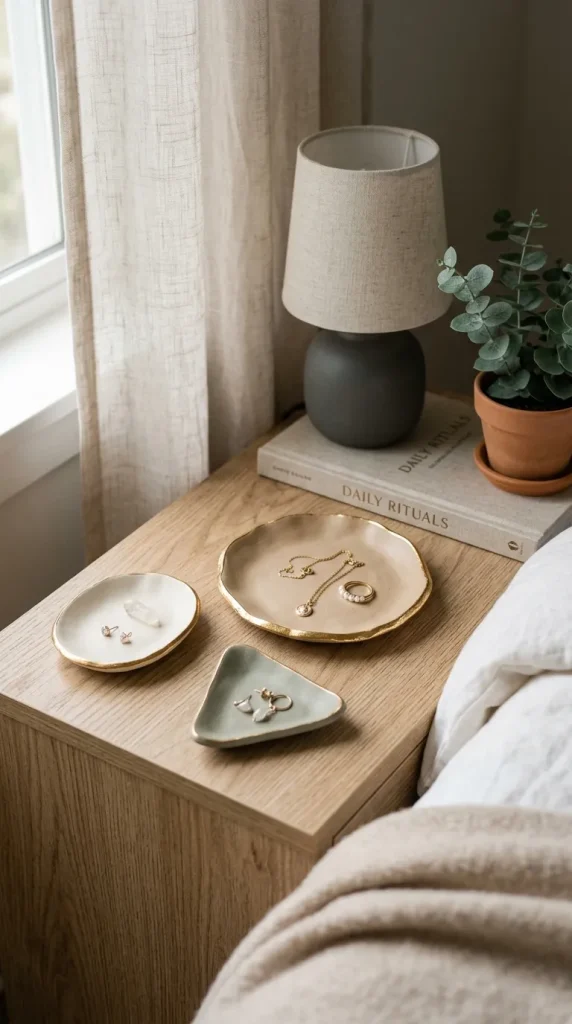
Clay trinket dishes are one of the easiest and most popular DIY projects. They are perfect for holding jewelry, keys, or small accessories while adding a stylish touch to your space.
To create these dishes, roll out the clay and cut it into a circular or oval shape. Gently press the edges upward to form a shallow dish. You can keep the design simple or add textures using stamps or lace.
Once dry, paint the dish in neutral tones like white, beige, or pastel colors. You can also add gold accents for a modern look.
These dishes work beautifully on bedside tables, entryways, or vanities.
Pinterest Style Pattern:
Minimal clay trinket dish with soft neutral tones and gold detailing.
2. Clay Candle Holders
Clay candle holders are elegant and functional décor pieces. They add warmth and ambiance to any room.
Shape the clay into a small base and create a hole in the center to hold the candle. You can experiment with different shapes like cylinders, arches, or abstract forms.
Pinterest Style Pattern:
Modern clay candle holders with soft matte finish and warm glow.

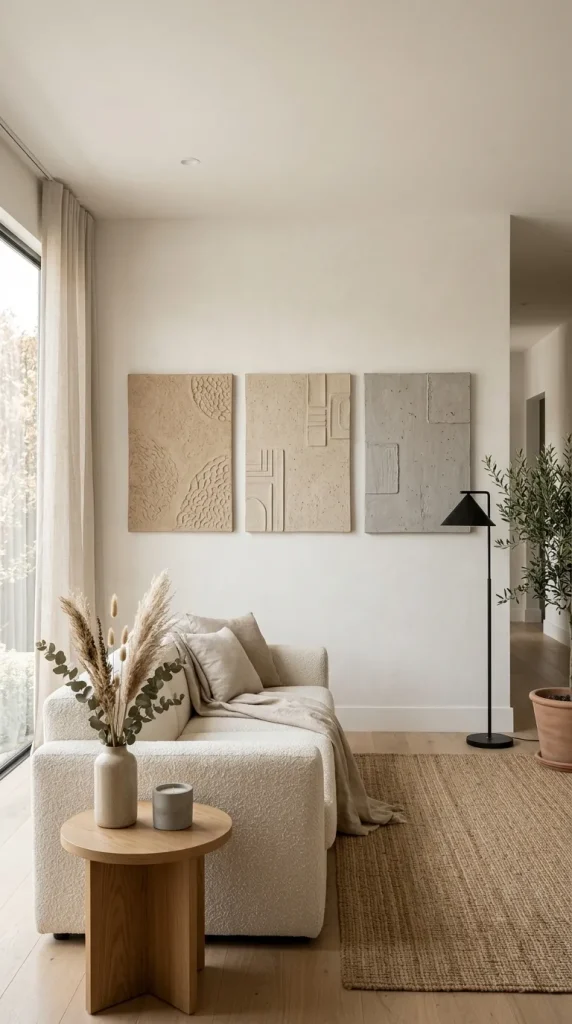
3. Clay Wall Art Pieces
Clay wall art allows you to create unique and artistic designs. You can make geometric shapes, abstract patterns, or textured panels.
Cut and shape the clay, then add patterns using tools or natural elements.
Pinterest Style Pattern:
Textured clay wall art in neutral tones for modern interior.
4. Clay Plant Pots
Small clay plant pots are perfect for adding greenery to your home. They are easy to make and highly customizable.
Shape the clay into a pot and ensure proper thickness for durability.
Pinterest Style Pattern:
Handmade clay pots with small plants in a cozy setting.

5. Clay Coasters
Clay coasters are practical and stylish. Roll out the clay and cut into round or square shapes.
Add textures or patterns for a unique look.
Pinterest Style Pattern:
Minimal clay coasters with subtle texture and neutral colors.

6. Clay Vases (Mini Decorative)
Mini clay vases are one of the most elegant and versatile air dry clay projects. These small decorative pieces can instantly elevate your home décor, whether placed on a coffee table, shelf, or bedside. Despite their delicate appearance, they are surprisingly easy to make, even for beginners.
To create a mini vase, start by shaping a small ball of clay and gently hollowing out the center using your fingers or sculpting tools. Gradually shape the walls upward, forming a narrow neck or wide opening depending on your desired style. Keep the thickness even to prevent cracking during drying.
You can experiment with different shapes such as round, cylindrical, or abstract forms. Once the shape is complete, smooth the surface using a damp sponge for a clean finish. After drying, paint the vase in neutral tones like white, beige, or soft grey for a modern aesthetic. You can also add subtle textures or patterns for extra detail.
These mini vases are perfect for holding dried flowers or simply as decorative objects. Their simplicity makes them suitable for minimalist, Scandinavian, or modern interiors.
Pinterest Style Pattern:
Small matte clay vases with dried flowers in a neutral modern setting.

7. Clay Photo Holders
Clay photo holders are a creative and functional way to display your favorite pictures or notes. They add a personal touch to your décor while keeping things simple and stylish.
To make a photo holder, shape a small base using clay. It can be round, square, or even abstract. Before the clay dries, insert a thin wire or metal clip into the top of the base. This will hold your photo or card securely.
You can decorate the base with textures, patterns, or paint. Neutral colors work well for a modern look, while bright colors can make the piece more playful.
Once dry, place your favorite photos, quotes, or reminders in the holder. These are perfect for desks, shelves, or bedside tables.
This project is ideal for beginners and makes a great handmade gift.
Pinterest Style Pattern:
Minimal clay photo holder with wire clip displaying a small photo.

8. Clay Hanging Ornaments
Clay hanging ornaments are a beautiful way to add decorative elements to your walls, windows, or shelves. These lightweight pieces can be customized in endless ways, making them perfect for seasonal or everyday décor.
To create ornaments, roll out the clay and cut it into shapes such as circles, leaves, or abstract forms. Use a straw or tool to create a small hole at the top for hanging. You can add textures using stamps, lace, or natural elements like leaves.
After the clay dries, paint the ornaments or leave them natural for a minimalist look. Thread a string or rope through the hole and hang them as desired.
These ornaments work well in boho, rustic, or modern interiors. You can hang them individually or create a cluster for a more dramatic effect.
They are also great for festive decorations or personalized gifts.
Pinterest Style Pattern:
Clay hanging ornaments with neutral tones and soft textures in a cozy setting.

9. Clay Incense Holders
Clay incense holders are both functional and calming décor pieces. They are perfect for creating a relaxing atmosphere in your home.
To make one, shape a flat base or a small dish using clay. Create a small hole to hold the incense stick at an angle. You can keep the design simple or add decorative elements like patterns or raised edges.
Once dry, paint the holder in soothing colors like white, beige, or soft pastels. A matte finish works best for a modern look.
These holders are ideal for meditation spaces, bedrooms, or living rooms. They add a peaceful and stylish touch to your décor.
This project is simple yet meaningful, making it a favorite among DIY enthusiasts.
Pinterest Style Pattern:
Minimal clay incense holder with soft neutral tones and calming setup.

10. Abstract Clay Sculptures
Abstract clay sculptures are perfect for those who want to explore creativity and create unique décor pieces. These sculptures don’t follow a specific shape or design, allowing you to experiment freely.
Start by molding the clay into abstract forms such as curves, loops, or geometric shapes. Focus on creating interesting silhouettes rather than perfect symmetry. Let your creativity guide the process.
Once the sculpture is dry, you can leave it in its natural state or paint it in neutral or bold colors depending on your style. Matte finishes are especially popular for modern interiors.
These sculptures can be placed on shelves, coffee tables, or desks as statement pieces. They add an artistic and contemporary touch to your space.
This project is ideal for expressing individuality and creating one-of-a-kind décor items.
Pinterest Style Pattern:
Abstract clay sculpture with smooth curves in a modern minimalist setting.

Final Thoughts
Air dry clay is an incredibly versatile material that allows you to create beautiful home décor pieces with ease. From simple trinket dishes to artistic sculptures, these DIY ideas offer endless possibilities.
The best part is that these projects are affordable, beginner-friendly, and highly customizable. You can experiment with shapes, colors, and textures to match your personal style.


Leave a Reply