
Introduction
A tissue box may seem like a small everyday item, but with a little creativity, it can become a beautiful decorative accessory for your home. Instead of keeping a plain cardboard tissue box on your coffee table, bedroom nightstand, office desk, or bathroom counter, you can transform it with paint and turn it into a stylish piece of DIY decor.
Aesthetic tissue box painting is a fun and affordable craft project for anyone who enjoys personalized home accessories. You can experiment with soft pastel shades, delicate floral patterns, minimalist designs, abstract art, vintage-inspired details, or nature-inspired illustrations. The best part is that you do not need advanced painting skills to create something beautiful.

Whether you prefer a neutral modern interior, a cozy cottagecore bedroom, a colorful maximalist home, or a cute pastel aesthetic, there is a tissue box painting idea to match your style. You can use an old wooden tissue box cover, a plain cardboard box suitable for painting, or a simple craft-ready tissue box holder as your base.
In this guide, you will discover 10 aesthetic tissue box painting ideas, along with materials, step-by-step instructions, styling suggestions, and practical tips to help you create a design that looks attractive and lasts.
Materials Needed for Aesthetic Tissue Box Painting
Before starting your project, gather the necessary supplies. Most of these materials are affordable and available at craft stores.
- Tissue box or tissue box cover: A wooden, papier-mâché, or paintable cardboard surface is ideal.
- Acrylic paints: Choose colors that complement your preferred aesthetic, such as pastel pink, sage green, cream, lavender, brown, or terracotta.
- Paintbrushes: Use small round brushes for details, flat brushes for larger areas, and fine brushes for outlines.
- Primer or gesso: Helps create an even surface, especially on wood or papier-mâché.
- Pencil and eraser: Useful for sketching patterns before painting.
- Painter’s tape: Helps create clean geometric shapes and straight lines.
- Water container and palette: For rinsing brushes and mixing colors.
- Protective varnish: A compatible clear acrylic sealer can protect a fully dried painted design.
- Fine sandpaper: Useful for lightly smoothing unfinished wooden surfaces before priming.
If you are painting a cardboard tissue box, use thin coats of paint to avoid warping. A wooden or papier-mâché cover is generally more durable and easier to reuse.
1. Pastel Pink and White Floral Tissue Box
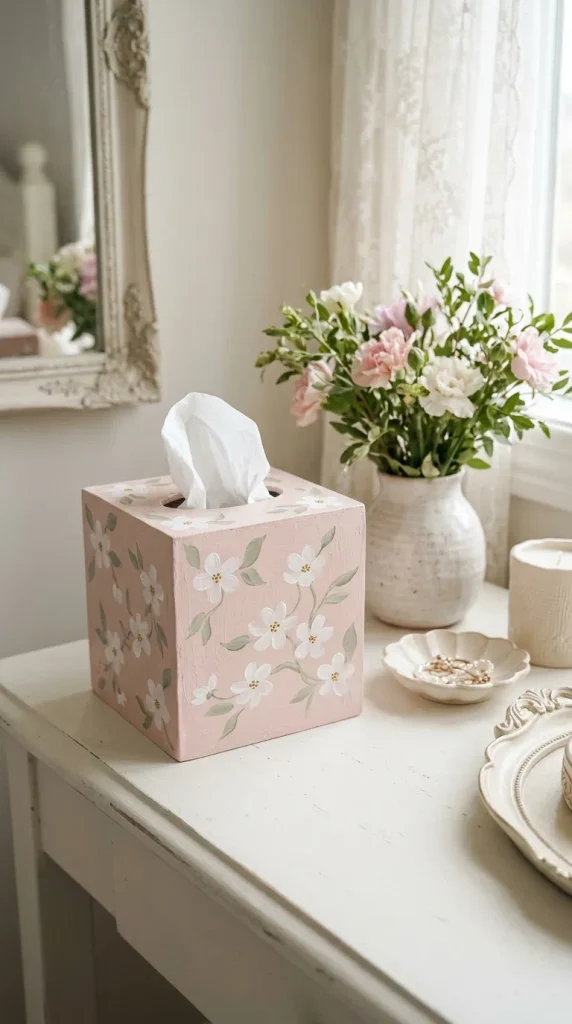
A pastel pink and white floral tissue box is perfect for anyone who loves a soft, feminine, romantic aesthetic. This design looks beautiful on a bedroom nightstand, vanity table, dressing table, or a light-colored living room shelf.
Start by choosing a paintable tissue box cover. Apply a thin coat of white or pale blush acrylic paint as the base. Allow it to dry completely before adding the floral design.
Use a small round brush to paint tiny flowers across the sides of the box. You can create simple five-petal flowers with a pale pink center and white petals, or reverse the colors for a more delicate appearance. Add small green leaves between the flowers to make the pattern look natural.
You do not need to cover every part of the box with flowers. Leaving some of the base color visible creates a cleaner, more sophisticated result. For a cottage-inspired look, arrange the flowers in small clusters near the corners. For a more playful design, distribute them evenly across the surface.
Once the paint is dry, use a fine brush to add small dots or delicate lines around the petals. These details make the finished design look more carefully crafted.
Finish with a compatible clear protective sealer if the material and paint allow it. Avoid coating the tissue opening in a way that catches or tears the tissues.
Materials needed: White and blush-pink acrylic paint, green paint, small paintbrushes, pencil, and optional clear sealer.
Styling tip: Pair this tissue box with white ceramic accessories, soft pink flowers, cream bedding, and natural wood furniture for a coordinated romantic bedroom aesthetic.
2. Minimalist Beige and Brown Tissue Box
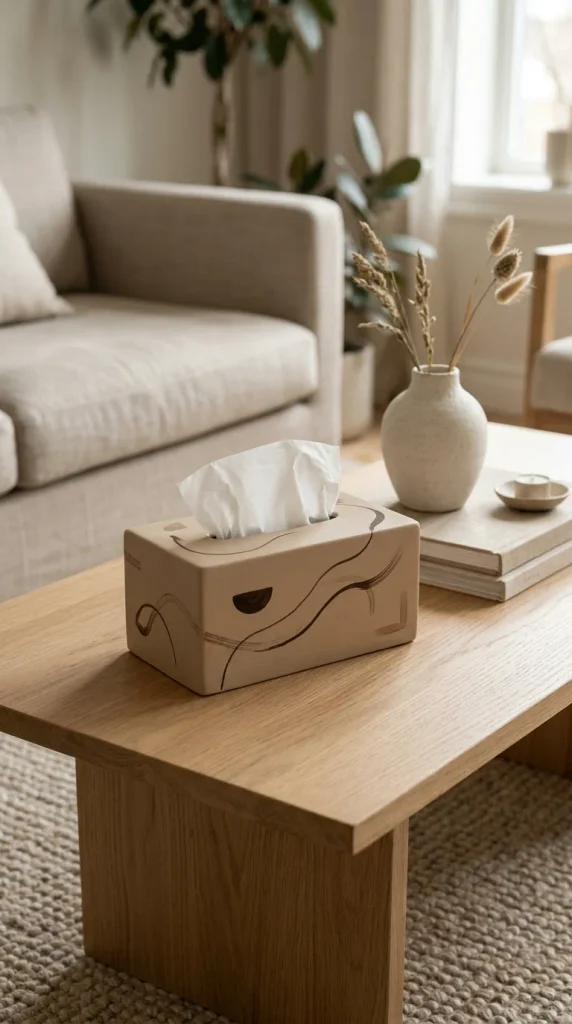
If you prefer simple and elegant home decor, a beige and brown tissue box is an excellent choice. Its neutral color palette complements modern, Scandinavian, minimalist, and contemporary interiors.
Begin by painting the entire box in warm beige, ivory, or creamy white. Apply two thin coats if needed, allowing each coat to dry before adding the next.
Once the base is completely dry, use light brown or dark taupe paint to create a minimalist design. You could paint a single curved line, a small arch, a simple abstract face, or a few organic shapes. Another option is to paint a thin border around the sides of the box.
For a modern look, keep the design asymmetrical. For example, paint a small brown semicircle in one corner and add a thin curved line extending toward the center. This creates visual interest without making the box look busy.
You can also use painter’s tape to create a clean two-tone design, such as a beige base with one dark brown side. Remove the tape carefully when the paint is dry to the touch, following the paint manufacturer’s instructions.
The beauty of this idea is its simplicity. The tissue box looks decorative without drawing too much attention, making it suitable for spaces where you want accessories to blend naturally with the rest of the room.
Materials needed: Beige acrylic paint, brown or taupe paint, flat and detail brushes, painter’s tape, and optional sealer.
Styling tip: Place the finished box on a wooden coffee table alongside a neutral tray, a small ceramic vase, and a textured linen cushion.
3. Sage Green Botanical Tissue Box
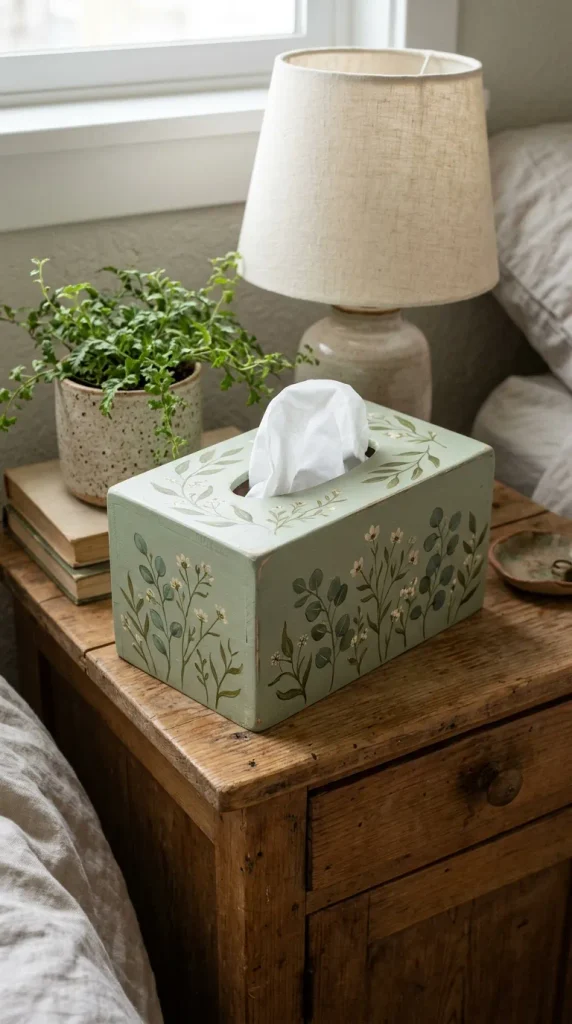
A sage green botanical tissue box brings a fresh, natural feeling into your home. It is ideal for nature-inspired interiors, cottagecore spaces, farmhouse bedrooms, and calm home offices.
Paint the tissue box cover in a soft sage green. If you want a lighter look, mix the sage with a little cream. Allow the base to dry before drawing a few simple botanical stems with a pencil.
Using a thin brush, paint delicate branches with muted green or olive paint. Add elongated leaves on either side of each stem. You can create eucalyptus-inspired leaves, tiny fern-like patterns, or simple leafy vines.
For a more realistic botanical effect, use two shades of green. Apply a darker green to the main stem and a lighter shade to a few leaves. Small cream-colored dots or flowers can add subtle contrast without overwhelming the design.
Try leaving the center of each side relatively open and placing the botanical pattern near the edges. This creates a balanced appearance and makes the box feel elegant rather than crowded.
If you are not confident drawing leaves, practice the shapes on paper first. Botanical patterns are forgiving because the leaves do not need to be perfectly identical.
After the paint has dried completely, apply a suitable clear sealer if desired. This can help protect the artwork from dust and light handling.
Materials needed: Sage green, olive green, cream acrylic paint, fine brushes, pencil, and optional protective varnish.
Styling tip: Display the box near a small potted plant, a natural wood tray, or linen accessories to create a peaceful, nature-inspired arrangement.
4. Cute Cherry and Strawberry Painted Tissue Box
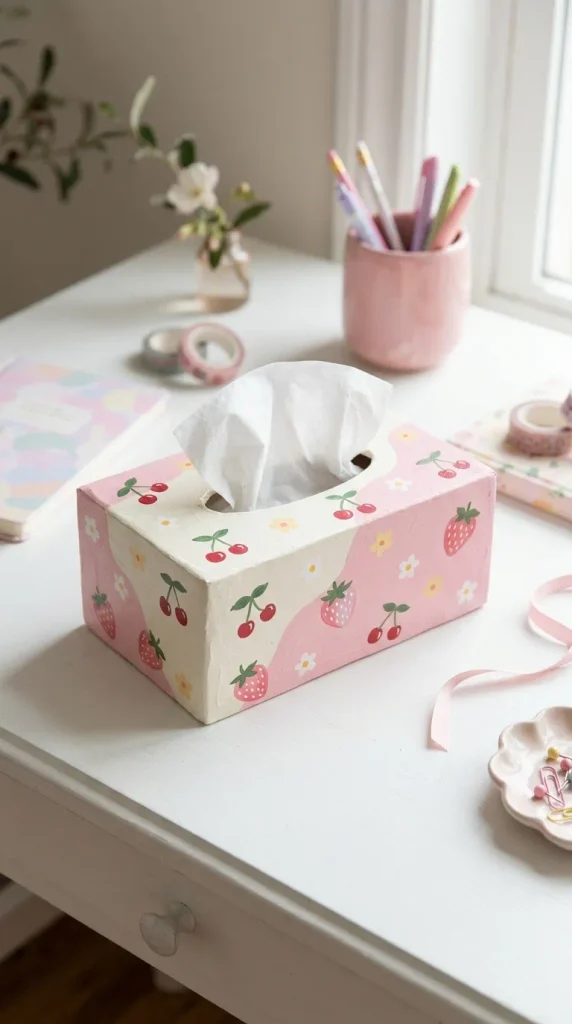
For a cheerful and playful aesthetic, decorate your tissue box with tiny cherries, strawberries, or a combination of both. This design works especially well in colorful bedrooms, craft rooms, kitchens, and cute desk setups.
Start with a white, cream, pale pink, or light red base coat. Once it dries, sketch small cherry pairs or strawberry shapes across the surface. Keep the illustrations relatively simple so they are easy to paint.
For cherries, use red paint to create two small rounded shapes connected by thin green stems. Add tiny white highlights to give the cherries a glossy appearance. For strawberries, paint small red hearts or rounded triangles, then add green leaves at the top and tiny cream or yellow dots for seeds.
You can repeat the same fruit pattern on all four sides or create a different arrangement on each side. A few scattered fruits against a pastel background will produce a light, whimsical look.
If you want the box to feel more polished, add a thin pink border along the bottom edge. Another option is to paint small white flowers between the fruit illustrations.
The design is particularly attractive when paired with other playful accessories, but it can also serve as a small pop of color in an otherwise neutral room.
Materials needed: Red, pink, white, green, and yellow acrylic paints, small brushes, pencil, and optional clear sealer.
Styling tip: Place the finished tissue box on a white desk with pastel stationery, a small fruit-themed decoration, or a pink ceramic cup.
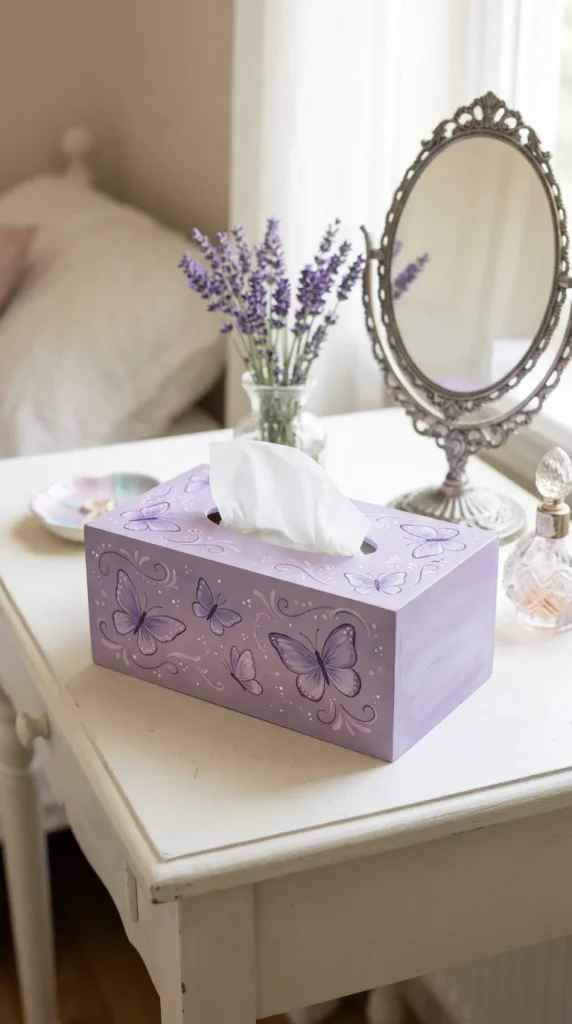
5. Lavender and Purple Butterfly Tissue Box
A lavender and purple butterfly tissue box creates a dreamy, delicate aesthetic. It is suitable for bedrooms, reading corners, dressing tables, and creative workspaces.
Begin by painting the box a pale lavender or soft lilac. If you prefer a more dramatic appearance, choose a deeper purple base and use lighter shades for the butterflies.
Once the base coat has dried, sketch a few butterfly outlines on the sides of the box. Use a small detail brush to paint their wings with lavender, violet, white, and a touch of pink. You can create symmetrical butterfly wings or simplify the design into small decorative silhouettes.
Add thin dark-purple outlines to define the wings, then use tiny white dots or short lines as decorative details. Avoid making every butterfly identical; varying their sizes slightly gives the design a more natural appearance.
For a softer aesthetic, paint just two or three butterflies on each side and leave plenty of space around them. You could also add a few tiny stars, small flowers, or delicate curved lines.
The tissue box will look particularly beautiful in a bedroom with lavender bedding, white furniture, or soft purple accessories. It can also complement a fairy-inspired or dreamy aesthetic without requiring complicated painting techniques.
Materials needed: Lavender, purple, white, and pink acrylic paint, fine brushes, pencil, and optional protective sealer.
Styling tip: Combine the tissue box with a lavender candle holder, a small flower vase, and soft white fabrics for a calm and coordinated look.
6. Abstract Color-Block Tissue Box
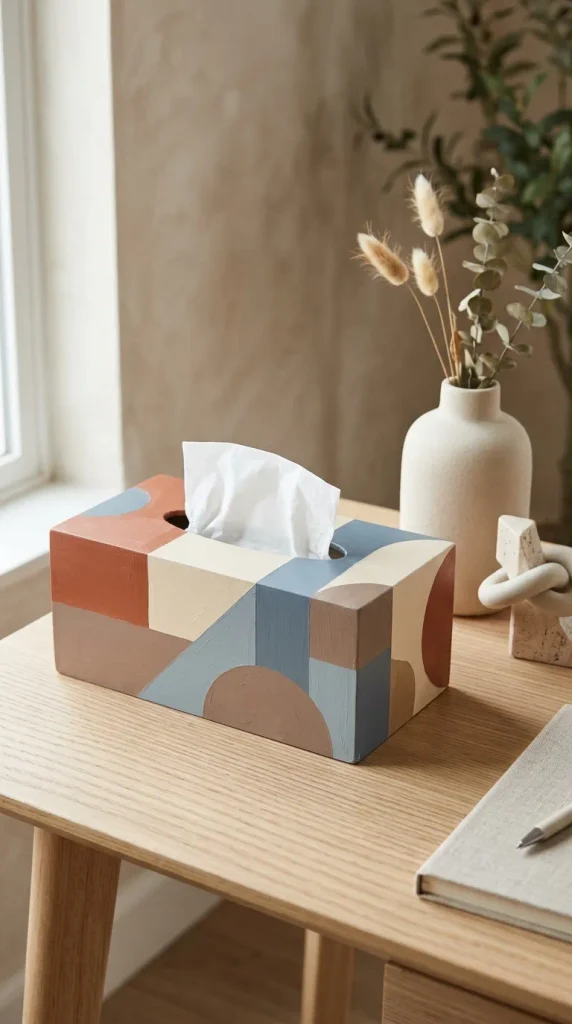
Abstract color blocking is a great option if you love modern art and bold home accessories. It allows you to create an attractive design without needing to paint detailed flowers or illustrations.
First, choose three or four colors that work well together. Terracotta, cream, muted blue, and brown create a warm contemporary palette. Alternatively, use pink, lavender, pale yellow, and white for a softer aesthetic.
Paint the entire tissue box in your lightest color and let it dry. Use painter’s tape to divide the sides into different geometric sections. You can create large rectangles, diagonal shapes, half circles, or asymmetrical blocks.
Paint each section in a different color. Apply thin coats to achieve an even finish, and avoid using too much paint near the tape edges. Remove the tape carefully according to the paint’s instructions to reveal clean lines.
For a more artistic effect, combine geometric blocks with a few hand-painted curved shapes. You can also leave a small portion of the base color visible to prevent the design from becoming too busy.
Because this style focuses on shapes and colors rather than intricate illustrations, it is suitable for beginners. It is also easy to coordinate with the colors already used in your room.
Materials needed: Acrylic paints in three or four colors, painter’s tape, flat brushes, ruler, and optional clear sealer.
Styling tip: Use one of the painted colors in a nearby cushion, desk organizer, or decorative tray to connect the tissue box to the rest of your decor.
7. Cottagecore Mushroom and Wildflower Tissue Box
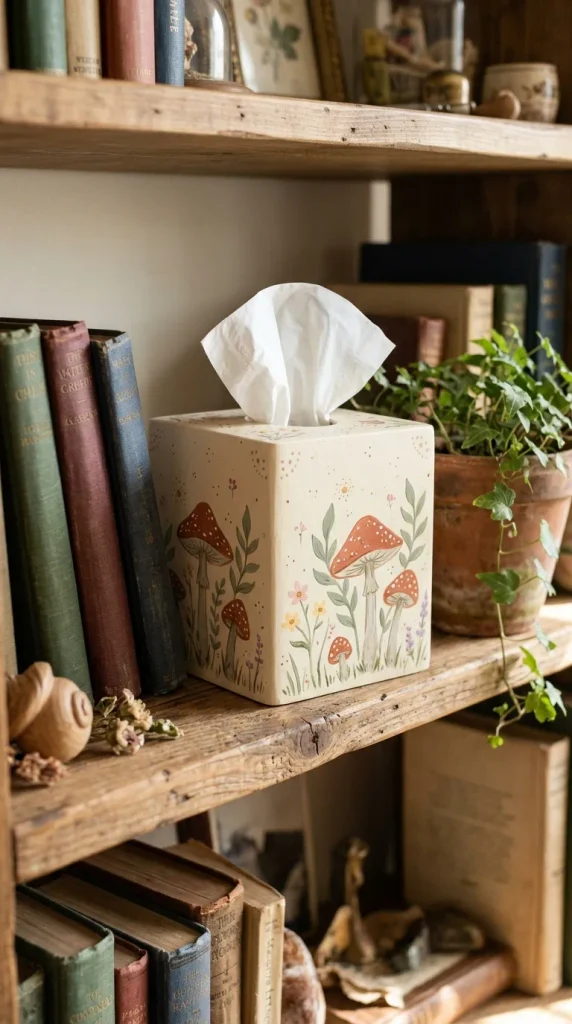
A mushroom and wildflower tissue box is perfect for anyone who enjoys cottagecore, woodland, vintage-inspired, or whimsical home decor. The combination of tiny mushrooms, delicate flowers, and earthy colors creates a charming handmade appearance.
Start with a cream, pale beige, or muted sage base. After the paint dries, lightly sketch a few small mushrooms across the sides of the box. Use terracotta or muted red for the caps, cream for the stems, and tiny white dots for decoration.
Next, add little wildflowers in shades of yellow, pink, lavender, or white. Paint thin green stems and small leaves around the mushrooms. You can also add tiny grass marks, dots, or simple stars to create a woodland-inspired pattern.
Keep the illustrations small enough to fit comfortably on the sides. It is better to have several simple, clearly painted elements than to squeeze too many details into a limited area.
For a vintage look, choose muted rather than highly saturated colors. A warm cream background with terracotta mushrooms and sage-green stems will feel especially cozy.
This design is a wonderful way to personalize a bedside table or bookshelf. It also works well as a handmade gift for someone who enjoys nature-inspired crafts.
Materials needed: Cream, terracotta, red, green, yellow, and white acrylic paints, detail brushes, pencil, and optional sealer.
Styling tip: Display the box beside a small plant, a stack of books, or a natural wood accessory to enhance its woodland-inspired charm.
8. Ocean Blue and White Wave Tissue Box
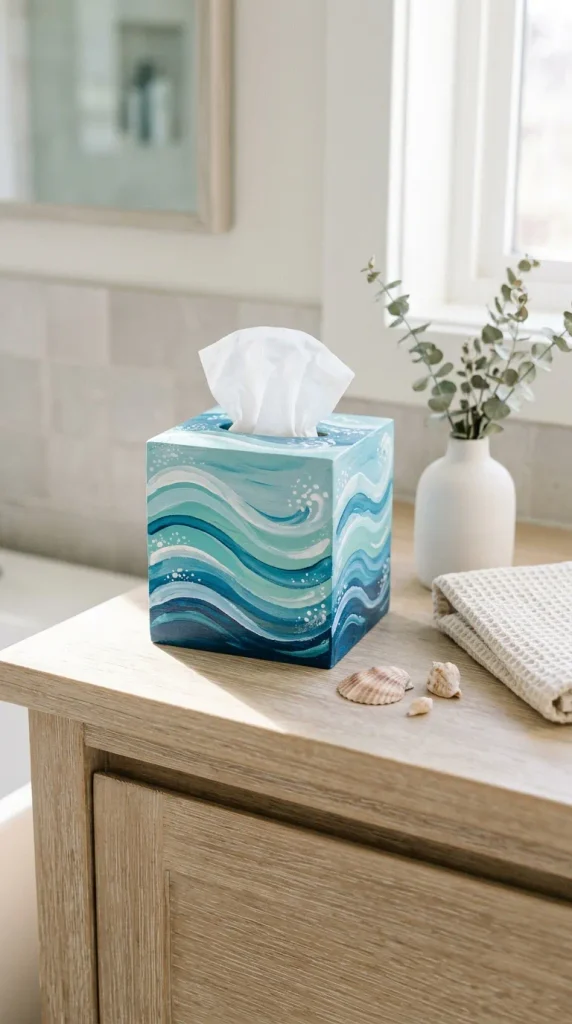
An ocean-inspired tissue box is a refreshing choice for coastal interiors, summer-themed rooms, bathrooms, and bedrooms decorated in blue and white.
Choose a base color such as pale blue, dusty blue, turquoise, or soft aqua. Paint the entire box evenly and let it dry completely.
Next, use white paint to create flowing wave patterns along the sides. You can paint several curved lines that rise and fall across the surface, creating the appearance of gentle ocean waves. Add a second shade of blue beneath selected curves to give the design more depth.
For a minimalist coastal look, use only two shades of blue and white. If you prefer a more decorative style, add tiny white dots, small seashell illustrations, or simple starfish shapes.
You do not need to create realistic ocean scenes. Loose, flowing brushstrokes often look more stylish and are easier to reproduce. Practice a few wave shapes on paper before painting directly onto the box.
This design can be used in a bathroom, guest room, or living room. A matching blue-and-white color palette helps the tissue box feel like part of the room’s overall decor rather than an ordinary household item.
Materials needed: Blue, aqua, navy, and white acrylic paint, flat brushes, fine brushes, and optional clear sealer.
Styling tip: Pair the box with white ceramic accessories, light wood, and simple coastal details for a clean, breezy aesthetic.
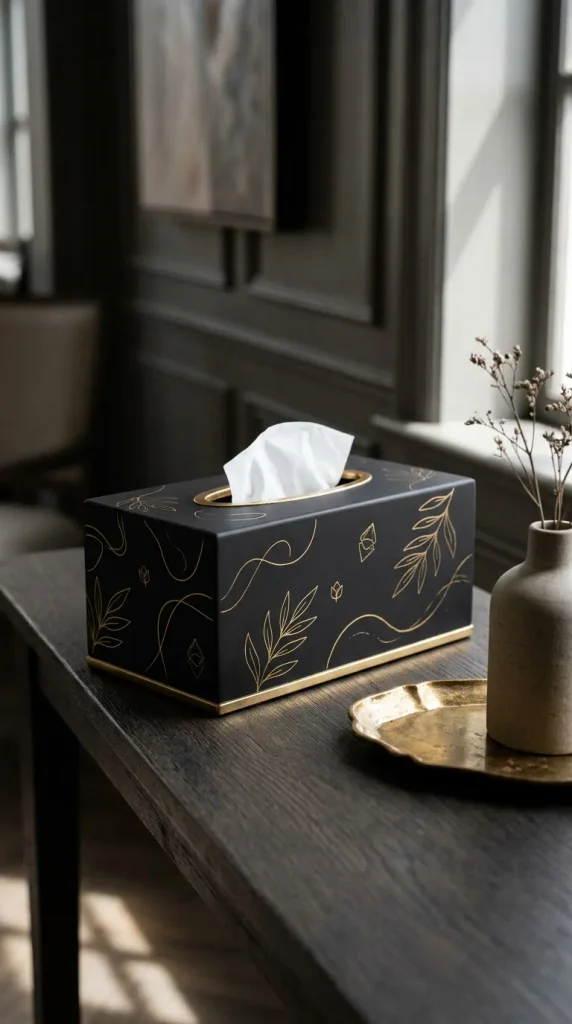
9. Gold Line Art on a Black Tissue Box
A black tissue box with delicate gold line art creates a sophisticated, luxurious appearance. This design works well in modern living rooms, elegant bedrooms, home offices, and spaces with dark accent colors.
Start by painting a suitable tissue box cover matte black. Depending on the material, you may need a primer and more than one thin coat to achieve an even finish.
Once the black base is fully dry, use metallic gold acrylic paint to create fine decorative lines. You can paint abstract curves, simple leaves, minimalist faces, small stars, or irregular geometric outlines.
For a modern design, try one continuous curved line on each side. For a botanical look, paint a single gold stem with a few leaves. You can also add a thin gold border near the bottom edge of the box.
Keep the metallic details delicate so the black background remains the main feature. If the design is too dense, the result may look less elegant.
Use a fine brush and work slowly. Metallic paint can appear streaky if applied too thickly, so follow the product instructions and allow each coat to dry before adding more.
After the design is completely dry, apply a compatible clear protective finish if appropriate for the paint. This can help preserve the gold details during everyday use.
Materials needed: Matte black acrylic paint, metallic gold acrylic paint, fine brushes, primer if needed, and optional protective varnish.
Styling tip: Place the box on a dark wood table or a neutral console with a gold decorative tray. A few coordinated metallic accents will make the design look intentional and refined.
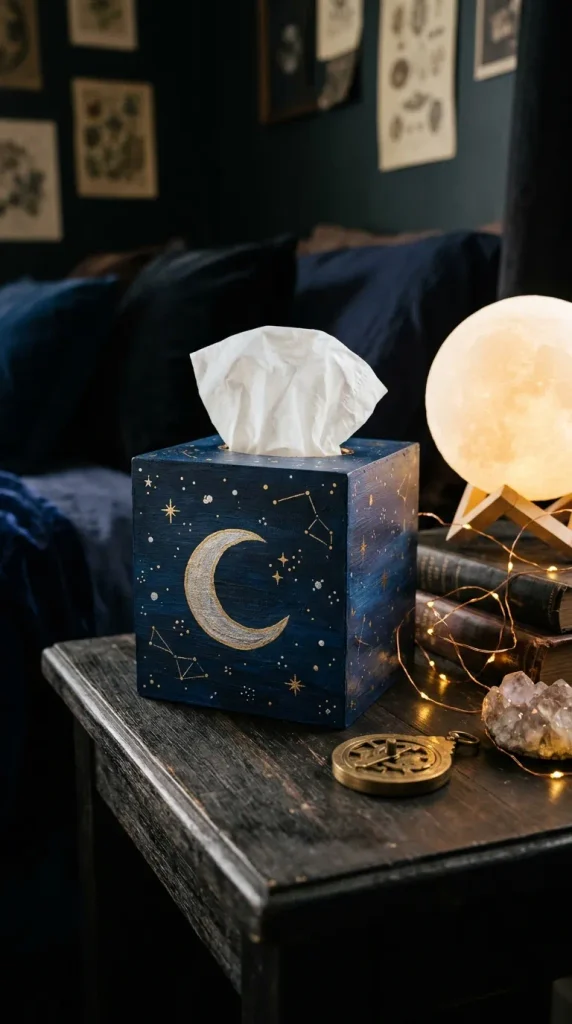
10. Celestial Moon and Stars Tissue Box
A celestial tissue box featuring moons, stars, and tiny constellations is an excellent choice for dreamy bedrooms, dark academia interiors, and celestial-themed decor.
Choose a deep navy, midnight blue, charcoal, or dark purple base. Paint the box evenly, allowing the first coat to dry before applying another if necessary.
Use white, pale gold, or silver paint to create small stars across the sides. Add crescent moons in different sizes and connect a few tiny stars with delicate lines to form simple constellation patterns.
For a more artistic appearance, paint one larger crescent moon on the front of the box and surround it with smaller stars. You can add tiny dots to resemble distant stars or use metallic paint for a subtle shimmer.
If you prefer a soft celestial aesthetic, use a lavender base with white moons and pale pink stars. For a more dramatic style, choose midnight blue with gold and silver details.
Keep the pattern balanced by leaving some areas of the base color visible. This allows the moon and star designs to stand out clearly.
The finished tissue box can become a charming accessory on a bedside table, study desk, or bookshelf. It is also a creative handmade gift for someone who loves astronomy-inspired decorations.
Materials needed: Navy or purple acrylic paint, white paint, metallic gold or silver paint, fine detail brushes, pencil, and optional clear sealer.
Styling tip: Pair the tissue box with star-themed accessories, dark bedding, warm fairy lights, or a small moon-shaped lamp for a coordinated celestial atmosphere.
Practical Tips for Painting a Tissue Box
Use these simple techniques to improve your results and help your painted tissue box look more professional.
Prepare the surface. Remove dust and dirt before painting. Lightly sand unfinished wood if needed, then apply a suitable primer. Make sure the surface is dry before adding paint.
Use thin coats. Several thin coats usually produce a smoother finish than one thick coat. This is especially important for cardboard, which can warp when exposed to excess moisture.
Sketch detailed designs first. Use a light pencil to plan flowers, butterflies, mushrooms, or geometric shapes before painting. This helps you maintain balanced spacing.
Choose the right brushes. Flat brushes work well for base coats, while small round brushes are useful for flowers, leaves, stars, and fine outlines.
Let each layer dry. Allow the base color and individual decorative layers to dry according to the paint manufacturer’s instructions. This reduces smudging and helps colors remain clean.
Protect the finished design. Once the paint has fully cured, apply a compatible clear sealer if suitable for the material. Follow the product instructions and allow the finish to cure before use.
Keep the tissue opening functional. Avoid building up thick paint around the opening, since this can catch tissues or cause the material to crack.
Common Mistakes to Avoid
- Using too much water or paint on cardboard: Excess moisture can soften or warp the box. Use light coats and consider painting a durable tissue box cover instead.
- Skipping surface preparation: Dusty or glossy surfaces may prevent paint from adhering properly.
- Choosing too many colors: A limited palette usually creates a more cohesive aesthetic.
- Painting before the base coat dries: This can cause colors to mix unintentionally and produce uneven patterns.
- Making the design too crowded: Leave some negative space so the painted details remain visible.
- Using incompatible finishes: Not every sealer works with every acrylic paint or surface. Check product compatibility before applying a protective coat.
- Forgetting durability: A decorative cardboard box may not withstand repeated handling as well as a reusable wooden or papier-mâché cover.
- Ignoring the room’s style: A brightly colored design may look out of place in a neutral interior unless you intentionally use it as an accent.
Conclusion
These 10 aesthetic tissue box painting ideas show how a simple everyday object can become a beautiful piece of personalized home decor. From pastel floral patterns and cute cherry illustrations to minimalist beige designs, abstract color blocking, and celestial moons, there is an option for almost every taste.
If you are a beginner, start with a simple two-color design or small floral pattern. If you enjoy detailed artwork, try the cottagecore mushroom, butterfly, or celestial design. For a modern home, minimalist neutrals and black-and-gold line art can create an elegant finish.
Choose a design that complements your room, prepare the surface carefully, and work in thin layers. With a few affordable supplies and a little patience, you can turn an ordinary tissue box into a stylish accessory that adds personality to your home.



Leave a Reply