Introduction
Zellige tile kitchen backsplash ideas combine traditional craftsmanship with modern design, making them a strong focus in Pinterest ideas and home decor inspiration. These tiles are known for their handcrafted texture, subtle color variation, and reflective glaze that enhances light within a kitchen space.
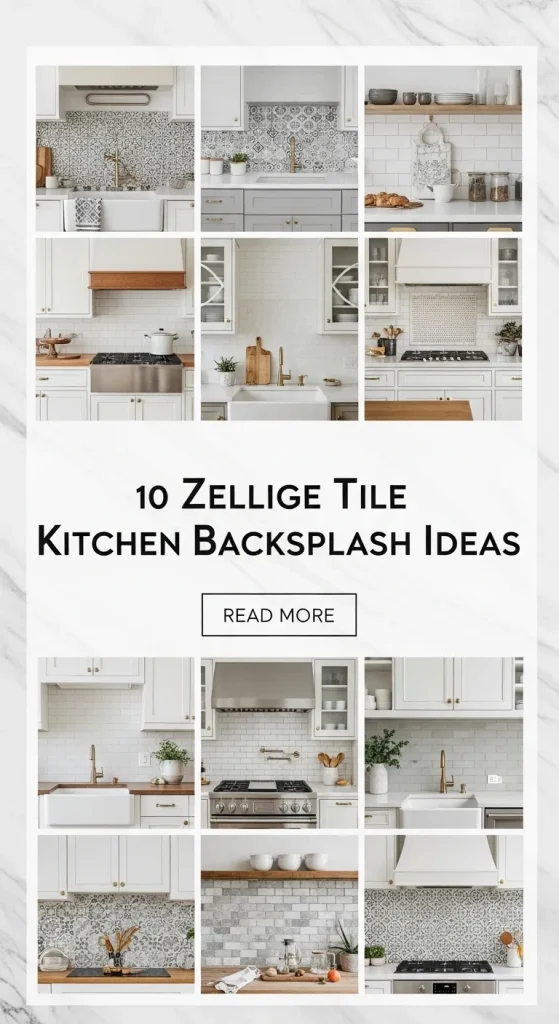
This article explains how to use zellige tiles in a practical and structured way. It covers materials, preparation, and step-by-step guidance for ten creative ideas. Readers will learn how to plan, design, and execute a beginner friendly DIY backsplash project with clear, actionable methods.
Why This Idea Is Trending or Useful
Zellige tile backsplashes are trending because they align with modern design preferences that value texture, authenticity, and natural variation. Unlike uniform tiles, zellige tiles feature slight imperfections that create depth and movement, making them visually engaging in both minimalist style and layered interiors. This makes them a frequent feature in Pinterest ideas focused on aesthetic and handmade decoration.
From a practical perspective, these tiles are highly durable and easy to clean, making them suitable for kitchen environments where moisture and heat are constant factors. Their glazed surface reflects light, which helps brighten small kitchens and improves the overall sense of space. This makes them particularly useful for compact layouts where visual expansion is important.
Zellige backsplash projects also have strong DIY appeal. While they require careful planning, the installation process is manageable with basic tools and patience. Beginners can follow structured tutorial methods to achieve professional-looking results. The wide range of color options, from neutral tones to bold shades, makes them adaptable to various creative ideas and organization styles within kitchen decor.
Materials and Preparation
Before starting a zellige tile backsplash project, proper preparation ensures efficiency and quality results. The essential materials include zellige tiles, tile adhesive, grout, tile spacers, a notched trowel, tile cutter, sponge, and sealant. Each material plays a specific role in achieving a durable and visually balanced finish.
Planning begins with accurate measurement of the backsplash area. This step helps calculate the number of tiles required and prevents material shortages during installation. It is recommended to purchase extra tiles to account for cuts and variations, as zellige tiles often differ slightly in size and thickness due to their handmade nature.
Surface preparation is equally important. The wall must be clean, dry, and smooth to ensure proper adhesion. Any uneven areas should be leveled before applying adhesive. Layout planning is another key step, where tiles are dry-arranged to determine spacing and alignment. This helps maintain consistency and avoids unexpected gaps during installation.
Proper preparation reduces errors and improves the overall workflow of the DIY project. It also ensures that the final backsplash aligns with the intended aesthetic and functional goals.
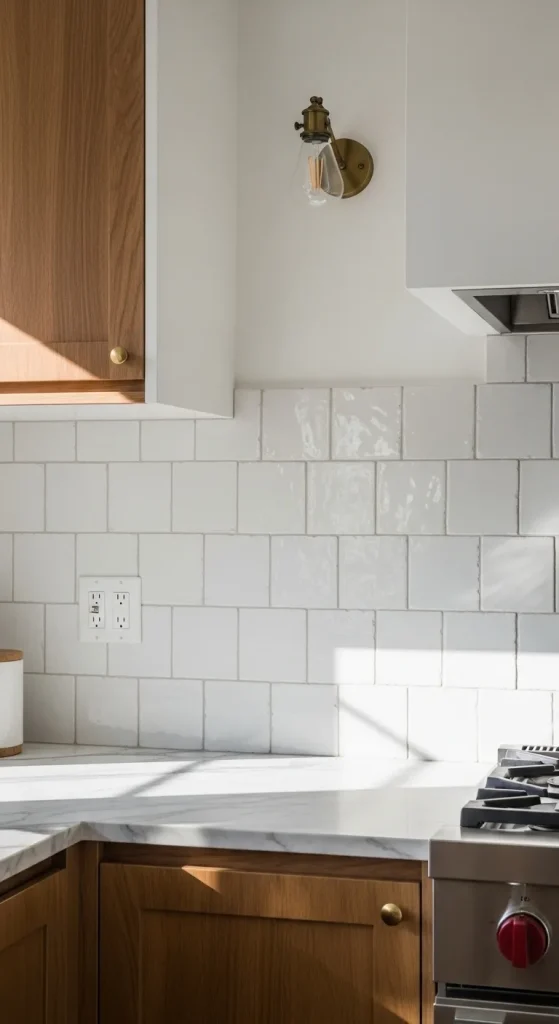
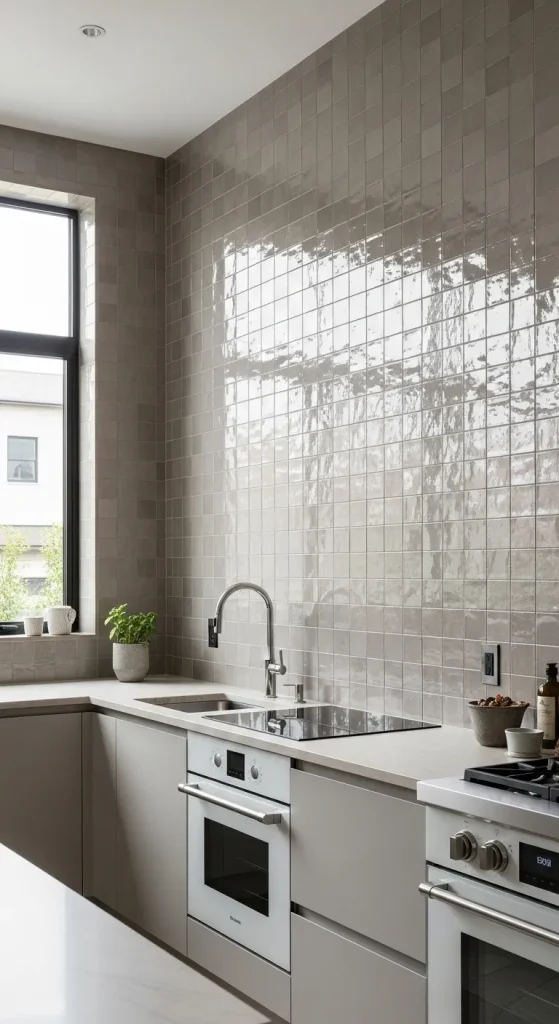
Idea 1: Classic White Zellige Backsplash
How to Create
A classic white zellige backsplash offers a clean and timeless look that fits well within modern design and minimalist style kitchens. The natural variation in white tones creates subtle texture without overwhelming the space. This idea works particularly well in kitchens with limited natural light, as the reflective glaze enhances brightness and creates a more open environment.
The design focuses on simplicity while maintaining visual interest through handcrafted irregularities. Unlike standard white tiles, zellige tiles introduce depth through uneven edges and tonal shifts. This makes the backsplash appear dynamic while still maintaining a neutral aesthetic. It pairs effectively with wooden cabinets, stone countertops, and metal fixtures, allowing flexibility in overall kitchen decor.
To create this backsplash, begin by preparing the wall surface and applying tile adhesive using a notched trowel. Place each tile carefully, maintaining slight spacing to preserve the handmade appearance. Avoid forcing uniform alignment, as slight irregularity is part of the design. Once the adhesive sets, apply grout and clean the surface with a damp sponge.
Finish by sealing the tiles to enhance durability and maintain their reflective quality. This step-by-step process ensures a polished and long-lasting result suitable for beginner friendly DIY projects.
Idea 2: Vertical Stack Zellige Pattern
Step-by-Step Guide
A vertical stack pattern uses rectangular zellige tiles arranged in straight vertical lines, creating a modern and structured appearance. This layout emphasizes height, making it ideal for kitchens with low ceilings or compact layouts. It is commonly featured in Pinterest ideas focused on organization and clean design.
The vertical orientation draws the eye upward, contributing to a more spacious visual effect. The handcrafted surface of zellige tiles prevents the pattern from appearing overly rigid, maintaining a balance between structure and organic texture. This approach works well with monochromatic color schemes or subtle tonal variations.
To execute this design, begin by marking vertical guidelines on the wall. Apply adhesive and align tiles along these lines, ensuring consistent spacing. Use spacers to maintain uniform gaps while allowing slight variation in tile edges.
After placement, allow the adhesive to cure before applying grout. Clean excess grout carefully to preserve the tile glaze. The result is a sleek and modern backsplash that enhances both functionality and aesthetic appeal.
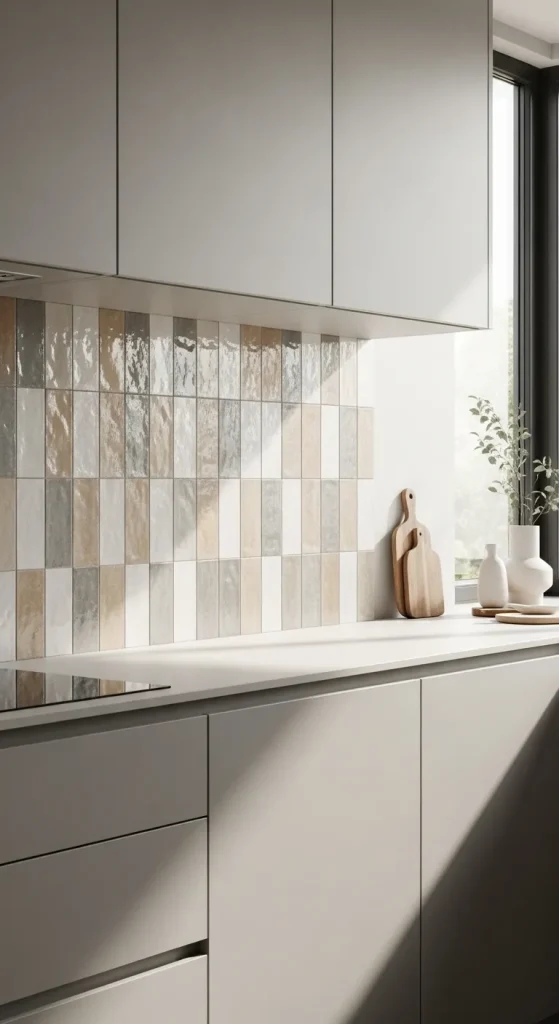
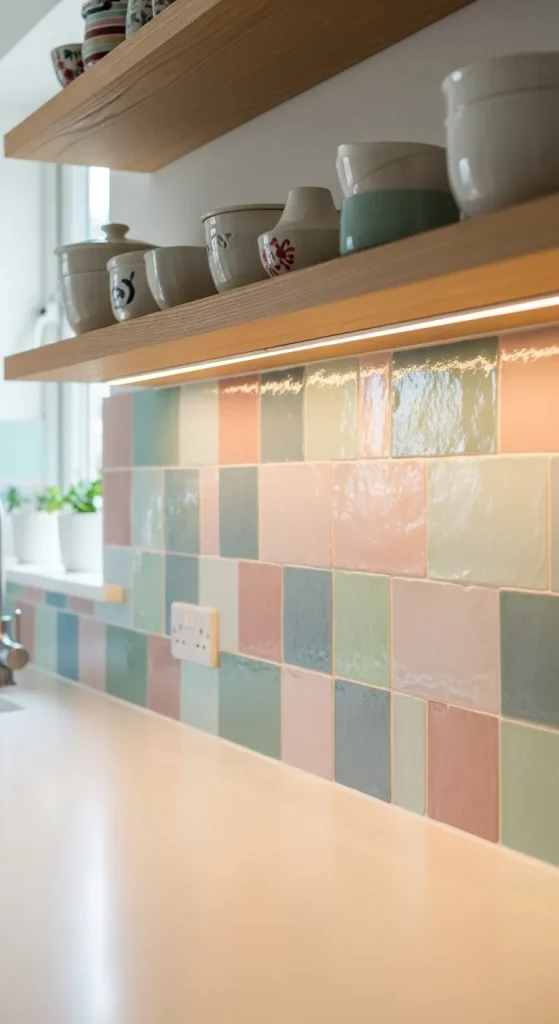
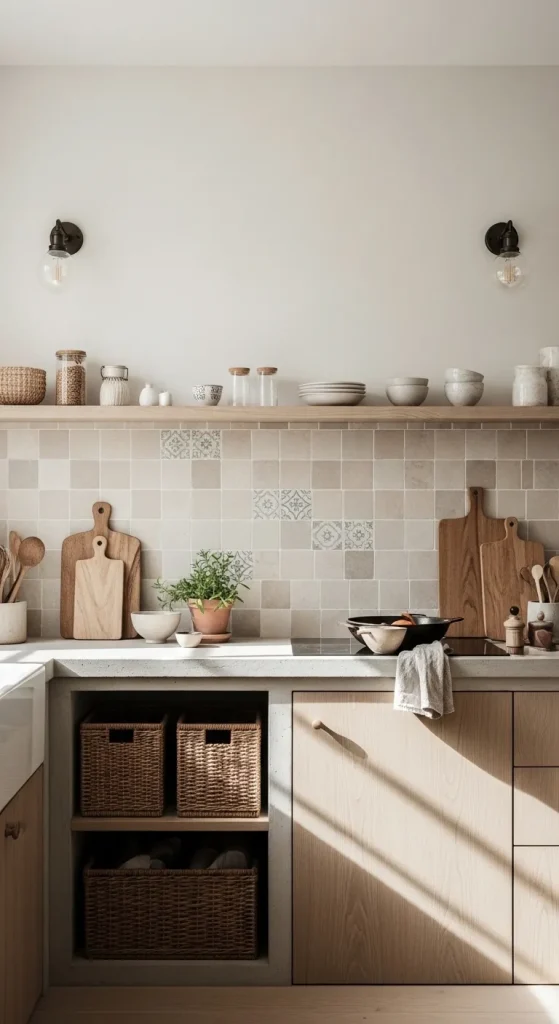
Idea 3: Soft Pastel Zellige Blend
How to Make
A pastel zellige blend introduces gentle color variation while maintaining a soft and cohesive aesthetic. This idea uses a mix of light tones such as blush, mint, and pale blue to create a calming kitchen environment. It aligns with creative ideas that focus on subtle color integration in home decor.
The key concept is balance. The tiles should be arranged in a way that distributes colors evenly without forming predictable patterns. This creates a natural flow and enhances the handmade quality of the backsplash. The pastel tones reflect light softly, contributing to a warm and inviting atmosphere.
To create this design, sort tiles by color before installation. Begin placing tiles randomly while ensuring even distribution. Avoid clustering similar shades together to maintain visual harmony.
Once installed, apply light-colored grout to blend the tiles seamlessly. Clean and seal the surface to preserve the finish. This easy project provides a unique and personalized backsplash with minimal complexity.
Idea 4: Full Wall Zellige Coverage
Execution Process
Full wall coverage extends zellige tiles from the countertop to the ceiling, creating a bold and immersive design. This approach transforms the backsplash into a dominant visual feature, making it a focal point in kitchen decor. It is often used in modern design layouts that prioritize texture and continuity.
This idea enhances the perception of space by eliminating visual breaks. The continuous surface reflects light across the entire wall, making the kitchen appear larger and more cohesive. It works well in both neutral and bold color schemes, depending on the desired aesthetic.
To execute this design, measure the entire wall area and plan tile placement carefully. Start from the bottom and work upward, ensuring consistent alignment. Use spacers to maintain even gaps and adjust for tile variations.
After installation, apply grout and clean thoroughly. Sealing the tiles ensures durability and maintains their appearance over time. This method creates a seamless and impactful backsplash that elevates the overall kitchen design.
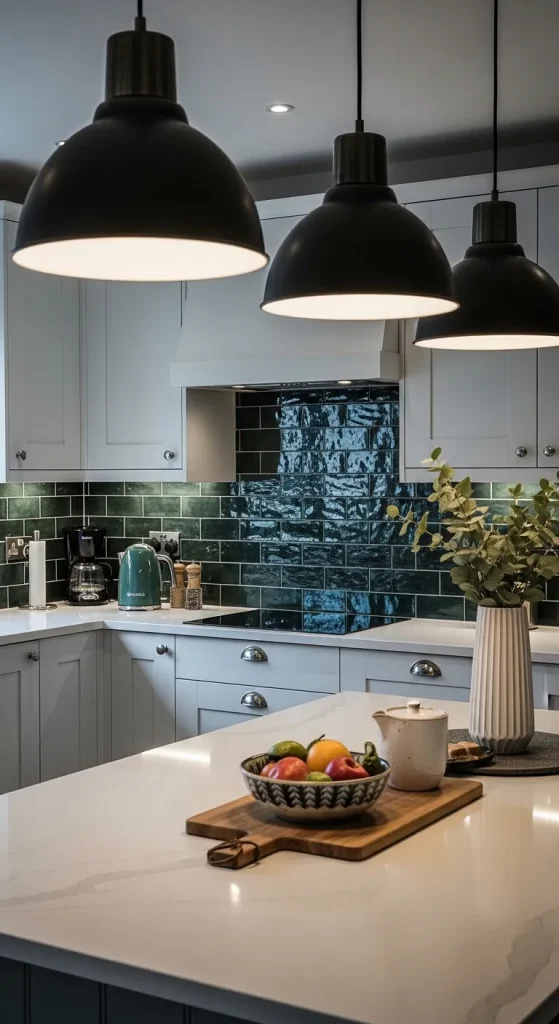
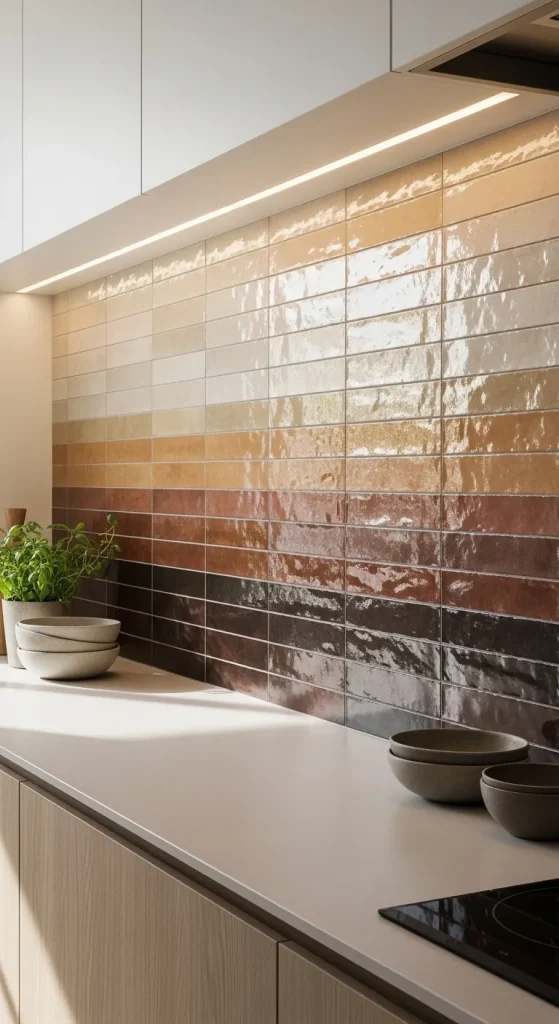
Idea 5: Contrasting Dark Zellige Tiles
Setup Method
Dark zellige tiles provide a striking contrast in kitchens with light cabinetry or countertops. Shades such as deep green, navy, or charcoal create depth and sophistication while maintaining the handmade aesthetic. This idea is commonly seen in trending ideas that focus on bold yet balanced interiors.
The reflective glaze prevents dark tiles from appearing heavy, as light interacts with the surface to create subtle highlights. This adds dimension and prevents the backsplash from feeling flat. The contrast enhances other design elements, making them stand out more clearly.
To install, prepare the wall and apply adhesive evenly. Place tiles with slight spacing to maintain their natural variation. Pay attention to alignment while allowing for organic irregularities.
After setting, apply grout in a complementary color to enhance contrast. Clean and seal the tiles to protect the surface. This design offers a dramatic yet practical solution for modern kitchen spaces.
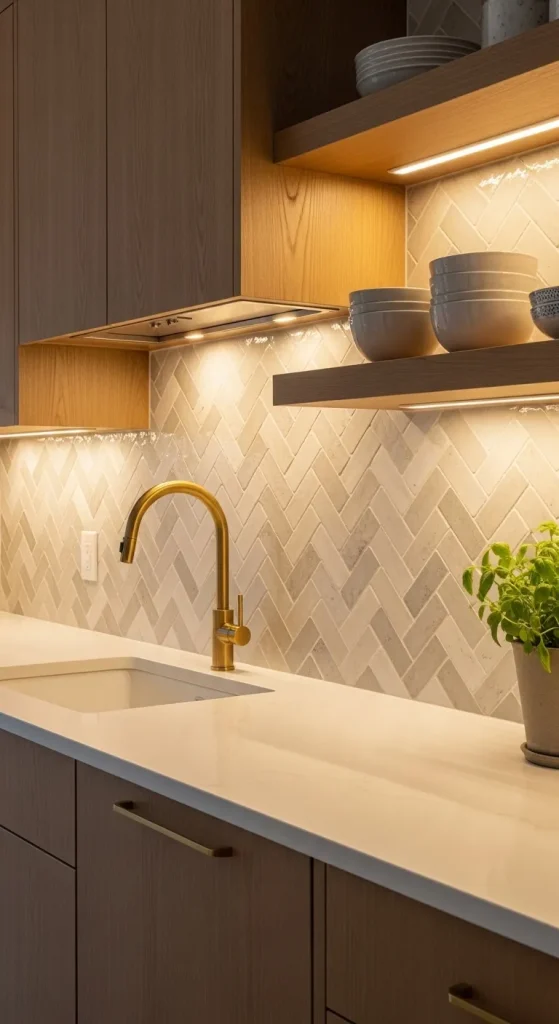
Idea 6: Herringbone Zellige Layout
How to Create
The herringbone layout arranges rectangular tiles in a zigzag pattern, creating movement and visual interest. This pattern adds complexity while maintaining a structured design, making it suitable for both traditional and modern kitchens.
The angled arrangement highlights the handcrafted nature of zellige tiles, as each piece contributes to the overall pattern. This creates a dynamic backsplash that draws attention without overwhelming the space. It works well with neutral tones and subtle color variations.
To create this pattern, mark diagonal guidelines on the wall. Begin placing tiles at a 45-degree angle, ensuring consistent spacing. This process requires careful alignment to maintain the pattern.
Once completed, apply grout and clean the surface thoroughly. Sealing the tiles ensures longevity. This creative project adds texture and sophistication to kitchen decor.
Idea 7: Mixed Finish Zellige Design
How to Make
A mixed finish design combines glossy and matte zellige tiles to create contrast in texture rather than color. This approach introduces subtle variation while maintaining a cohesive palette. It is ideal for minimalist style kitchens that focus on detail.
The interplay between finishes enhances depth and reflects light differently across the surface. This creates a layered effect that adds interest without relying on bold colors. It works well in neutral or monochromatic schemes.
To implement this design, separate tiles by finish before installation. Alternate between glossy and matte tiles in a balanced arrangement. Avoid forming repetitive patterns to maintain a natural look.
After installation, apply grout and clean carefully. Sealing helps maintain both finishes. This method offers a refined and modern backsplash solution.
Idea 8: Framed Backsplash Area
Step-by-Step Guide
A framed backsplash defines a specific area using zellige tiles, creating a structured focal point. This idea is useful for kitchens where full wall coverage is not required. It combines organization and aesthetic appeal in a controlled design.
The frame can be created using contrasting tiles or a border pattern. This adds definition and separates the backsplash from surrounding surfaces. It works well behind stoves or sinks, where visual emphasis is needed.
To create this design, outline the area with border tiles before filling the center. Ensure alignment and spacing remain consistent throughout the installation.
Apply grout and clean the surface after setting. Sealing ensures durability. This approach offers a practical and visually balanced solution for smaller spaces.

Idea 9: Gradient Color Zellige Layout
Execution Process
A gradient layout arranges tiles in a gradual transition from light to dark shades. This creates a smooth visual flow and adds depth to the backsplash. It is a popular choice in Pinterest ideas focused on artistic and creative projects.
The gradient effect enhances the handmade quality of zellige tiles by emphasizing their natural variation. It creates a soft transition that draws attention without being overwhelming. This design works well in both warm and cool color palettes.
To execute this layout, sort tiles by shade before installation. Begin with the lightest color at one end and gradually transition to darker tones. Maintain consistent spacing and alignment throughout the process.
After installation, apply grout and clean carefully. Sealing preserves the finish. This method creates a unique and visually engaging backsplash.
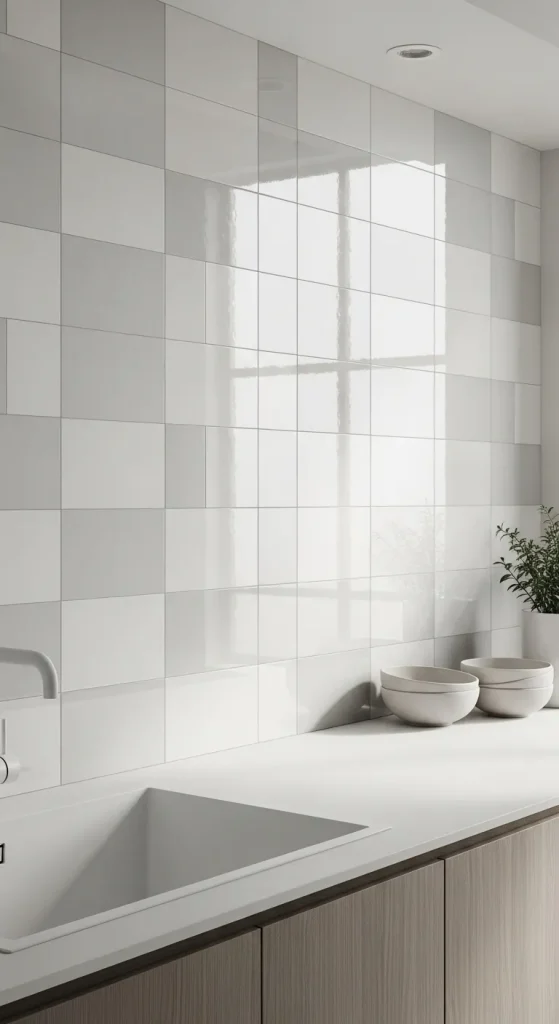
Idea 10: Minimalist Neutral Zellige Backsplash
How to Create
A minimalist neutral backsplash uses tones such as beige, cream, or soft gray to create a calm and balanced kitchen environment. This idea aligns with modern design principles that prioritize simplicity and functionality.
The subtle variation in neutral tones adds texture without distracting from other design elements. It works well in kitchens with natural materials such as wood and stone, creating a cohesive aesthetic.
To create this design, select tiles within a narrow color range. Arrange them randomly to maintain a natural appearance. Avoid strict patterns to preserve the handmade effect.
After installation, apply grout in a matching tone and clean thoroughly. Sealing ensures durability and enhances the finish. This easy project provides a timeless and adaptable backsplash solution.
Common Beginner Mistakes and How to Avoid Them
One common mistake is treating zellige tiles as uniform materials. Their handmade nature requires flexibility in placement and spacing. Forcing perfect alignment can result in uneven surfaces and visual inconsistency. Allowing natural variation ensures a more authentic result.
Another issue is insufficient surface preparation. Installing tiles on uneven or dirty walls reduces adhesion and durability. Proper cleaning and leveling are essential steps that should not be skipped. Additionally, using incorrect adhesive or grout can affect the final outcome. Selecting materials suited for ceramic tiles ensures better performance.
Improper planning is also a frequent problem. Failing to measure accurately or calculate materials can lead to delays and mismatched tiles. Preparing a layout in advance helps avoid these issues. Careful execution improves both efficiency and final appearance.
Practical Tips for Better Results
Using a dry layout before installation helps visualize the final design and identify potential issues. This step allows adjustments without affecting the wall surface. It also improves consistency in spacing and alignment.
Working in small sections ensures better control over adhesive and tile placement. This prevents drying issues and allows corrections during installation. Cleaning excess adhesive immediately helps maintain a clean finish.
Consistent spacing is important, but slight variation should be maintained to preserve the handmade look. Using appropriate tools and following a structured tutorial approach improves accuracy and efficiency.
Styling, Presentation, or Organization Ideas
Zellige backsplashes can be styled with complementary materials such as wood, metal, and stone to create a balanced kitchen design. Open shelving allows the tiles to remain visible while adding functional storage.
Lighting plays a key role in highlighting the reflective surface of the tiles. Under-cabinet lighting enhances texture and creates a warm ambiance. Choosing simple fixtures helps maintain a cohesive aesthetic.
Organizing kitchen elements around the backsplash ensures visual harmony. Neutral accessories and minimal decoration allow the tiles to remain the focal point. This approach aligns with modern and minimalist design principles.
Budget or Time Planning
Planning a zellige backsplash project requires careful budgeting and time management. Material costs vary depending on tile selection and quantity, so accurate measurement is essential to avoid overspending. Purchasing extra tiles helps prevent delays caused by shortages.
Time planning should include preparation, installation, drying, and finishing مراحل. Rushing the process can lead to mistakes and uneven results. Allocating sufficient time for each step ensures better quality.
DIY projects can reduce labor costs, but they require patience and attention to detail. Following a structured step by step approach improves efficiency and helps complete the project within a reasonable timeframe.
Creative Expansion and Advanced Inspiration
Advanced variations of zellige backsplashes include combining multiple patterns, integrating mosaic sections, or extending tiles into adjacent areas such as kitchen islands. These approaches add complexity and create a more customized design.
Experimenting with color combinations and finishes allows for unique creative ideas. Mixing bold and neutral tones can create contrast while maintaining balance. Incorporating geometric layouts adds structure to the design.
For larger projects, zellige tiles can be used beyond the backsplash to create cohesive interior themes. This expands the design potential and enhances overall visual impact.


Leave a Reply