Introduction
Pearl home decor ideas bring together soft shine, smooth texture, and elegant detail to create interiors that feel calm and refined. On Pinterest ideas boards, pearl-inspired decoration is a trending idea because it fits modern design, minimalist style, and handmade DIY projects. The gentle luster of pearl tones works with white, beige, silver, and pastel palettes in every room.
This long-form tutorial explains how to use simple materials to create aesthetic home decor with a polished appearance. Readers will discover beginner friendly projects, step by step methods, organization tips, and budget ideas. Each creative project offers practical inspiration for adding handmade decoration that feels timeless, balanced, and visually cohesive.
Why Pearl Decor Is Trending and Useful
Pearl-inspired home decor is popular because it adds texture and subtle reflection without overwhelming a space. Unlike bright metallic finishes, pearl surfaces create a soft glow that complements natural light and neutral interiors. This makes pearl decoration suitable for bedrooms, living rooms, bathrooms, and event styling.
The DIY appeal is also strong. Faux pearls, pearl beads, and iridescent finishes are widely available and easy to work with. Beginners can use these materials in small projects such as frames, trays, and vases. Pinterest inspiration frequently features pearl decor because it combines luxury, simplicity, and accessibility in one creative project.
Materials and Preparation
Common materials include faux pearl beads, adhesive, hot glue, acrylic paint, picture frames, mirrors, glass vases, candles, trays, and decorative boxes. Optional materials include ribbon, fabric, and clear sealant. Basic tools include scissors, a glue gun, paint brushes, rulers, and cleaning cloths.
Before starting any project, clean all surfaces and arrange materials by size and color. Sketch the design layout to improve organization and reduce waste. Measure edges and borders carefully. Test glue on a small section first. Good planning ensures that each DIY tutorial remains beginner friendly and produces a neat, professional result.
Idea 1: Pearl Picture Frame Border
How to Create
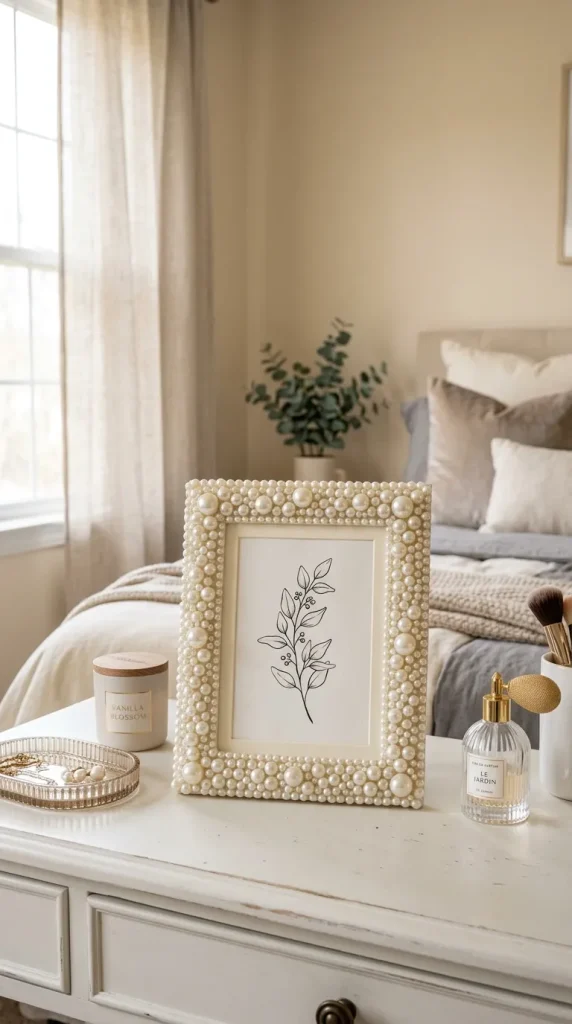
A pearl picture frame border transforms a basic frame into an elegant decorative accent. The smooth shape and reflective finish of faux pearls create a balanced outline around photographs, art prints, or inspirational quotes. This idea works well in bedrooms, entryways, and vanity areas where subtle decoration enhances the overall aesthetic.
Choose a frame with a flat front surface. White, ivory, or silver frames pair especially well with pearl materials. The design can be symmetrical with identical pearl sizes or layered with larger beads in the corners and smaller beads along the sides. This flexibility makes the project suitable for both minimalist style and more decorative Pinterest ideas.
Arrange pearl beads around the frame before gluing. Start from each corner and work toward the center of each side to maintain even spacing. Apply a small amount of adhesive under each bead. Allow the glue to dry completely before inserting the artwork or photo.
For additional detail, paint the frame in pearl white or champagne before attaching beads. A protective clear coat can improve durability. Display the finished frame on a shelf, desk, or gallery wall as handmade decoration that adds texture and visual refinement.
Idea 2: Pearl Vase Makeover
Step-by-Step Guide
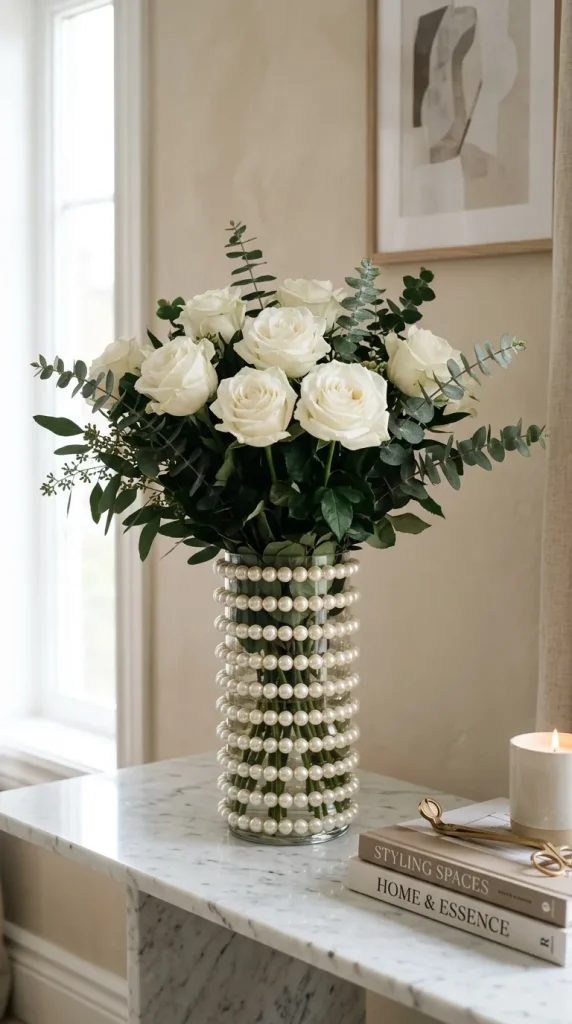
A pearl vase makeover turns a plain glass or ceramic vase into a centerpiece with soft elegance. This project is widely featured in Pinterest inspiration because it combines simple materials with a sophisticated result. Pearl accents complement fresh flowers, dried arrangements, and decorative branches.
Tall cylindrical vases create a clean modern design, while rounded shapes provide a more traditional look. Pearl beads can be applied in vertical lines, horizontal bands, or full surface patterns. Neutral tones maintain a cohesive aesthetic and blend with many home decor styles.
Clean the vase thoroughly and mark guide lines if a structured pattern is desired. Apply adhesive in small sections and press the pearls firmly into place. Rotate the vase as you work to keep spacing consistent. Let each section dry before continuing.
Once complete, use the vase as a dining table centerpiece or shelf accent. Pair it with white flowers, eucalyptus, or pampas grass. This easy project provides a handmade decorative object that looks polished while remaining budget friendly and beginner friendly.
Idea 3: Pearl Candle Holders
How to Make
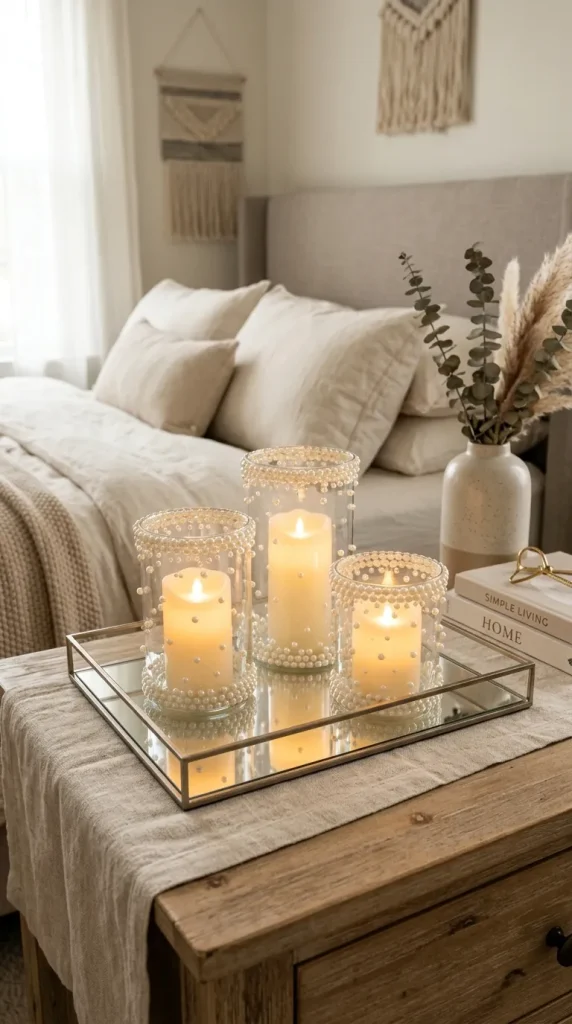
Pearl candle holders add warm light and reflective texture to a room. The combination of candle glow and pearl surfaces creates a soft, luxurious atmosphere. This decorative idea is especially effective for bedrooms, bathrooms, and dining spaces.
Glass candle holders are ideal because they offer a smooth surface for attaching beads. Small pearls create delicate detail, while medium pearls provide a stronger visual effect. Designs may include pearl rims, vertical accents, or fully embellished outer walls.
Measure the area to decorate and place beads without glue first. Apply adhesive in short sections and attach pearls carefully. Keep the inner candle area clear to maintain safety. Battery-operated candles are an effective alternative for continuous display.
Arrange finished holders in groups of varying heights for better presentation. Place them on mirrored trays or console tables. This tutorial combines practical materials and creative ideas to produce handmade decoration with both function and aesthetic value.
Idea 4: Pearl Decorative Tray
Execution Process
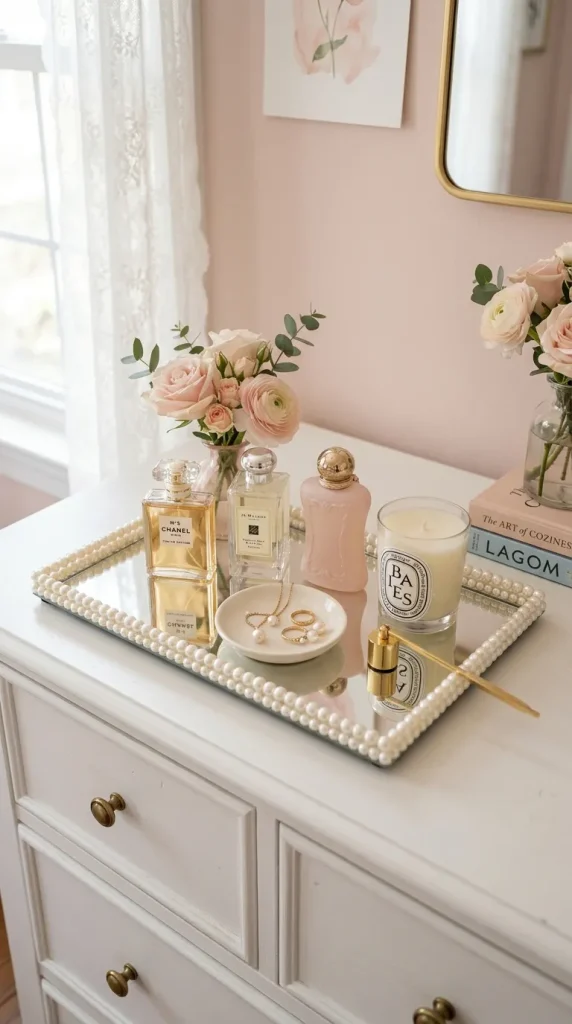
A pearl decorative tray provides both organization and home decor value. It can hold candles, perfume bottles, jewelry, or small accessories while adding a refined visual element to the room. Pinterest ideas often feature embellished trays as practical and aesthetic accents.
Wood, acrylic, and mirrored trays all work well for this project. Pearls can be placed along the outer border or around handles. A symmetrical layout reinforces modern design and creates a clean, professional appearance.
Begin by cleaning the tray and measuring the edges. Arrange the pearl beads to confirm spacing. Glue each bead one at a time, ensuring that the border remains straight and consistent. Allow the tray to dry on a flat surface.
Use the tray on a dresser, coffee table, or bathroom counter. Organize items by color and height to maintain visual balance. This beginner friendly DIY project combines decoration and organization in one elegant creative project.
Idea 5: Pearl Mirror Frame
Setup Method
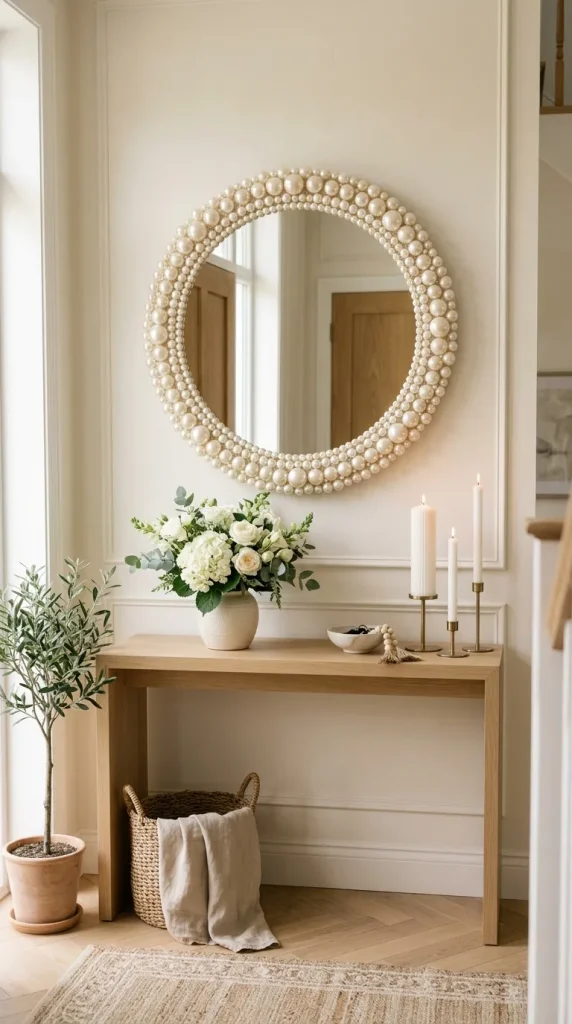
A pearl mirror frame enhances reflective surfaces with delicate texture and soft shine. This idea is popular in vanity setups and entryway decor because it adds detail without changing the mirror’s functionality.
Round and rectangular mirrors both work well. Larger pearls can highlight corners, while smaller pearls create continuous borders. The design may be simple for minimalist style or layered for a more decorative effect.
Clean the frame and test the pattern before applying glue. Start with the most visible sections, usually the top and corners. Attach each pearl carefully and check alignment regularly to keep the border symmetrical.
After drying, hang the mirror where it can reflect natural light. The pearl surface enhances brightness and adds subtle luxury. This tutorial offers practical inspiration for transforming an ordinary mirror into standout home decor.
Idea 6: Pearl Jewelry Box
How to Create
A pearl jewelry box combines storage and decoration in a single handmade project. It is useful for organizing rings, earrings, and bracelets while adding an elegant accessory to a dresser or vanity.
Choose a wooden or cardboard box with a smooth lid. The pearl design can cover the lid, form a monogram, or outline the edges. Soft interior fabric in ivory or blush complements the pearl exterior and improves presentation.
Paint the box if needed and allow it to dry fully. Plan the layout and attach pearls with precision. Larger center designs can be balanced with smaller border beads. Let the adhesive cure before placing jewelry inside.
The finished box keeps accessories organized and protected. It also functions as a decorative element. This easy project is beginner friendly and offers a useful way to combine organization with aesthetic decoration.

Idea 7: Pearl Wall Art Canvas
Step-by-Step Guide
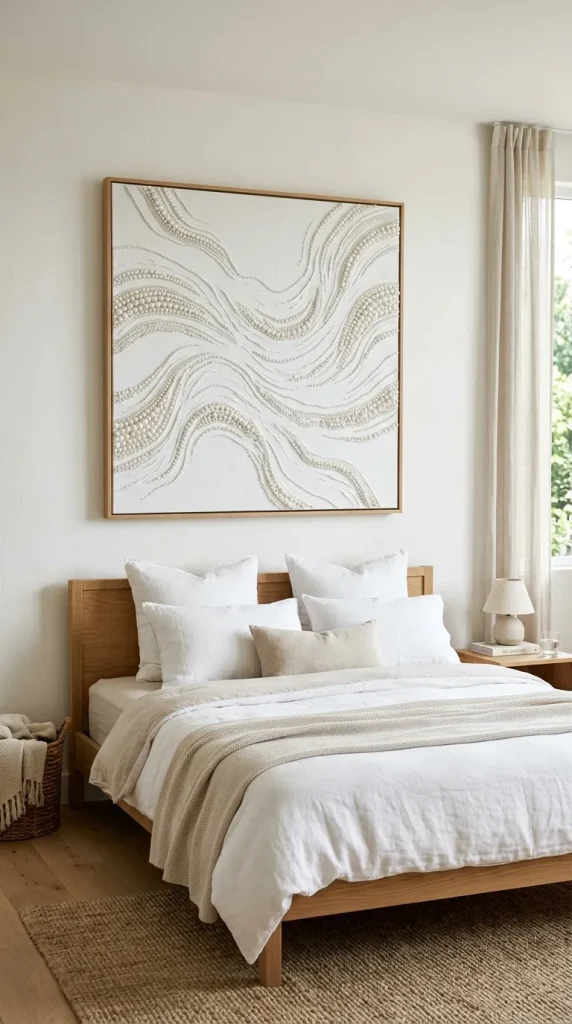
Pearl wall art transforms a blank canvas into textured home decor. The three-dimensional surface catches light and creates a subtle sculptural effect. Pinterest inspiration often uses pearl canvases to complement neutral interiors.
Design options include abstract waves, floral outlines, geometric shapes, and monograms. White pearls on a matte white background create a minimalist style, while pearl tones on pastel backgrounds add gentle contrast.
Sketch the design lightly with pencil. Apply glue along one section at a time and place beads carefully. Use different pearl sizes to create depth and movement. Allow the canvas to dry flat.
Hang the artwork above a bed, desk, or console table. Pair it with simple decor to emphasize texture. This creative project offers a practical tutorial for producing handmade wall decoration with modern design appeal.
Idea 8: Pearl Napkin Rings
How to Make
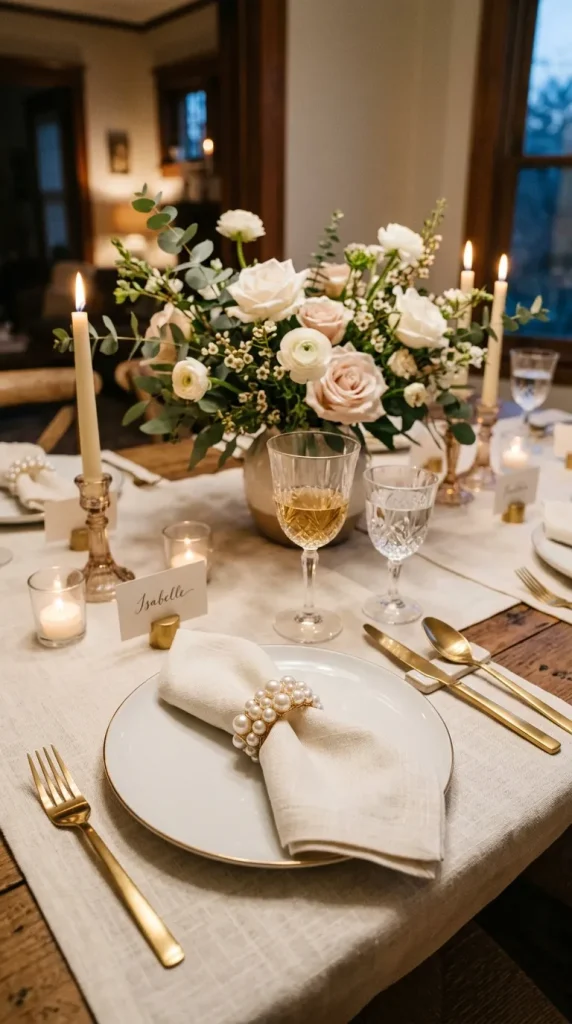
Pearl napkin rings add decorative detail to table settings for daily dining and special occasions. They are small projects that provide strong visual impact and can be completed with minimal materials.
Flexible wire, elastic cord, or sturdy ribbon can serve as the base. Faux pearls are threaded or glued to form circular holders. Neutral colors match most table linens and centerpiece styles.
Measure the circumference needed to fit a rolled napkin comfortably. Attach pearls evenly and secure the ends tightly. Test each ring before use to ensure durability and balance.
Pair these handmade accessories with candles and floral arrangements for cohesive presentation. This beginner friendly project demonstrates how simple materials can create polished and functional decoration.
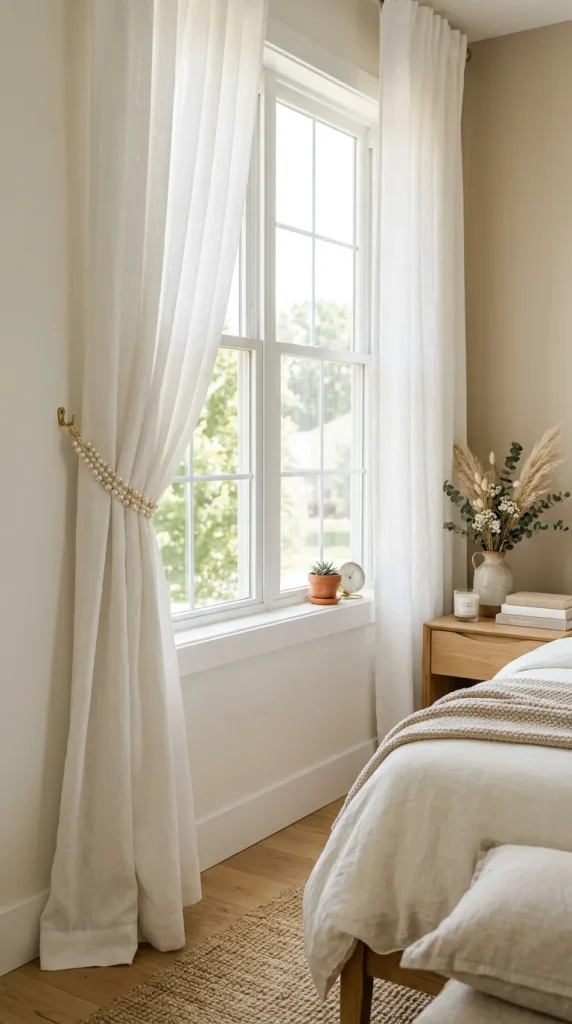
Idea 9: Pearl Curtain Tiebacks
Execution Process
Pearl curtain tiebacks combine utility and elegance by holding drapes neatly while adding decorative texture. They are effective in bedrooms and living rooms where window treatments influence the overall aesthetic.
Tiebacks can be made with ribbon, cord, or flexible wire. Pearl beads may be concentrated in the center or distributed along the full length. Magnetic closures or loops provide easy installation.
Measure the curtain width and determine how much slack is needed. String the pearls securely and attach the chosen fastening method. Test the tieback around the curtain to confirm proper fit.
Use these tiebacks to improve organization and allow more natural light into the room. This DIY tutorial is practical, budget friendly, and well suited to both traditional and modern design styles.
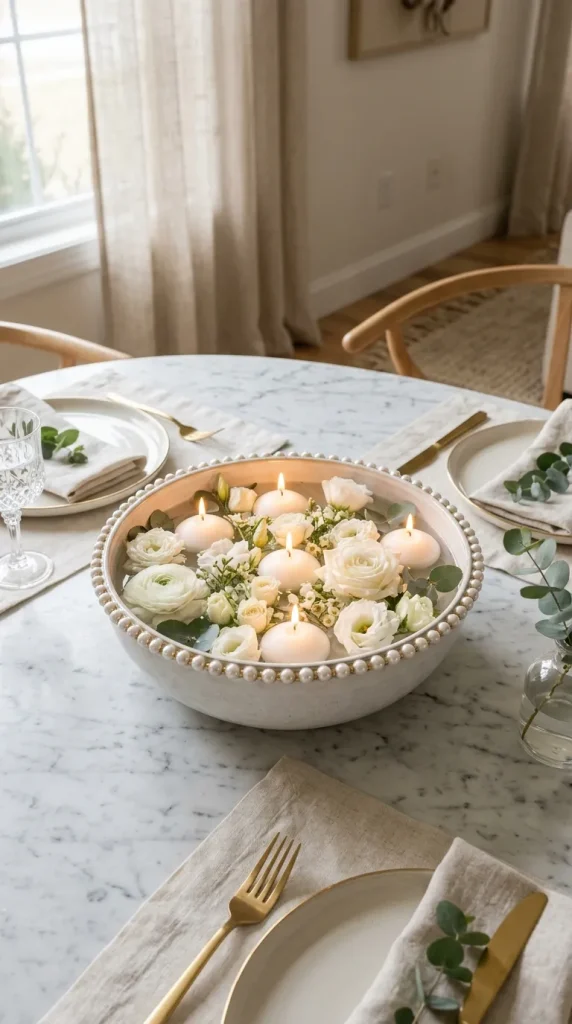
Idea 10: Pearl Centerpiece Bowl
How to Create
A pearl centerpiece bowl offers a versatile decorative accent for dining tables, coffee tables, and consoles. The project combines a simple bowl with pearl embellishment to create a refined focal point.
Glass, ceramic, and wooden bowls all work well. Pearl beads can be arranged around the rim or in clustered patterns on the exterior. The bowl can be filled with candles, flowers, ornaments, or seasonal decorations.
Clean the bowl and plan the design. Apply adhesive gradually and attach the pearls evenly. Keep the interior mostly clear if the bowl will hold practical items. Allow all glue to dry thoroughly.
Style the finished centerpiece with coordinated objects in soft neutral tones. This handmade decoration is an easy project that provides year-round inspiration and enhances both organization and presentation.
Common Beginner Mistakes and How to Avoid Them
A frequent mistake is using too much glue, which causes visible residue and uneven surfaces. Applying adhesive in small amounts produces cleaner results. Another issue is skipping the layout stage. Dry-fitting materials before attaching them improves spacing and symmetry.
Some beginners mix too many colors or pearl sizes, creating a cluttered appearance. Limiting the palette and repeating consistent shapes supports modern design and minimalist style. Rushing the drying process can also weaken the project. Allow adequate curing time for durable handmade decoration.
Practical Tips for Better Results
Work in strong natural light so alignment is easy to monitor. Use rulers and marking pencils to maintain straight borders. Keep a damp cloth nearby to remove excess adhesive immediately.
Combine different pearl sizes only when there is a clear pattern. Store unused materials in labeled containers for better organization. Seal finished projects if they will be handled frequently. These practical tips improve both appearance and durability.
Styling, Presentation, and Organization Ideas
Pearl decor works best when paired with clean surfaces and coordinated accessories. White ceramics, glass, mirrors, and soft textiles enhance the reflective quality of the materials. Group items in odd numbers to create visual balance.
Use trays and boxes to keep decorative objects organized. Repeat pearl accents in multiple areas, such as a frame, vase, and candle holder, to create a cohesive aesthetic throughout the room.
Budget and Time Planning
Many pearl DIY projects can be completed with a small quantity of materials. Purchasing basic supplies and using existing household items such as frames and vases keeps costs low.
Small projects like napkin rings may take less than one hour, while larger projects such as wall art or mirrors may require several hours including drying time. Planning materials in advance makes each tutorial more efficient.
Creative Expansion and Advanced Inspiration
Once basic techniques are mastered, pearl materials can be incorporated into wreaths, lampshades, holiday ornaments, and furniture accents. Combining pearls with lace, glass, and textured fabric creates more advanced decorative compositions.
Seasonal variations are also effective. Soft pink pearls suit spring decoration, while silver and ivory combinations work well during winter. These creative ideas provide ongoing inspiration for expanding pearl home decor into larger handmade projects.
Leave a Reply