
Introduction
Outdoor stairs are more than just a practical way to move between different levels of your garden, porch, patio, or backyard. With the right stair riser design, they can become an attractive architectural feature that improves your home’s curb appeal and gives your outdoor space a more personalized look. Whether you have a small front entrance, a raised deck, garden steps, or a long staircase leading to your backyard, decorating the risers can make an ordinary staircase feel unique.
DIY outdoor stair riser ideas are especially appealing because they allow you to update existing stairs without completely rebuilding them. A fresh coat of exterior paint, decorative tile, natural stone, weather-resistant panels, or simple wooden details can transform the appearance of your steps. You can choose a modern, rustic, colorful, farmhouse, or Mediterranean-inspired design depending on your home’s architecture.
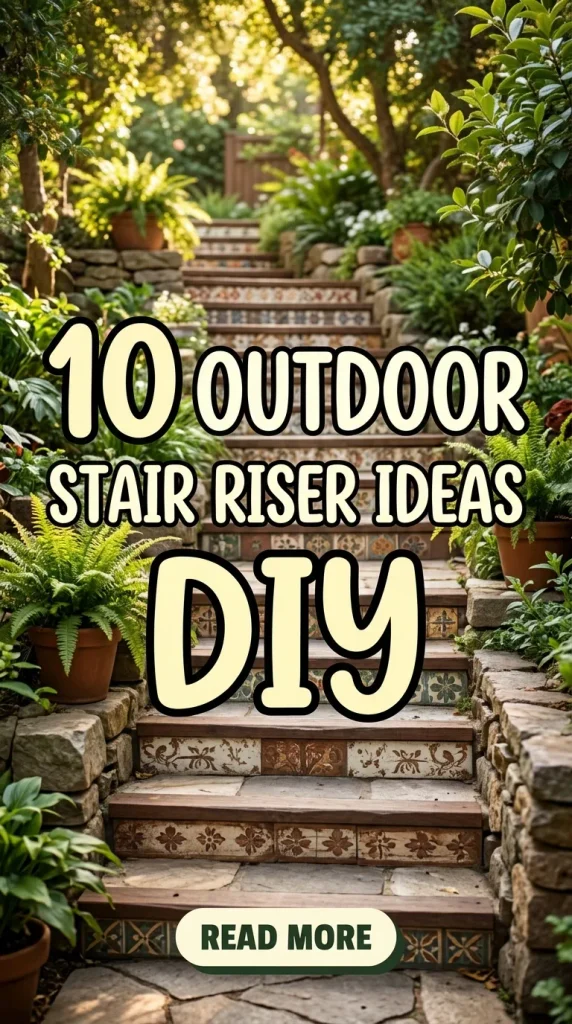
However, outdoor stair risers need more consideration than indoor decorative surfaces. They are exposed to sunlight, moisture, temperature changes, dirt, and regular wear. Choosing weather-resistant materials and suitable exterior finishes helps your project remain attractive for longer. It is also important to keep the stair treads safe and slip-resistant, maintain consistent step dimensions, and avoid adding decorative elements that create tripping hazards.
In this guide, you will discover 10 outdoor stair riser ideas DIY, with materials, step-by-step instructions, and styling suggestions for different budgets and outdoor settings. Whether you prefer a simple weekend makeover or a more detailed decorative project, these ideas will help you create outdoor stairs that look beautiful and remain practical.
Materials Used for DIY Outdoor Stair Risers
Before starting your project, inspect the existing stairs and determine which materials are appropriate for their construction and exposure to weather.
- Exterior-grade paint and compatible primer
- Exterior-rated stencils and masking tape
- Weather-resistant ceramic or porcelain tiles
- Suitable tile adhesive and exterior grout
- Exterior-grade plywood or decorative cladding where appropriate
- Outdoor-rated wood stain and protective finish
- Natural stone veneer or suitable stone-look panels
- Measuring tape, level, pencil, and straightedge
- Brushes, rollers, and cleaning supplies
- Exterior-rated screws and fasteners
- Weather-resistant sealant and caulk
- Protective gloves, eye protection, and other appropriate safety equipment
Always follow the manufacturer’s instructions for surface preparation, installation, curing time, and weather conditions. For structural repairs, loose stairs, damaged concrete, or changes to stair dimensions, consult a qualified professional.
1. Painted Outdoor Stair Risers
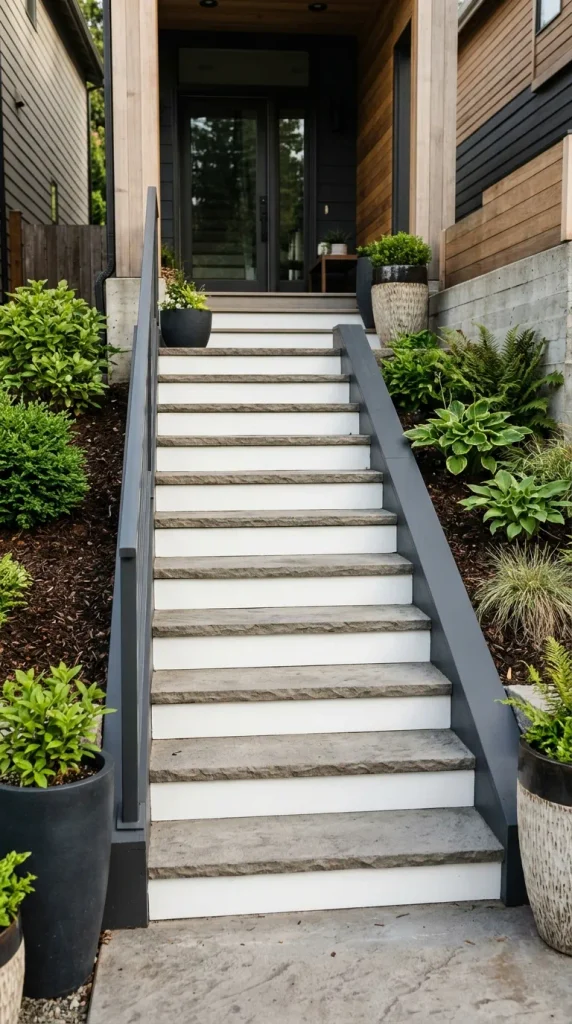
Painted stair risers are one of the easiest and most affordable ways to refresh outdoor stairs. This DIY project works particularly well on concrete, masonry, and suitable exterior timber risers. By changing the color of the vertical faces of the steps, you can introduce contrast, coordinate with your home’s exterior, or create a more polished entrance.
For a modern appearance, paint the risers white or charcoal while keeping the treads in a natural wood or stone finish. If you prefer a farmhouse look, cream risers pair beautifully with timber steps and neutral landscaping. Bold colors can also work well in playful garden spaces.
Materials needed: Exterior-rated primer, compatible exterior paint, cleaning supplies, masking tape, paintbrushes, rollers, and a suitable protective finish if required by the paint manufacturer.
How to create the look: Begin by cleaning the risers thoroughly and allowing them to dry. Remove loose paint and repair minor surface imperfections with a product suitable for the existing material. Apply the recommended primer, then use masking tape to protect the treads and surrounding surfaces.
Apply the exterior paint in thin, even coats, allowing the required drying time between coats. Choose a product specifically suitable for the substrate, whether concrete, masonry, or exterior wood. Do not paint over damp, crumbling, or damaged surfaces without addressing the underlying problem.
For a coordinated design, repeat the riser color on nearby planters, railings, or exterior trim. Alternatively, use a contrasting color to make the staircase stand out against a neutral facade.
Avoid glossy finishes that may create distracting reflections, and keep paint away from the walking surface unless the product is specifically intended for that use. Stair treads must retain appropriate slip resistance.
This project is ideal for homeowners who want a visible improvement without complicated construction. With careful preparation and suitable exterior paint, simple risers can become a clean, attractive feature of your outdoor entrance.
2. Decorative Outdoor Tile Stair Risers
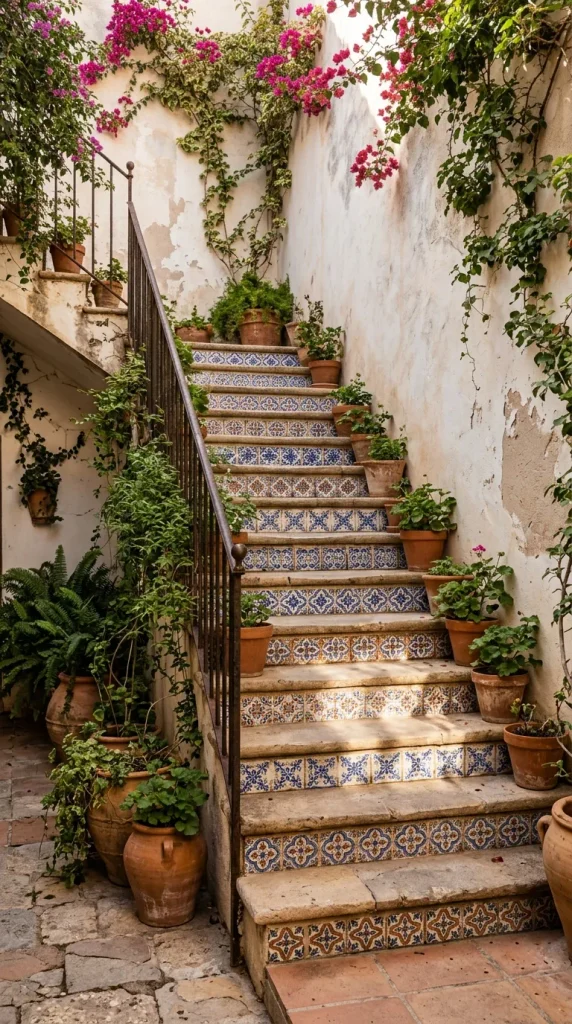
Decorative tiles can give outdoor stairs a colorful, Mediterranean-inspired appearance. Patterned risers are particularly effective on front porch steps, courtyard staircases, and garden entrances where the vertical surfaces are visible from a distance.
You can choose geometric patterns, floral designs, traditional motifs, or subtle stone-inspired finishes. Blue and white tiles create a coastal or Mediterranean feel, while terracotta-inspired designs complement warm brickwork and rustic landscaping.
Materials needed: Exterior-rated porcelain or suitable outdoor tile, compatible exterior tile adhesive, grout, spacers, measuring tools, a tile cutter, and appropriate surface-preparation products.
How to create the look: First, measure each riser separately because outdoor steps may not be perfectly uniform. Calculate the number of tiles required and plan the pattern before beginning installation. Dry-lay the tiles to check alignment and minimize awkward cuts.
Prepare the riser surface according to the tile and adhesive manufacturers’ requirements. Apply the compatible adhesive, position the tiles carefully, and use spacers to maintain consistent joints. After the adhesive has cured, apply suitable exterior grout and clean away excess material.
Use tiles specifically rated for outdoor conditions and temperature changes. Water absorption, freeze-thaw exposure, and substrate movement can affect durability, so choose a complete installation system suitable for your climate. If the existing stairs are unstable or heavily cracked, repair them before tiling.
For a sophisticated result, use one pattern across every riser and keep the treads visually simple. Alternatively, alternate two coordinated patterns for a more decorative appearance.
Tile edges must be properly finished, and no material should protrude into the walking area. Avoid using slippery tile on the treads, especially where rainwater may collect.
Although tile installation requires more preparation than painting, the result can look custom-designed and long-lasting. This idea is ideal for people who want their outdoor stairs to become a distinctive architectural feature.
3. Stenciled Stair Riser Patterns
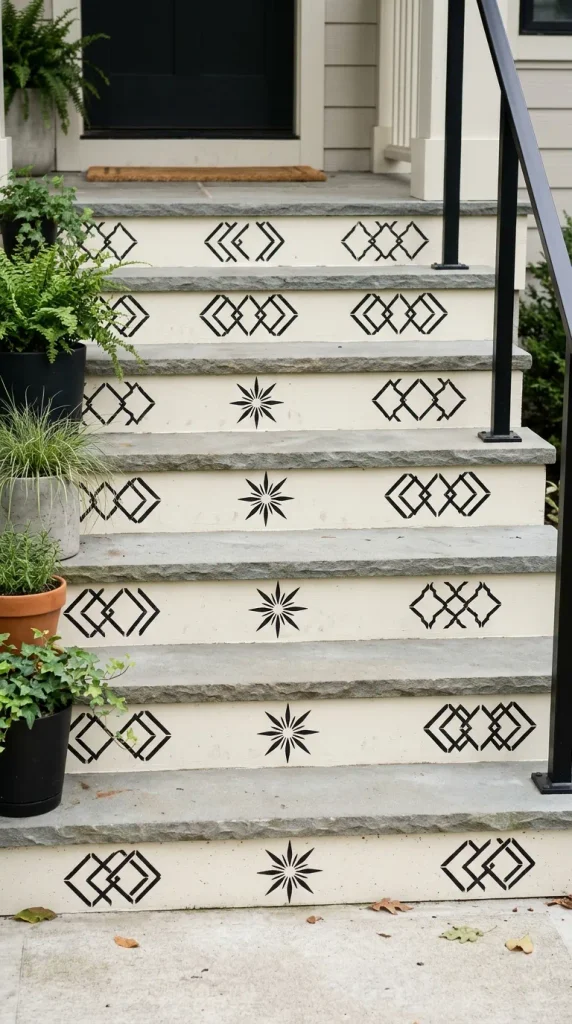
Stenciling offers a creative way to add decorative patterns without installing individual tiles. It is especially useful when you want the appearance of patterned surfaces at a lower cost or prefer a design that can be changed in the future.
You can create geometric shapes, botanical motifs, Moroccan-inspired patterns, or simple repeating designs. A black stencil on cream risers produces a classic look, while muted blue, sage green, and terracotta create a softer outdoor palette.
Materials needed: Exterior-rated paint, compatible primer, reusable stencils, masking tape, a stencil brush or small roller, cleaning supplies, and a suitable protective finish if recommended.
How to create the look: Clean the risers and allow them to dry completely. Apply primer if required, then paint the base color and let it cure according to the manufacturer’s instructions.
Position the stencil carefully on the first riser and secure it with masking tape. Apply a small amount of paint using a stencil brush or roller. Use light, controlled pressure to prevent paint from spreading beneath the stencil. Remove the stencil carefully and allow the design to dry before moving to the next riser.
Measure and mark the placement of each pattern so the designs remain aligned across the staircase. If the risers have different widths or heights, adjust the stencil placement individually rather than assuming every step is identical.
Choose paint suitable for the surface and outdoor exposure. A compatible protective coating may improve durability, but it should not interfere with the finish or create peeling.
For a balanced appearance, use the same motif on every riser and keep the treads neutral. If you prefer a more artistic style, alternate two patterns that share a common color palette.
Stenciling is an excellent weekend DIY project because it offers substantial visual impact without the cost of custom tiles. It is particularly suitable for porch stairs, garden steps, and small exterior entrances that need extra character.
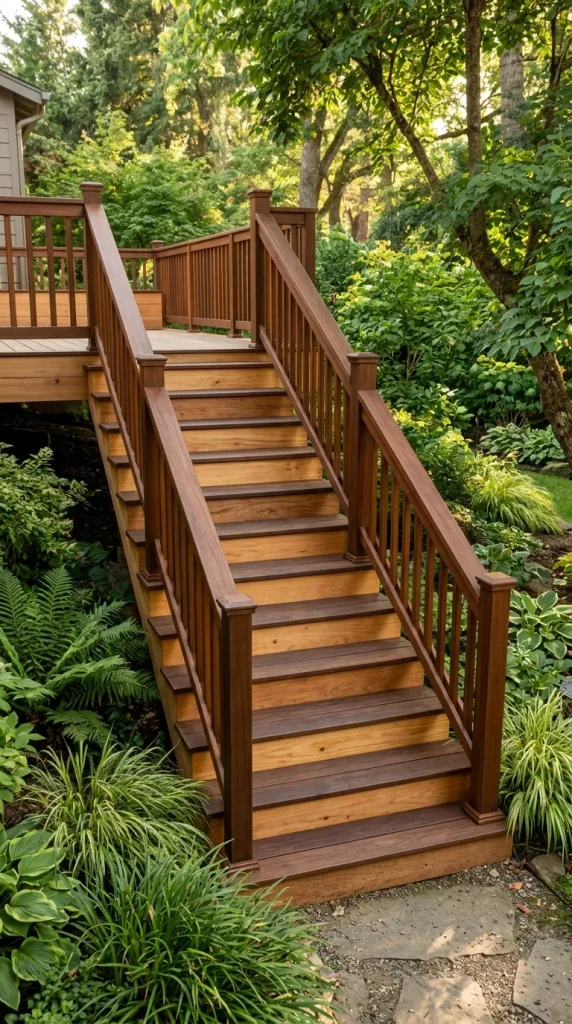
4. Natural Wood Stair Riser Panels
Natural wood can bring warmth and texture to outdoor stairs, especially when paired with concrete treads, stone landscaping, or modern exterior architecture. Wooden riser panels are a useful option when you want to soften the appearance of a staircase and connect it visually with a wooden deck or porch.
The best wood choice depends on your climate, exposure to moisture, and existing stair construction. Exterior-rated timber or a suitable composite product can provide a more durable finish than untreated indoor materials.
Materials needed: Exterior-rated timber or suitable composite panels, compatible fasteners, measuring tools, a saw appropriate for the material, protective equipment, and an outdoor-rated finish where required.
How to create the look: Measure each riser carefully and inspect the staircase before cutting any panels. Confirm that the proposed installation will not change the height of the steps or obstruct drainage. Cut the panels to fit the vertical faces and test the fit before attaching them.
Use fasteners and installation methods recommended for the chosen material and substrate. Timber should be appropriately protected for exterior use, while composite panels should be installed according to the manufacturer’s guidance for expansion and ventilation.
For a natural look, choose a warm brown finish that complements the surrounding decking. A darker stain can create contrast against pale concrete, while a lighter timber tone suits modern outdoor spaces.
Wood should not remain in constant contact with trapped moisture. Provide appropriate drainage and ventilation, and avoid covering damp or deteriorating surfaces. Inspect the panels periodically for loose fasteners, splitting, rot, or other damage.
Keep all panel edges flush and securely fixed. Do not allow the panels to project onto the treads or create gaps that could catch shoes.
This design is especially effective for deck staircases and raised outdoor entertaining areas. It creates a cohesive appearance by repeating the materials already used in the surrounding architecture.
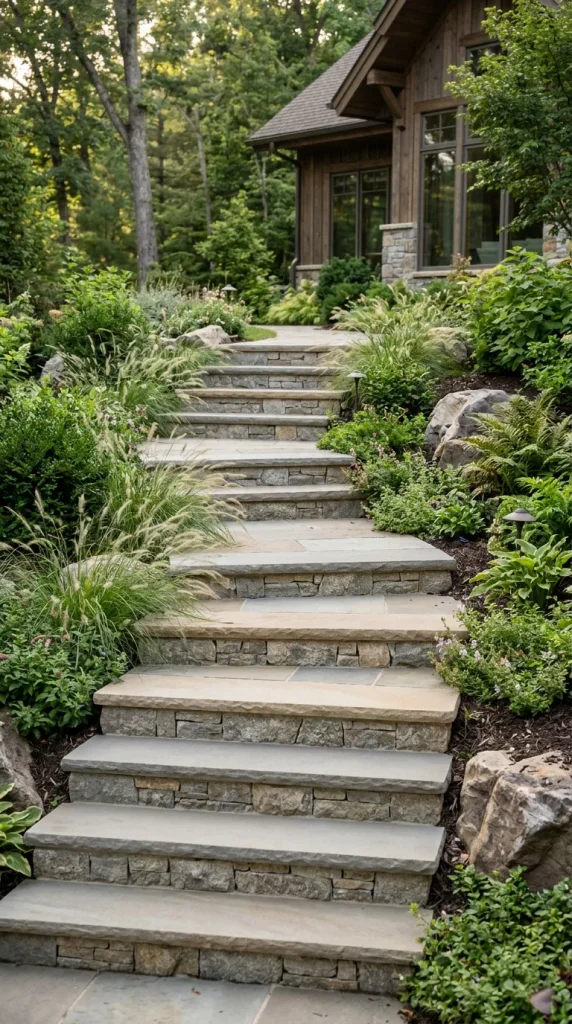
5. Stone Veneer Stair Risers
Stone veneer can give outdoor stairs a substantial, natural appearance without necessarily using full-thickness stone blocks. It works particularly well with rustic homes, garden paths, retaining walls, and outdoor entrances that already feature stone or textured masonry.
Depending on the product, you can choose the appearance of stacked stone, slate, limestone, or irregular natural rock. Gray stone creates a contemporary look, while warm beige and brown tones complement traditional landscaping.
Materials needed: Suitable exterior stone veneer, compatible installation materials, measuring tools, cutting equipment appropriate for the product, protective gear, and exterior-rated grout or mortar if required.
How to create the look: Begin by checking whether the existing staircase and substrate are suitable for the selected veneer system. Remove loose material and repair surface damage before installation. Stone veneer adds weight and thickness, so the structure must be able to support it.
Plan the arrangement before fixing the pieces in place. Mix stones from different packages where appropriate to create a balanced distribution of color and texture. Cut pieces carefully to fit the riser dimensions, following the manufacturer’s recommendations.
Use only the specified adhesive, mortar, backing system, and installation details. Outdoor moisture can damage an unsuitable installation, so weatherproofing, drainage, and movement joints may be necessary depending on the substrate and climate.
For a natural appearance, coordinate the stone color with nearby walls, garden borders, or paving. You can keep the treads in concrete, timber, or another complementary material, creating contrast between the horizontal and vertical surfaces.
Ensure that the veneer does not project into the walking area or create sharp exposed edges. If the staircase is old, loose, or structurally damaged, obtain professional advice before adding material.
Stone veneer generally requires more skill and preparation than painting or stenciling, but it can create an elegant, architectural finish. It is a strong option for homeowners who want their outdoor staircase to blend with a stone garden or traditional exterior.
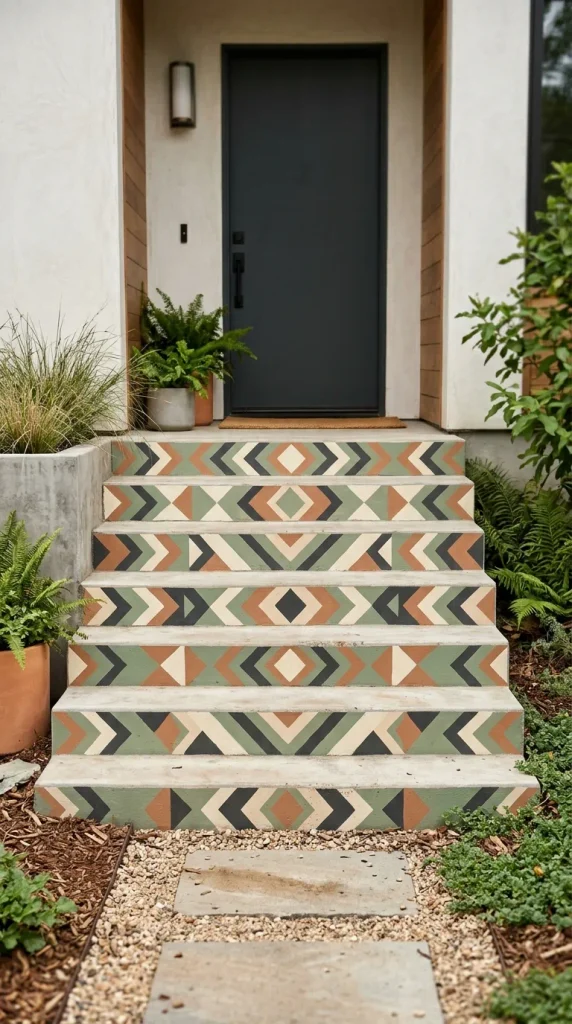
6. Outdoor Stair Risers with Geometric Designs
Geometric stair risers are an excellent choice for contemporary homes and outdoor spaces with clean lines. Repeating triangles, diamonds, stripes, and abstract shapes can create a modern pattern that looks custom-made without requiring elaborate materials.
This idea works particularly well on concrete stairs, painted timber risers, and smooth masonry surfaces. A limited palette of black, white, and gray creates a minimalist appearance, while sage green, terracotta, and cream provide a softer, more natural effect.
Materials needed: Exterior-rated paint, compatible primer, masking tape, a measuring tape, a straightedge, a pencil, and brushes or rollers.
How to create the look: Clean the risers and prepare the surface. Once the primer and base coat have cured, use a measuring tape and straightedge to mark the geometric pattern. Apply masking tape along the edges of each shape, pressing it down securely to minimize paint bleed.
Paint one color at a time, allowing it to dry before removing or repositioning the tape as appropriate for the design. For crisp results, follow the paint manufacturer’s guidance on tape removal and recoating.
Keep the pattern consistent across all risers. You can repeat one simple design on every step or create a larger continuous pattern that appears to flow down the staircase. The latter requires careful planning because the dimensions of individual risers may vary.
Choose colors that coordinate with your home’s exterior rather than introducing too many unrelated shades. Two or three colors are usually enough to create an attractive design.
Use paint designed for the particular riser material and outdoor conditions. Do not extend decorative paint onto the treads unless it is specifically approved for that application and preserves adequate slip resistance.
Geometric patterns are an affordable way to add a modern personality to plain stairs. They are especially suitable for minimalist entrances, contemporary decks, and small outdoor spaces where a repeated design can create a strong visual impact.
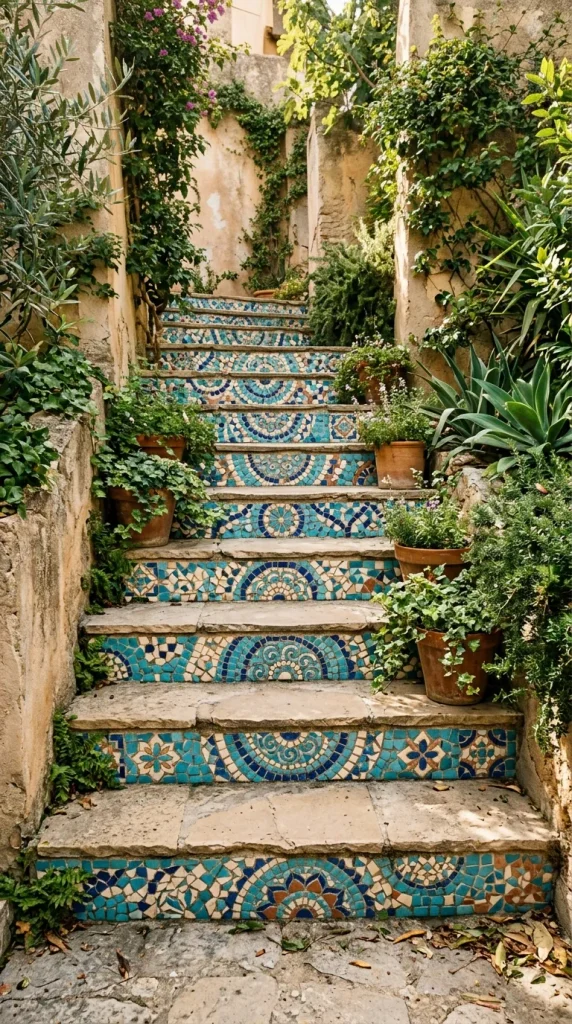
7. Mosaic Stair Riser Art
Mosaic stair risers allow you to create a personalized outdoor staircase using small pieces of suitable tile or mosaic material. The design can be colorful and playful or subtle and artistic, depending on your choice of shapes, colors, and patterns.
Mosaics are particularly effective on garden steps, courtyard staircases, and outdoor areas with Mediterranean or eclectic styling. You can create a different motif on each riser or repeat a coordinated pattern across the staircase.
Materials needed: Outdoor-rated mosaic tiles, compatible adhesive, exterior grout, a suitable substrate, measuring tools, tile-cutting equipment, and protective equipment.
How to create the look: Begin by sketching your design on paper. Choose a palette of colors that work together and calculate how the pattern will fit the risers. If this is your first mosaic project, start with simple geometric shapes or a repeating border.
Prepare the substrate according to the requirements of the mosaic system. Arrange the pieces before attaching them so you can check spacing and make adjustments. Apply the appropriate adhesive and position the pieces according to the planned layout.
After the adhesive has cured, apply exterior-rated grout suitable for the tile and environmental conditions. Clean the surface carefully and allow the installation to cure fully before exposing it to rain or regular use.
Outdoor mosaics must be installed on a stable, suitable surface. Movement, trapped moisture, and temperature changes can cause tiles to loosen, so follow the manufacturer’s recommendations for waterproofing and movement joints.
Keep the mosaic confined to the vertical riser face. The horizontal treads should remain safe and slip-resistant, and no tile edges should protrude into the walking path.
A mosaic can turn a plain staircase into a distinctive feature that reflects your personal taste. Although it takes patience and careful preparation, the finished design can look handcrafted and unique.
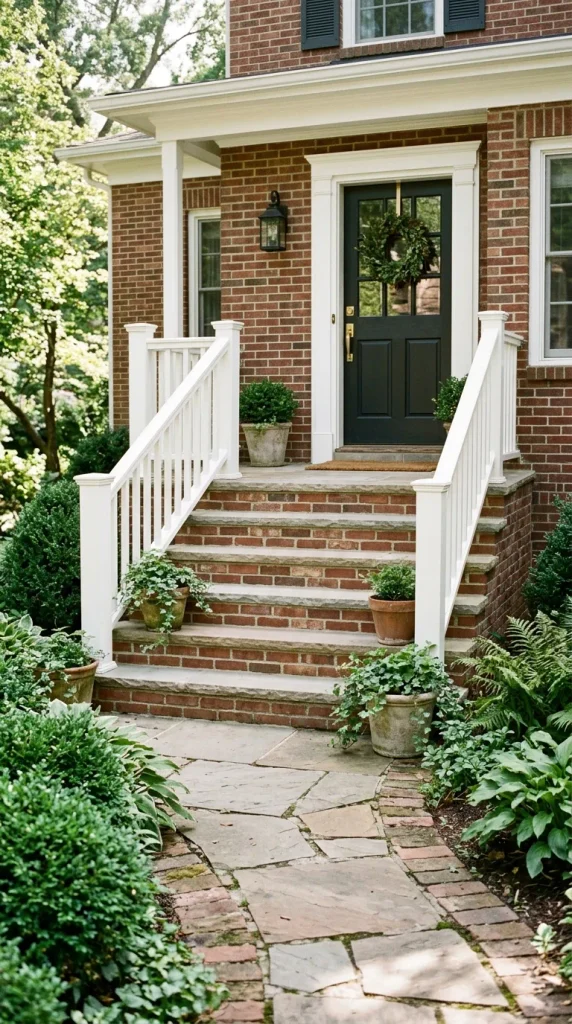
8. Brick-Style Outdoor Stair Risers
Brick-style risers create a classic, grounded appearance that complements traditional homes, cottage gardens, and rustic outdoor spaces. You can achieve this look with suitable brick veneer, exterior-rated brick slips, or a decorative finish designed to imitate masonry.
Warm red brick adds traditional character, while gray or whitewashed brick-style finishes work well with modern farmhouse exteriors.
Materials needed: Suitable exterior brick slips or veneer, compatible adhesive or mortar, appropriate jointing material, measuring tools, and surface-preparation supplies.
How to create the look: First, check that the existing risers can support the chosen finish and that the product is suitable for outdoor exposure. Clean and prepare the substrate according to the installation instructions.
Lay out the brick pattern before installation. A traditional running-bond arrangement, in which joints are offset, usually creates a familiar brick appearance. Measure carefully to avoid narrow pieces at the ends and maintain consistent spacing between units.
Install the veneer using the manufacturer’s recommended materials and methods. Apply the specified jointing material where required, remove excess material, and allow the installation to cure fully.
For a coordinated design, pair red brick-style risers with neutral concrete or stone treads. If your home has white exterior walls, a muted brick finish can add texture without overwhelming the entrance.
Brick veneer can add thickness and weight, so check the existing staircase structure and ensure the finished risers will not alter the stair geometry. Avoid covering damaged or damp masonry without repairing the underlying issue.
This idea requires more preparation than painting, but it creates a durable, architectural appearance when correctly installed. It is particularly suited to outdoor stairs that connect a front porch, garden path, or brick patio.
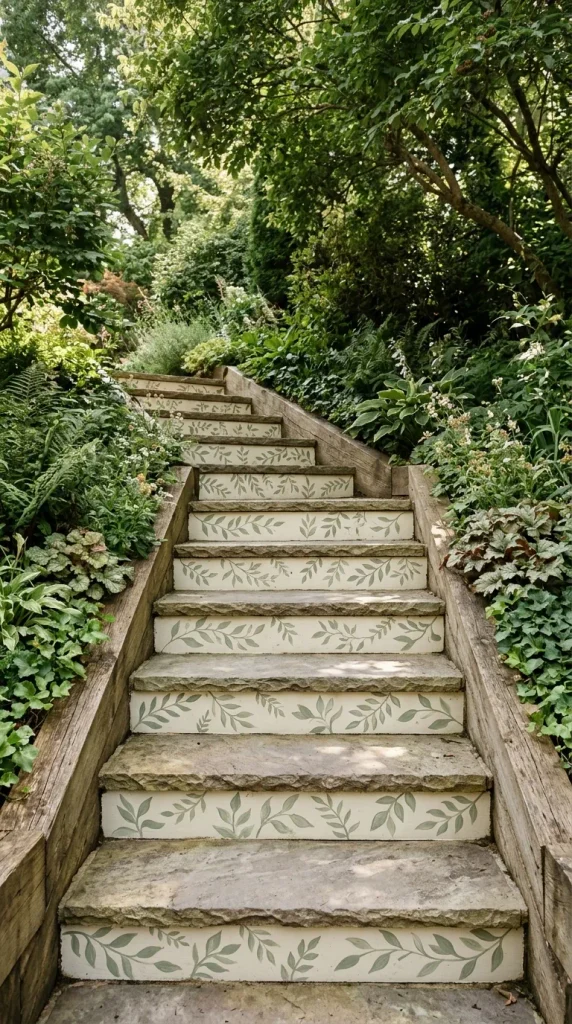
9. Vertical Garden-Inspired Stair Riser Decor
For garden stairs, a nature-inspired design can help the staircase blend into the surrounding landscape. Instead of covering the risers with heavy materials, you can use painted botanical motifs, subtle leaf patterns, or weather-resistant decorative panels inspired by greenery.
This idea is suitable for homeowners who want their outdoor steps to feel connected to garden beds, climbing plants, and natural landscaping.
Materials needed: Exterior-rated paint or suitable decorative panels, compatible primer, stencils if desired, measuring tools, masking tape, and suitable installation hardware.
How to create the look: Start by choosing a botanical style. Simple leaf silhouettes, fern-inspired patterns, or muted green accents can create a natural appearance without making the staircase look overly decorative.
Clean and prepare the risers, then apply the recommended primer if needed. Use stencils to repeat the botanical pattern across the vertical faces, or install weather-resistant decorative panels according to the product instructions.
For a restrained look, use a warm neutral base color and add a few green leaf motifs. If your garden already contains dense greenery, a simple design may work better than a highly detailed pattern.
You can coordinate the risers with nearby planters, timber borders, or stone pathways. The goal is to make the staircase feel like a natural part of the garden rather than an isolated feature.
If you choose to place plants near the stairs, keep them outside the walking path. Avoid containers that obstruct step edges or allow water to pool on the treads. Plants with invasive roots should not be allowed to damage the staircase or surrounding masonry.
Use materials that can withstand outdoor moisture and sunlight. Inspect painted designs and panels periodically for peeling, fading, or loose fixings.
This idea is particularly attractive for backyard garden steps and pathways that connect different landscape levels. It provides a softer alternative to bold geometric patterns or heavy stone finishes.
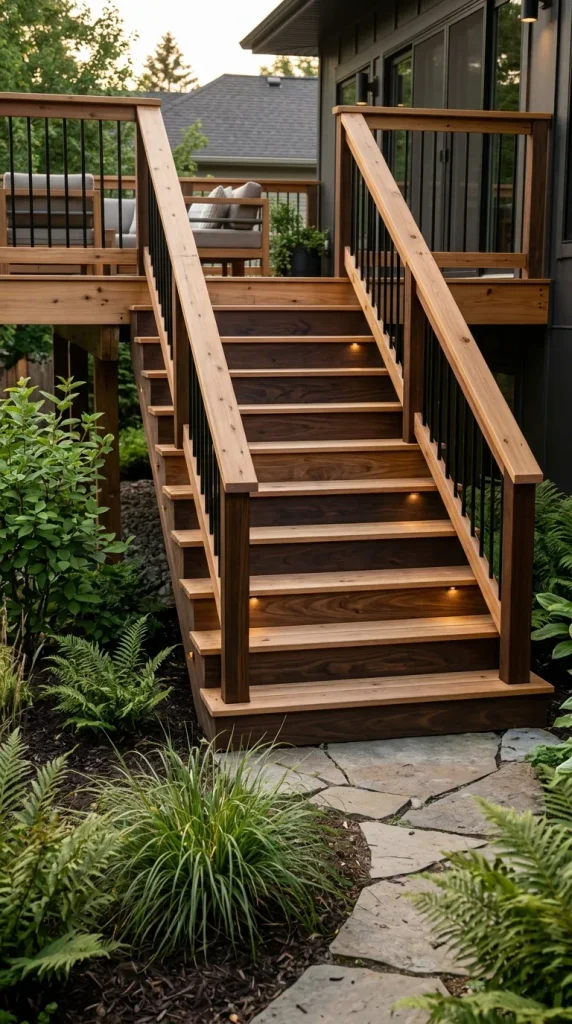
10. Stained and Contrasting Timber Stair Risers
A stained timber finish is ideal for outdoor stairs where you want a warm, natural appearance. Rather than painting the risers in a solid color, you can use a contrasting wood tone to highlight the staircase and coordinate it with a deck, porch, or timber handrail.
For a modern look, pair light-colored treads with darker risers, or reverse the contrast for a brighter appearance. Natural brown finishes suit rustic gardens, while cooler timber tones complement contemporary architecture.
Materials needed: Suitable exterior timber or existing wooden risers, compatible wood stain or paint, cleaning supplies, sanding equipment where appropriate, brushes, and protective equipment.
How to create the look: Inspect the existing timber for rot, splitting, loose fixings, or other damage. Repair or replace damaged components before applying a finish. Clean the surfaces and prepare them according to the stain manufacturer’s instructions.
Test the selected stain on an inconspicuous area to confirm the color and appearance. Apply the product evenly using a suitable brush or applicator, following the recommended coverage and drying times. Multiple coats may be necessary depending on the product and desired finish.
If you are adding new riser boards, measure each step individually and choose exterior-grade timber suited to your climate. Use suitable fasteners and installation methods, and allow for drainage and ventilation so moisture does not become trapped behind the boards.
For a coordinated staircase, repeat the timber tone on nearby decking or outdoor furniture. Dark risers can create visual depth, while lighter finishes help a small entrance feel open and natural.
Avoid using interior wood stain or varnish outdoors unless the manufacturer specifically approves it for that use. Inspect the finish periodically and maintain it according to the product instructions.
This idea is particularly effective for wooden deck stairs, garden platforms, and outdoor entertainment areas. It enhances the natural grain and helps the staircase feel connected to the surrounding architecture.
How to Upgrade Outdoor Stair Risers Step by Step
A successful DIY project begins with preparation. Follow these steps before applying paint, installing tile, or adding decorative panels.
Step 1: Inspect the Existing Staircase
Check for loose steps, cracked concrete, rotting timber, damaged fasteners, and water damage. Decorative finishes should not be used to conceal structural problems. Repair significant defects before starting the makeover.
Step 2: Measure Every Riser
Measure the height and width of each riser separately. Outdoor stairs may not be perfectly uniform, especially in older homes and garden settings. Record the dimensions before ordering materials or cutting panels.
Step 3: Choose a Suitable Material
Select a finish that suits the substrate and local weather. Exterior paint may be sufficient for a simple refresh, while tile, veneer, and panels require more preparation and suitable installation systems.
Step 4: Prepare the Surface
Remove dirt, loose paint, moss, and other contaminants using a method suitable for the existing material. Allow the surface to dry completely before applying paint or adhesive.
Step 5: Plan the Pattern
For stencils, geometric paint designs, tiles, or mosaics, arrange the pattern before installation. This helps you avoid uneven spacing and awkward cuts.
Step 6: Install the Finish
Follow the product instructions for application, fastening, curing, and weather conditions. Do not rush drying or curing times, particularly when rain is forecast.
Step 7: Check Stair Safety
Confirm that the finished work has not changed the step dimensions, reduced tread depth, blocked drainage, or created protruding edges. Keep treads slip-resistant and maintain clear walking surfaces.
Step 8: Maintain the Finished Stairs
Inspect the risers periodically for peeling paint, loose tiles, cracked grout, damaged timber, or water intrusion. Address small problems early to help preserve the finish.
Tips for Beautiful Outdoor Stair Riser Designs
- Match the home’s architecture: Choose materials and colors that complement your exterior walls, porch, deck, and landscaping.
- Keep the design consistent: Repeating one pattern or color scheme across the staircase usually looks more polished than mixing unrelated designs.
- Choose outdoor-rated materials: Sunlight, rain, moisture, and temperature changes can quickly damage unsuitable finishes.
- Test colors before committing: Paint and stain can look different outdoors depending on the lighting and surrounding materials.
- Prioritize drainage: Avoid finishes that trap water against timber or masonry.
- Protect the treads: Keep decorative treatments on the vertical riser faces unless a product is specifically suitable for the walking surface.
- Work in suitable weather: Follow the recommended temperature, humidity, and curing requirements for paint, adhesive, grout, and sealants.
- Consider maintenance: Painted surfaces may need refreshing, while tiles and veneer require periodic checks for loose pieces and damaged joints.
Common Mistakes to Avoid
One common mistake is choosing materials based on appearance alone. A decorative finish may look attractive in a photo but fail outdoors if it is not suitable for moisture, sunlight, or temperature changes. Always check the product specifications before buying.
Another mistake is ignoring the condition of the existing staircase. Loose steps, cracked masonry, and rotting timber should be repaired before decorative work begins. A new finish cannot solve structural problems.
Poor measurements can also lead to uneven patterns, awkward cuts, and protruding edges. Measure every riser individually and test the layout before attaching materials permanently.
Finally, avoid making the stairs slippery or changing their dimensions. Do not allow tile, panels, or trim to project onto the tread. Preserve the original stair geometry, drainage, and safe walking surfaces throughout the project.
Conclusion
Outdoor stair riser ideas DIY offer a creative way to refresh your porch, garden steps, deck staircase, or front entrance without completely rebuilding the stairs. From simple exterior paint and stenciled patterns to decorative tiles, natural timber, stone veneer, mosaics, and brick-style finishes, there are options for a wide range of budgets and architectural styles.
The best design is one that complements your home, suits your climate, and remains practical for everyday use. Start by inspecting the existing staircase, measuring each riser, and choosing materials specifically designed for outdoor conditions. With careful preparation and consistent styling, even plain concrete or timber steps can become an attractive feature of your outdoor space.
Remember that durability and safety matter as much as appearance. Keep the treads slip-resistant, preserve the dimensions of the steps, and address structural problems before decorating. By combining thoughtful design with suitable materials, you can create outdoor stair risers that improve curb appeal and remain beautiful for years to come.





Leave a Reply