Introduction
Flush mount hallway ceiling lights are a practical and stylish solution for narrow or low-ceiling spaces where traditional hanging fixtures are not suitable. These lighting options provide even illumination while maintaining a clean and modern design, making them ideal for functional and aesthetic home decor improvement.

This article explains how to choose, design, and create flush mount hallway lighting ideas that align with current Pinterest ideas and DIY trends. Readers will learn beginner friendly methods, materials, and step by step approaches to achieve a balanced, well-lit hallway with creative and budget-conscious solutions.
Why This Idea Is Trending or Useful
Flush mount lighting has gained strong popularity because it combines space efficiency with modern design appeal. Hallways often lack natural light and require practical illumination that does not obstruct movement. This makes flush mount fixtures one of the most functional solutions for small or narrow areas in contemporary home decor planning.
Pinterest ideas highlight minimal clutter, clean lines, and aesthetic lighting that enhances everyday spaces. Flush mount hallway ceiling lights meet these requirements by offering easy installation, affordable materials, and versatile design options. These projects are also beginner friendly, making them accessible for DIY enthusiasts who want to improve their interiors without complex electrical modifications.
Materials and Preparation
Before starting any flush mount lighting project, proper planning ensures safety and visual consistency. Essential materials include a flush mount light base, LED bulbs, mounting brackets, screws, wire connectors, and a voltage tester. Additional decorative materials may include glass covers, wood panels, metal frames, or acrylic diffusers depending on the chosen design.
Preparation begins with measuring the hallway dimensions and identifying ceiling height. Turn off the power supply before installation and confirm wiring compatibility. Plan spacing between fixtures to maintain even lighting. Select a design that matches the overall aesthetic of the home decor. Organizing tools and materials in advance ensures a smooth and efficient step by step execution process.
Idea 1: Minimalist White Disk Lighting
How to Create
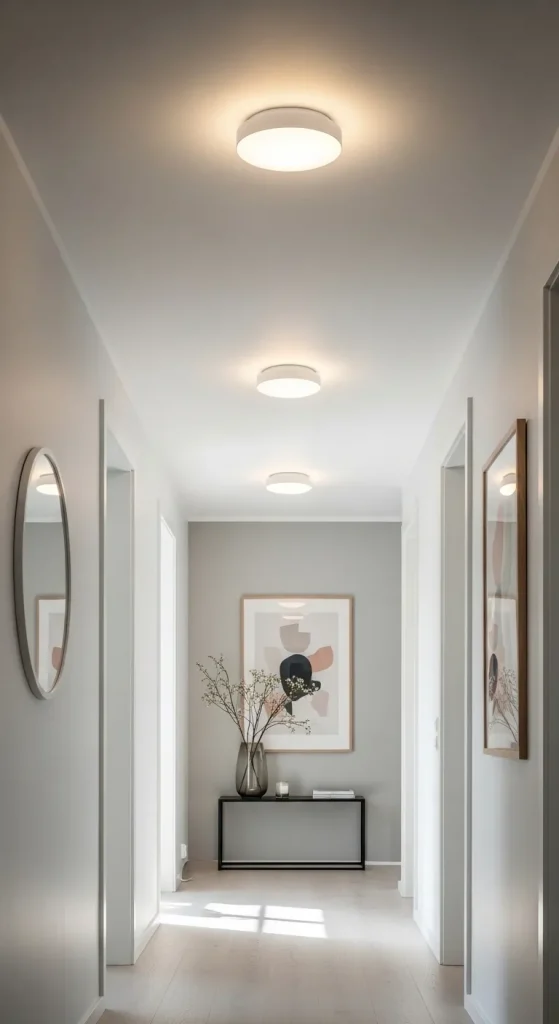
A minimalist white disk light is one of the most effective flush mount solutions for hallways. This design focuses on simplicity, using a flat circular fixture with a smooth matte finish. It blends seamlessly into ceilings and provides soft, diffused light that enhances a clean and uncluttered environment. This approach aligns with modern design and minimalist style trends.
To create this look, select a slim LED disk light with a neutral white finish. Begin by marking the installation points evenly across the hallway ceiling. Attach the mounting bracket securely and connect the wiring using standard connectors. Fix the disk fixture onto the bracket and test the light. This easy project requires minimal materials and delivers a balanced aesthetic suitable for any home decor setting.
Idea 2: Frosted Glass Panel Lights
Step-by-Step Guide
Frosted glass panel lights provide a soft glow that reduces harsh shadows in hallways. This design uses a square or rectangular flush mount fixture with a frosted surface to diffuse light evenly. It works well in modern interiors where uniform brightness and subtle elegance are essential for visual comfort and organization.
To implement this idea, choose a frosted glass flush mount fixture that matches your hallway width. Install the mounting plate and secure the wiring properly. Attach the glass panel carefully to avoid fingerprints or damage. Use LED bulbs for energy efficiency. This tutorial approach ensures even light distribution and enhances the overall aesthetic without requiring complex tools or advanced skills.
Idea 3: Wooden Frame Flush Lights
How to Make
Wooden frame flush lights introduce warmth and texture into hallway lighting. This idea combines natural materials with simple lighting structures, creating a balanced blend of rustic and modern design. It works particularly well in homes aiming for a cozy yet minimalist aesthetic.
Start by selecting a flush mount light base and a lightweight wooden frame. Sand and finish the wood to match your home decor. Install the light base first, then attach the wooden frame around it using secure fasteners. Ensure proper ventilation for heat management. This handmade approach adds character while maintaining functionality and fits well within budget ideas.

Idea 4: Black Metal Grid Lights
Execution Process
Black metal grid flush mount lights create a bold and structured appearance in hallways. This design uses geometric patterns to add visual interest without occupying space. It is suitable for industrial or contemporary interiors that emphasize clean lines and strong contrasts.
To execute this design, choose a flush mount fixture with a metal grid cover. Install the base securely and connect wiring carefully. Position the grid evenly over the light source and fasten it tightly. Use warm LED bulbs to soften the overall look. This creative project enhances hallway decoration while maintaining a practical lighting solution.

Idea 5: Acrylic Diffuser Panels
Setup Method
Acrylic diffuser panels provide a sleek and modern lighting solution. These panels distribute light evenly and reduce glare, making them ideal for long hallways. The smooth surface contributes to a polished and refined aesthetic often seen in trending ideas.
Install a flat LED panel with an acrylic cover. Secure the mounting bracket and connect wiring as per standard safety procedures. Attach the diffuser panel carefully to avoid scratches. Ensure alignment for a uniform appearance. This beginner friendly setup offers a professional finish with minimal effort and supports effective space organization.

Idea 6: Multi-Light Flush Mount Series
How to Create
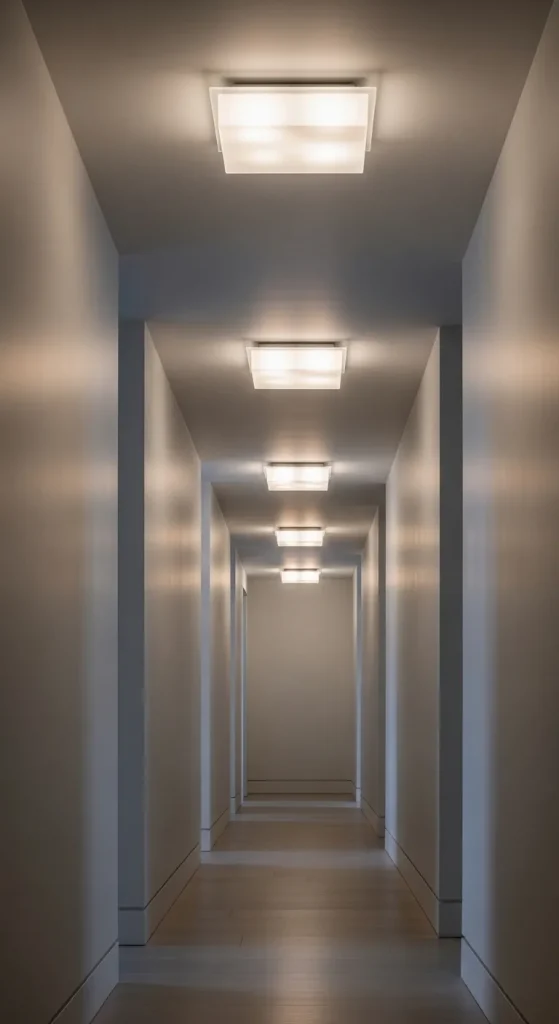
Using multiple flush mount lights in a series improves illumination in extended hallways. This idea focuses on spacing and repetition to create a consistent lighting pattern. It enhances both functionality and visual rhythm within the space.
Measure the hallway length and divide it into equal sections. Install identical flush mount fixtures at each marked point. Connect wiring systematically and ensure consistent brightness levels. This step by step approach creates a cohesive design and eliminates dark spots, making it a reliable solution for practical home decor planning.

Idea 7: Vintage Dome Lights
How to Make
Vintage dome flush lights add a classic touch to hallway lighting. These fixtures often feature curved glass or metal finishes that create a timeless aesthetic. They are suitable for traditional or transitional interior styles.
Select a dome-shaped flush mount fixture with a vintage finish. Install the mounting base and secure the wiring connections. Attach the dome cover carefully, ensuring it is aligned properly. Use warm-toned bulbs to enhance the vintage feel. This DIY idea combines traditional design with modern efficiency.

Idea 8: Color Temperature Layered Lighting
Execution Process
Layering different color temperatures in flush mount lights creates depth and variation in hallway lighting. This approach uses warm and cool tones strategically to enhance ambiance and functionality.
Install multiple fixtures with adjustable LED settings. Position warmer lights near entry points and cooler lights in functional areas. Ensure consistent wiring and control options. This creative idea allows flexibility and improves overall lighting quality, making it suitable for modern design applications.

Idea 9: Decorative Pattern Covers
How to Create
Decorative pattern covers transform simple flush mount lights into artistic elements. These covers can feature geometric, floral, or abstract designs that project patterns onto walls and ceilings.
Choose a basic flush mount fixture and attach a patterned cover. Install the light base first and ensure secure wiring. Fix the decorative cover over the fixture using clips or screws. This handmade approach adds visual interest and enhances the aesthetic without major structural changes.

Idea 10: Ultra-Slim LED Strip Flush Panels
Step-by-Step Guide
Ultra-slim LED panels provide a futuristic and space-saving lighting solution. These panels sit close to the ceiling and offer high brightness with minimal visual impact, making them ideal for modern hallways.
Install the slim panel using a low-profile mounting bracket. Connect the wiring carefully and ensure proper alignment. Secure the panel flush against the ceiling for a seamless look. This easy project delivers efficient lighting and aligns with minimalist style trends.

Common Beginner Mistakes and How to Avoid Them
One common mistake is incorrect spacing between lights, which results in uneven illumination. Planning the layout before installation prevents dark spots. Another issue is choosing the wrong brightness level, which can make hallways either too dim or overly harsh. Selecting appropriate LED wattage ensures balanced lighting.
Improper wiring is another frequent problem. Always turn off power before installation and use proper connectors. Ignoring ceiling height can also affect design choice. Low ceilings require ultra-slim fixtures to maintain space efficiency. Careful planning and attention to detail help avoid these issues and ensure a successful DIY project.
Practical Tips for Better Results
Use consistent fixture styles throughout the hallway to maintain visual harmony. Mixing too many designs can disrupt the overall aesthetic. Choose LED lighting for energy efficiency and long-term use. Position lights strategically to highlight key areas such as doorways or artwork.
Test lighting before final installation to ensure proper brightness and placement. Use neutral tones for a versatile design that complements different home decor styles. Keeping materials organized during installation improves efficiency and reduces errors. These simple adjustments significantly enhance the final outcome.
Styling, Presentation, or Organization Ideas
Coordinate flush mount lights with wall colors and flooring to create a cohesive look. Light-colored ceilings enhance brightness, while darker tones create contrast. Adding subtle decorative elements such as frames or mirrors can complement lighting patterns.
Maintain symmetry in fixture placement for a structured appearance. Use matching hardware finishes to unify the design. Organized spacing and alignment contribute to a polished and professional result. These styling techniques elevate the hallway from purely functional to visually appealing.
Budget or Time Planning
Flush mount lighting projects can be completed within a limited budget by selecting cost-effective materials and standard fixtures. Planning purchases in advance helps avoid unnecessary expenses. Choosing simple designs reduces installation time and complexity.
Allocate time for preparation, installation, and testing. Most beginner friendly projects can be completed within a few hours. Reusing existing wiring or fixtures can further reduce costs. Efficient planning ensures that the project remains practical and manageable.
Creative Expansion and Advanced Inspiration
Advanced variations include integrating smart lighting controls for adjustable brightness and color temperature. Combining flush mount lights with wall sconces can create layered lighting effects. Experimenting with custom covers or materials adds unique character.
Exploring different layouts and spacing patterns can transform hallway lighting into a design feature. Incorporating motion sensors improves functionality and energy efficiency. These creative ideas allow expansion beyond basic setups and support more personalized and innovative home decor solutions.


Leave a Reply