
Introduction
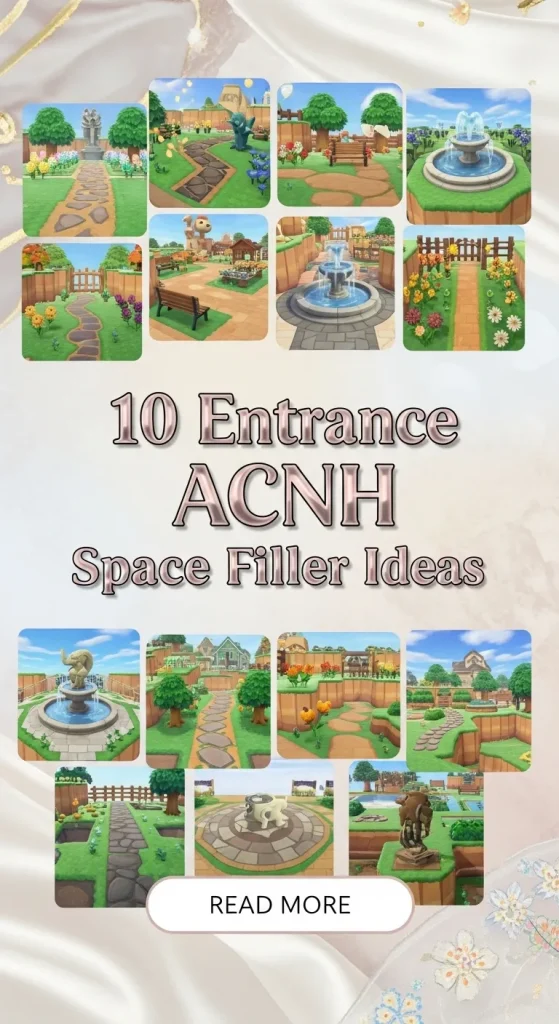
In island design within Animal Crossing: New Horizons, the entrance area serves as the first visual impression visitors receive when arriving from the airport. Many players carefully design paths, bridges, and decorative themes, yet small empty spaces often remain around the entrance plaza, path corners, or nearby cliffs. These small gaps can interrupt visual flow and make a carefully planned island feel unfinished. Space filler elements solve this design problem by adding compact decorative details that blend naturally with larger structures. In Pinterest-style island planning, these small additions are frequently shared as creative ideas because they improve the overall aesthetic without requiring large builds or complex terraforming. This article presents ten practical entrance space filler ideas designed specifically for ACNH island layouts. Each idea explains both the visual concept and the practical method for building it using accessible materials and beginner friendly techniques. Readers will learn how to transform unused entrance corners into purposeful decorative features while maintaining balance, symmetry, and cohesive island design. These ideas support modern design themes, minimalist island aesthetics, and budget conscious planning using items that most players can obtain easily.
Why This Idea Is Trending or Useful
Entrance space fillers have become a popular topic in Pinterest ideas related to ACNH island design because players increasingly focus on polished visual layouts rather than large structures alone. While bridges, waterfalls, and themed districts create the main identity of an island, small decorative details provide the finishing layer that ties everything together. On Pinterest boards and island inspiration galleries, many trending ideas highlight compact builds that fit naturally beside airport paths or near Resident Services plazas. These elements are useful because entrance zones often contain irregular shapes caused by path intersections or cliff edges. Without thoughtful decoration, these spaces appear empty and reduce the visual harmony of the entrance design. Space fillers allow players to add character without rebuilding the entire layout. They also support DIY creativity since most designs use simple furniture, plants, fencing, or custom paths arranged in thoughtful patterns. Another reason for their popularity is accessibility. Beginner players who are still collecting materials can still build attractive entrance decoration without rare items. Small builds also encourage experimentation with aesthetic themes such as cottagecore, modern design, tropical islands, or minimalist style islands. As a result, entrance fillers have become a core part of island planning tutorials and creative project guides.
Materials and Preparation
Before creating entrance space fillers, proper planning helps ensure that each decorative element complements the surrounding island layout. Start by observing the airport exit path and the first viewing angle visitors experience when they arrive. Measure the empty areas around corners, cliff edges, and path intersections. Small filler builds usually occupy spaces between one and three tiles wide, so accurate spacing is important for balanced placement. Next, gather common materials used in ACNH decoration. Typical items include simple panels, wooden benches, garden lanterns, stone stools, log stakes, potted plants, shrubs, and fencing pieces. These materials work well because they are compact and flexible in many themes. Custom design paths also play an important role. Players often use custom stone tiles, stepping stones, or dirt patches to frame small decorative builds. Preparation also involves selecting a visual theme for the entrance area. A tropical island entrance might use palm trees and beach furniture, while a cottagecore entrance might rely on flowers, wooden furniture, and natural paths. Planning ahead prevents clutter and ensures each filler element supports the overall aesthetic. Organizing materials in storage before building also speeds up the setup process for each small creative project.
Main Ideas
Idea 1: Mini Garden Corner
How to Create
A mini garden corner is one of the most reliable entrance space filler designs because it blends naturally with almost any island theme. This concept focuses on transforming a small empty corner near the entrance path into a compact decorative plant area. Instead of leaving unused tiles around path edges, a mini garden introduces layered greenery that softens the surrounding hard surfaces. The design usually combines flowers, shrubs, and a small decorative object such as a watering can or stone stool. The visual goal is to create an organic patch that feels naturally integrated with the environment. Pinterest inspiration boards frequently feature these miniature gardens because they add color and texture without overwhelming the entrance view. This approach works especially well for minimalist style island entrances that rely on subtle decoration rather than dense structures. The garden corner also acts as a visual transition between airport pathways and the broader island layout. When positioned correctly, it frames the entrance path and encourages visitors to visually explore the surrounding landscape. Because it uses basic items, it is considered one of the most beginner friendly decoration methods in ACNH entrance planning.
To build this design step by step, begin by selecting a two-by-two or three-by-three tile space near the entrance path. Replace standard path tiles with a dirt or stone custom design to create a small garden base. Plant a mix of flowers with varying heights, such as tulips or hyacinths, along one edge to form a natural border. Next, add a shrub behind the flowers to introduce layered depth. Place a small decorative object like a garden lantern or wooden bucket slightly off center to avoid rigid symmetry. This asymmetrical placement creates a more natural aesthetic. If space allows, add a single log stool or stone stool to complete the scene. Surround the garden with partial fencing or log stakes on one side to visually contain the area. Finally, review the entrance view from the airport to ensure the garden complements the surrounding layout. Adjust flower colors to match the island palette. This simple DIY decoration transforms unused tiles into a cohesive decorative feature that supports the overall island aesthetic.

Idea 2: Decorative Signpost Station
Step-by-Step Guide
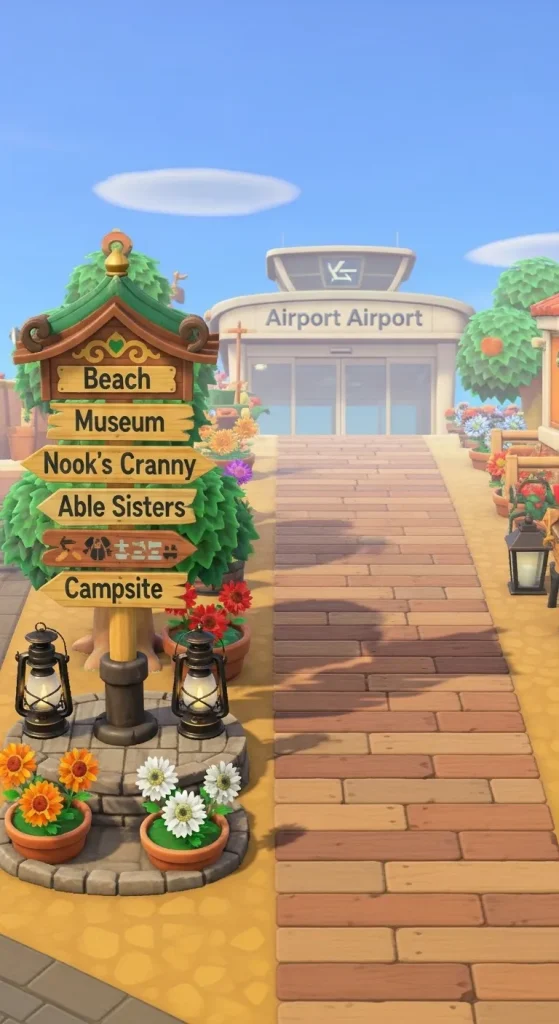
A decorative signpost station is a practical entrance filler that also improves island navigation. In many ACNH island designs, players create multiple districts such as shopping streets, beaches, or residential neighborhoods. A small signpost area near the entrance helps visually introduce these destinations while filling awkward empty spaces beside paths. The concept centers on building a compact information point that looks like a small travel guide station. Pinterest inspiration frequently highlights these builds because they combine function and decoration. Signposts naturally draw attention without blocking movement, making them ideal for narrow entrance corners. They also support themed islands such as citycore, park style layouts, or adventure themed islands. The presence of directional signs creates a storytelling effect, suggesting that the island is a structured destination with different areas to explore. When placed near the airport exit, the signpost station becomes part of the visitor experience. Even though it occupies only a few tiles, it adds personality and improves visual organization.
To construct this filler idea, begin by placing a two tile wide area beside the main entrance path. Lay down custom wooden plank or stone path tiles to create a small base platform. Position a signpost item in the center of this space and customize it with directional arrows if possible. Next, add two decorative elements to frame the signpost. Garden lanterns, small plants, or log stakes work well for this purpose. Keep the arrangement balanced but not perfectly symmetrical. Place a small stool or crate nearby to simulate a resting spot where travelers might read directions. To enhance the visual effect, place one shrub behind the signpost to create depth. Avoid overcrowding the space because the signpost should remain the focal point. After placement, check the entrance view from the airport to ensure the station is clearly visible. This simple build provides both decorative value and functional organization while maintaining a clean modern design.
Idea 3: Stone Seating Nook
How to Create
A stone seating nook is a compact relaxation area designed to occupy small entrance gaps without interrupting the flow of the main path. This idea is particularly popular in Pinterest island inspiration because it suggests that the entrance is a welcoming social space rather than just a transit zone. The concept focuses on placing a small seating arrangement that appears like a quiet resting spot where villagers or visitors might pause. The use of stone furniture creates a natural appearance that blends well with gardens, cliffs, or plaza areas. This design works well in both rustic and minimalist island aesthetics. Even though the structure is small, the presence of seating furniture adds a sense of purpose to the space. Instead of leaving blank tiles near path corners, the nook provides a functional decoration that enriches the entrance environment. Because stone furniture has neutral tones, it integrates easily with various island themes without clashing with surrounding colors.
To build the seating nook, begin by selecting a small two-by-three tile space near the entrance walkway. Lay a circular or square stone pattern using custom path designs to define the seating zone. Place one stone stool and one stone table within this area, leaving a small gap to maintain comfortable spacing. Add a decorative element such as a lantern or book on top of the table to give the area a lived-in appearance. Next, plant a shrub or small tree behind the seating arrangement to create a natural backdrop. If space allows, place a flower bed on one side to soften the edges of the build. Avoid placing too many items in the nook because the purpose is to maintain a clean and relaxing atmosphere. Finally, review the entrance view and adjust furniture orientation so the seating area faces the main path. This simple arrangement turns an empty corner into an inviting decorative feature.

Idea 4: Small Market Display
Execution Process
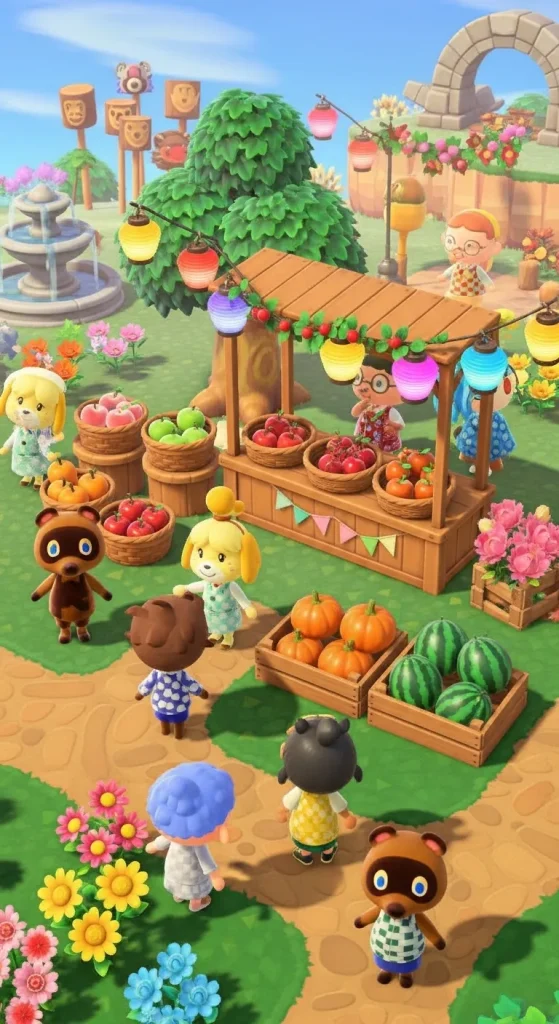
A small market display is an effective filler idea that introduces lively visual storytelling near the island entrance. This design simulates a compact roadside stall or vendor stand that appears to greet visitors as they arrive. On Pinterest boards dedicated to ACNH island planning, miniature markets are frequently used because they add activity and color without occupying large spaces. The concept revolves around displaying goods such as fruit baskets, crates, or handmade decorations arranged as if they are part of a small island marketplace. Even when the display is purely decorative, it gives the entrance area a dynamic atmosphere. Market displays also complement many island themes including countryside villages, coastal islands, and urban inspired layouts. Because the structure is small, it works well in narrow gaps between paths or near cliff edges.
To create this market display, begin with a three tile wide base area beside the entrance path. Lay wooden plank custom path tiles to represent a small vendor platform. Place a simple stall or table at the back of the area as the main structure. On top of the stall, display decorative items such as fruit baskets, potted plants, or small containers. In front of the stall, place two crates or barrels to create the impression of stored goods. Add a lantern or small sign nearby to complete the visual scene. To prevent clutter, limit the number of objects and maintain clear spacing between items. A small flower patch or shrub behind the stall can provide a natural background. After arranging the objects, observe the design from the airport entrance angle and adjust placement so the stall remains clearly visible. This compact creative project adds energy and character to otherwise unused entrance tiles.
Idea 5: Decorative Fountain Tile
Setup Method
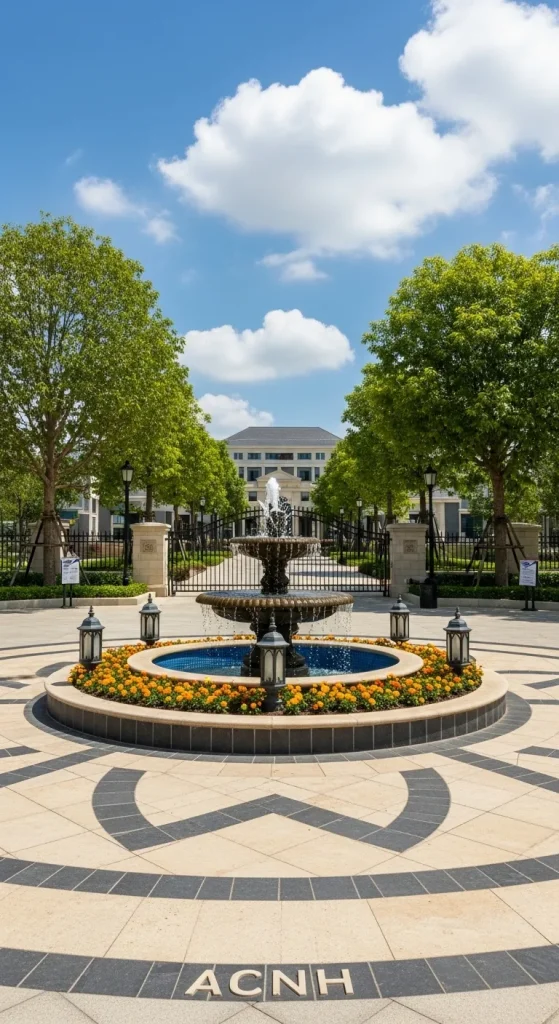
A decorative fountain tile creates a strong focal point while occupying a relatively small space near the entrance. This design works particularly well in modern design islands or symmetrical layouts where players want a central decorative feature. The concept involves placing a fountain on a custom tile base surrounded by subtle decorations. Pinterest inspiration frequently highlights this idea because fountains naturally draw attention and give entrances a refined aesthetic. Even a single fountain can elevate the visual quality of the area if placed correctly. This filler idea is useful when a small square space remains between pathways or near Resident Services plazas. The presence of moving water also introduces a calming atmosphere to the entrance zone. Because fountains are relatively compact items, they function as both decoration and spatial anchor.
To build this setup, first select a square area roughly three tiles wide near the entrance. Replace existing path tiles with a custom stone circle or plaza pattern to define the fountain base. Place the fountain item in the center of this pattern. Surround the fountain with four small decorative elements such as flower beds or garden lanterns placed diagonally. This arrangement creates visual balance without overcrowding the design. Next, plant low shrubs or flowers around the outer edges to soften the structure. Ensure that the entrance path remains clearly visible so visitors can walk comfortably around the fountain area. If desired, add a bench nearby to encourage villagers to sit beside the fountain. Review the layout from the airport viewpoint and adjust spacing to keep the fountain centered within the visual frame. This simple structure transforms empty entrance tiles into a polished decorative landmark.
Idea 6: Wooden Fence Divider
How to Make
A wooden fence divider is a subtle but highly effective space filler for entrances that have irregular path edges or cliff boundaries. The idea focuses on using short fence sections to visually organize small areas without constructing full barriers. Pinterest island layouts often use partial fencing because it helps guide movement while adding texture to the landscape. In entrance areas, a short fence divider can separate a decorative garden from the main path or frame the edge of a cliff. This technique improves organization and prevents the entrance design from appearing scattered. Wooden fences are particularly versatile because they match many themes such as cottagecore islands, natural forest layouts, or rural villages. Even minimalist island designs benefit from the clean structure that fencing provides. When used carefully, the divider acts as a subtle architectural element that improves visual balance.
To implement this idea, start by identifying an empty strip of land beside the entrance path. Place three to five wooden fence pieces along one side of the space to create a short boundary line. Avoid extending the fence too far because the goal is to suggest structure rather than block access. Next, decorate the interior side of the divider with small plants, flowers, or a garden lantern. This creates a layered effect where the fence frames the decoration behind it. On the outer side, leave the path open so visitors can move freely. For added aesthetic detail, place a log stake or small sign near one end of the fence. After placement, examine the entrance from the airport view and confirm that the divider naturally guides attention toward the main island path. This simple project uses minimal materials while significantly improving entrance organization.

Idea 7: Path Pattern Mosaic
Step-by-Step Guide
A path pattern mosaic is a creative filler that transforms empty tiles into decorative flooring rather than placing furniture objects. This idea focuses on designing custom path arrangements that resemble small mosaics or patterned tiles. Pinterest inspiration boards frequently highlight path art because it provides decoration without consuming item placement limits. The concept involves layering multiple custom path designs in a small space to create visual texture. These mosaics work especially well in modern design islands, plaza entrances, or minimalist layouts where furniture clutter is avoided. Instead of filling the area with objects, the mosaic becomes a subtle artistic detail embedded in the ground. Because the design is flat, it does not interfere with walking paths or camera angles.
To create the mosaic, start by selecting a two-by-two or three-by-three tile space near the entrance path. Replace standard path tiles with a base layer such as stone or brick. Next, apply custom designs like decorative borders, small star patterns, or geometric tiles in alternating positions. The goal is to create a balanced pattern rather than random placement. After finishing the base pattern, consider adding a single accent object such as a lantern or plant pot in one corner. This object anchors the design without covering the mosaic entirely. Ensure that the colors of the custom tiles match the island’s overall palette. Test the visual effect from the airport arrival angle and adjust the pattern if it appears too busy. This simple DIY creative project adds artistic character to entrance areas while remaining extremely compact.

Idea 8: Mailbox Decoration Spot
How to Create
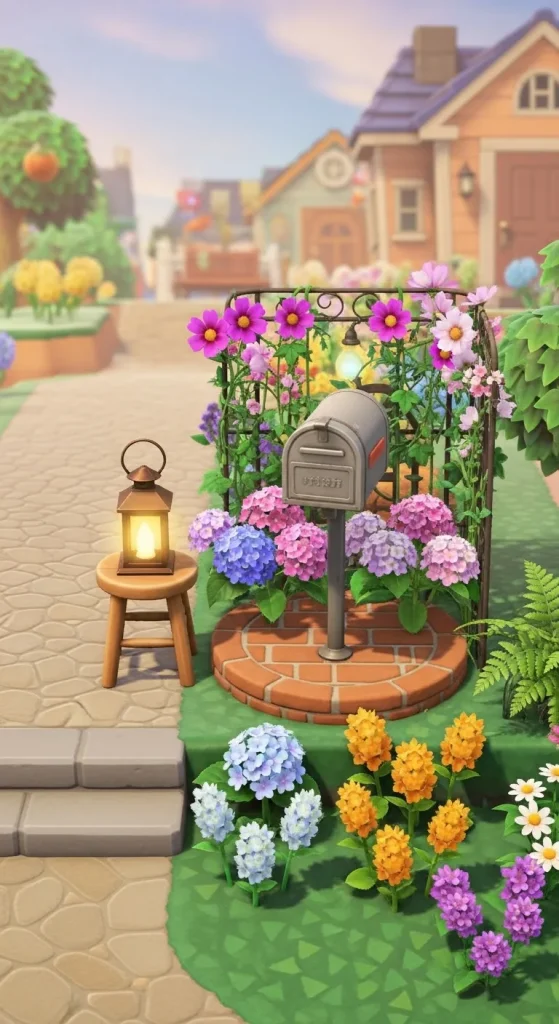
A mailbox decoration spot is a small entrance filler that creates the illusion of a community communication area. In many island layouts, the entrance connects directly to residential districts. A decorated mailbox corner visually suggests that the island has an organized neighborhood system. Pinterest inspiration frequently showcases mailbox builds because they add storytelling details while occupying very little space. The design focuses on highlighting a single mailbox surrounded by decorative elements. Even though each player already has a mailbox at their home, placing an additional decorative mailbox near the entrance adds charm and personality. This type of filler works especially well in cozy or village themed islands where the entrance represents the start of a small community.
To build the mailbox spot, begin by placing a small square of custom dirt or brick tiles near the entrance path. Position a decorative mailbox item in the center of this area. Next, add two small plants or flowers on either side to frame the mailbox visually. Place a log stool or small crate nearby to represent a place where villagers might set letters or packages. For additional detail, include a lantern or signpost behind the mailbox. Keep the arrangement simple and avoid stacking too many items in the small space. After finishing the setup, observe how the mailbox area appears when entering from the airport. Adjust plant colors and item spacing so the decoration remains clear but not overwhelming. This compact design fills empty space while adding a welcoming village atmosphere.
Idea 9: Lamp Post Accent
Setup Method
A lamp post accent is one of the simplest entrance filler designs, yet it provides strong visual structure. Lighting elements are widely used in Pinterest island inspiration because they enhance atmosphere while maintaining minimal clutter. The concept centers on highlighting a single lamp post with subtle surrounding decoration. Lamp posts naturally guide attention along paths and improve nighttime island visibility. When placed near the entrance, they create a welcoming glow that emphasizes the arrival route. Because the structure is tall and narrow, it fits easily into small spaces where larger builds would feel crowded. This makes it an excellent solution for tight path corners or cliff edges.
To build the lamp post accent, begin by selecting a one or two tile space near the entrance walkway. Place the lamp post slightly offset from the path rather than directly centered. This positioning creates a natural appearance and prevents the walkway from feeling blocked. Next, add a small base decoration such as a custom stone tile or grass patch beneath the lamp. Place a flower or shrub beside the base to soften the structure. Avoid adding multiple tall objects because the lamp post should remain the focal point. If desired, add a small bench nearby so villagers can sit under the light. Review the design during both daytime and nighttime conditions to ensure the lighting enhances the entrance atmosphere. This minimal setup provides both practical illumination and decorative value.

Idea 10: Compact Picnic Display
Execution Process
A compact picnic display creates a cheerful entrance decoration that suggests a relaxed island lifestyle. Pinterest boards dedicated to ACNH aesthetics often feature picnic builds because they add warmth and storytelling elements. The idea involves arranging a small picnic setup that appears ready for visitors to enjoy. Even though the area is small, it adds personality to the entrance and makes the island feel lively. Picnic displays work particularly well on grassy areas near the airport or beside scenic paths. Because the design uses low furniture and soft textures, it blends easily with natural landscapes.
To create the picnic display, begin by laying a custom picnic blanket design across two or three tiles near the entrance path. Place a small basket or food themed decoration on top of the blanket to represent picnic supplies. Add a low stool or cushion nearby to simulate seating. Surround the area with flowers or small plants to frame the scene. Avoid overcrowding the display because the blanket should remain visible. For additional charm, place a lantern or book beside the blanket. After finishing the arrangement, check how the picnic scene appears from the airport arrival perspective. Adjust placement so it feels naturally integrated with the surrounding path. This easy project transforms unused tiles into a welcoming decorative feature.

Common Beginner Mistakes and How to Avoid Them
One common mistake in entrance filler design is overcrowding small spaces with too many decorative objects. Because ACNH furniture items are visually detailed, placing several items in a tiny area can create visual clutter that distracts from the main entrance path. Beginners often attempt to fill every empty tile with furniture, which can make the island feel chaotic rather than organized. A better approach is to focus on one central element and support it with one or two complementary decorations. Another frequent issue involves inconsistent design themes. Mixing modern furniture with rustic materials in the same entrance filler can disrupt the island’s aesthetic balance. Planning the entrance style in advance helps maintain visual harmony. Players also sometimes ignore the arrival viewpoint from the airport. Decorations that look attractive from above may appear hidden or awkward when viewed from the entry angle. Always test the design by walking out of the airport and adjusting placement accordingly. Finally, many beginners forget to leave enough walking space around fillers. Maintaining clear pathways ensures that decorations enhance the entrance without interfering with movement.
Practical Tips for Better Results
Improving entrance fillers often requires careful attention to scale, color balance, and spacing. Start by using small decorative items that match the size of the empty space. Large furniture pieces can overwhelm narrow entrance areas, while compact objects blend more naturally. Another effective technique is color coordination. Choosing flowers and furniture colors that match the island’s palette creates a cohesive visual style. For example, islands with natural green landscapes may benefit from neutral stone and wooden decorations. Players should also consider layering elements at different heights. Combining ground tiles, low furniture, and taller plants creates depth without occupying excessive space. Lighting also improves the atmosphere of entrance fillers. Placing lanterns or lamp posts near decorations enhances nighttime visibility and adds warmth to the island design. Finally, reviewing Pinterest inspiration regularly can introduce new creative ideas for arranging objects and paths. Observing how experienced players structure small decorative spaces can help beginners refine their own entrance layouts.
Styling, Presentation, or Organization Ideas
Styling entrance fillers effectively requires careful arrangement so each decorative element contributes to the overall aesthetic rather than appearing random. One useful method is visual framing. Placing flowers, shrubs, or fences around a focal object helps guide the viewer’s attention toward the center of the design. This technique is commonly used in modern design layouts where simplicity is important. Another styling strategy involves symmetry near main entrance paths. For example, placing matching fillers on both sides of the path creates a balanced appearance that feels organized and welcoming. However, perfect symmetry is not always necessary. Many natural island themes use asymmetrical arrangements to create a relaxed and organic look. Texture variation also improves presentation. Combining stone tiles, wooden furniture, and greenery introduces visual richness without overcrowding the space. Custom path designs can also enhance styling by adding borders or decorative ground patterns beneath objects. By organizing elements thoughtfully, players can turn small entrance fillers into cohesive decorative scenes that enhance the overall island atmosphere.
Budget or Time Planning
Entrance filler projects are ideal for players who want to improve their island without investing large amounts of time or rare materials. Most filler builds require only a few common items such as flowers, lanterns, stools, or custom paths. This makes them accessible even for beginners who are still collecting DIY recipes and materials. Efficient planning begins by identifying several empty spaces around the entrance area and assigning a simple decoration to each. Instead of redesigning the entire entrance at once, players can complete one filler project at a time. This gradual approach prevents burnout and allows for experimentation with different design styles. Another useful strategy involves reusing existing items from storage rather than crafting new furniture. Many everyday objects can function as decorative accents when arranged creatively. Time efficiency can also be improved by placing custom path tiles first before adding furniture. Establishing the ground layout makes it easier to visualize where objects should be placed. With thoughtful planning, multiple entrance fillers can be completed in a short building session.
Creative Expansion and Advanced Inspiration
Once basic entrance fillers are completed, players can expand their designs into more complex decorative scenes. Advanced builders often combine several small fillers into a cohesive entrance district that includes gardens, seating areas, and themed decorations. One creative direction involves seasonal design updates. Changing flowers, decorations, or path colors to match different seasons keeps the entrance visually fresh throughout the year. Another expansion idea involves storytelling elements. For example, a signpost station can evolve into a full tourist welcome center with additional stalls and decorative maps. Players interested in advanced island aesthetics may also experiment with terraforming around entrance fillers. Creating small cliffs, waterfalls, or raised flower beds can add vertical dimension to the entrance landscape. Lighting design is another advanced technique. Carefully placed lamp posts, lanterns, and glowing decorations can transform the entrance into a dramatic nighttime scene. By gradually building on simple filler ideas, players can turn their entrance area into a highly detailed and visually memorable introduction to their island.



Leave a Reply