
Introduction
Unused corners can often become the most overlooked areas of a home. Instead of leaving an awkward corner empty, you can turn it into a practical and beautiful storage feature with a DIY corner bookshelf.
Corner bookshelves are especially useful because they make use of vertical space without taking up as much floor area as a traditional bookcase. With a few basic materials, some creativity, and the right design, you can create a custom bookshelf that fits perfectly into your room.

A DIY corner bookshelf can be as simple as a few floating shelves or as creative as a floor-to-ceiling built-in display. You can make one from reclaimed wood, plywood, pine boards, old furniture pieces, or even materials you already have at home.
The best part is that a corner bookshelf doesn’t have to be used only for books. You can combine books with plants, framed artwork, candles, ceramics, baskets, and other decorative accessories to create a Pinterest-worthy display.
Here are 10 creative DIY corner bookshelf ideas that can help you transform an empty corner into a functional and stylish feature.
1. Simple Floating Corner Bookshelf
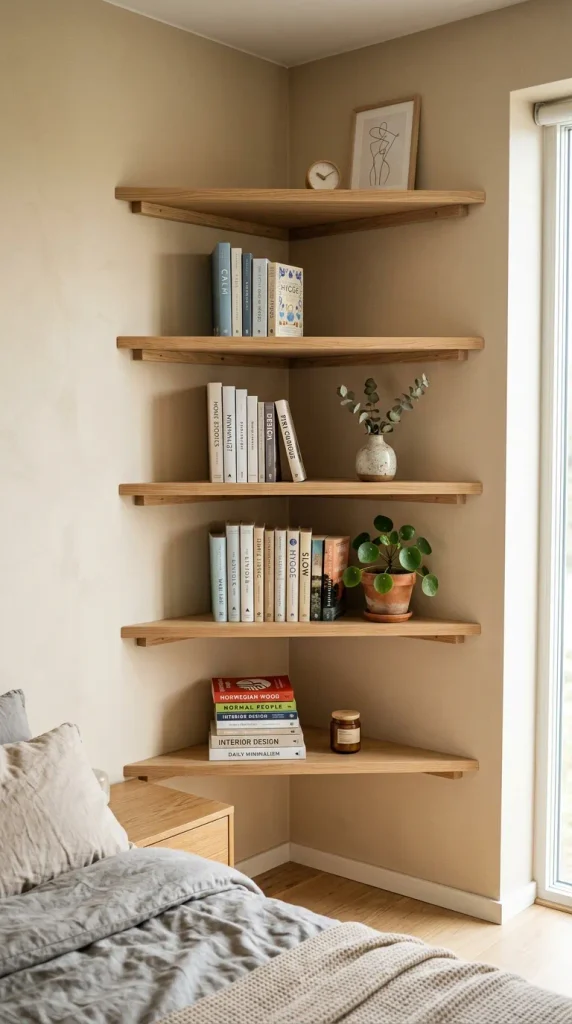
A floating corner bookshelf is one of the easiest DIY options for beginners. It requires minimal materials and creates a clean, modern appearance.
For this design, install several triangular or L-shaped wooden shelves into the corner. The shelves can be arranged vertically with equal spacing or staggered slightly for a more relaxed look.
Choose natural wood for a warm Scandinavian appearance, white paint for a minimalist room, or dark stain for a more dramatic interior.
You can use the shelves primarily for books or combine them with small decorative objects. Place larger books toward the bottom shelves and smaller books toward the upper levels.
Add a small plant, ceramic vase, or framed photograph between book collections to break up the display.
Materials Used
- Wooden boards
- Wall brackets or concealed shelf supports
- Screws and wall anchors
- Drill
- Measuring tape
- Sandpaper
- Paint or wood stain
- Level
DIY Tip
Measure both walls carefully before cutting the shelves. Even small differences in wall dimensions can affect how the corner shelves fit.
2. Floor-to-Ceiling Corner Bookshelf
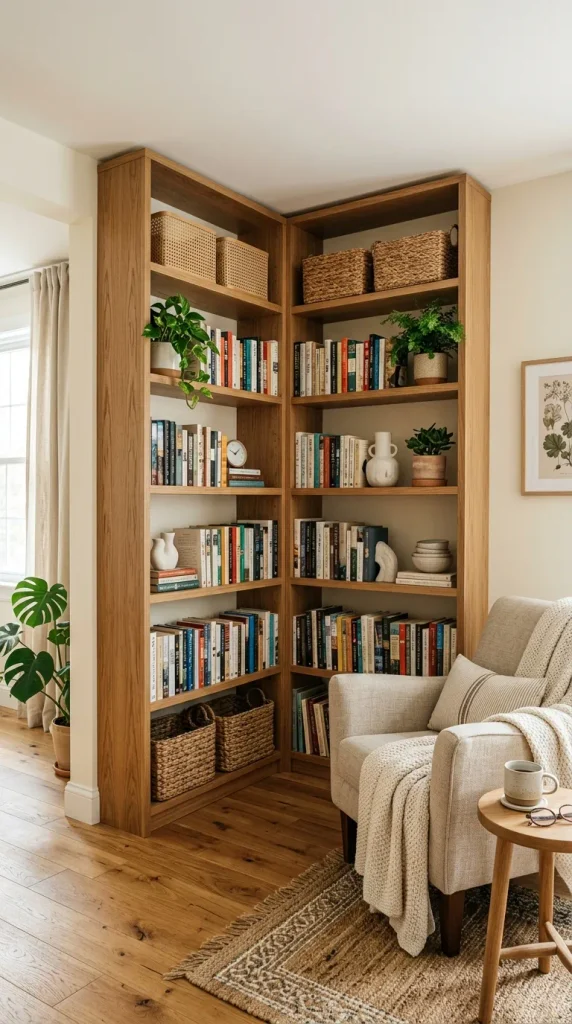
If you want maximum storage, a floor-to-ceiling corner bookshelf can turn an empty wall into a dramatic home library.
Build a series of shelves vertically from near the floor to close to the ceiling. The design can follow the shape of the corner, creating a continuous storage area.
For a classic appearance, paint the shelves the same color as the walls. This makes the bookshelf feel built-in rather than added afterward.
If you prefer contrast, use natural wood against a white wall or dark shelving against a light neutral wall.
Use the lower shelves for larger books and storage baskets, while the upper shelves can display decorative objects.
Materials Used
- Plywood or pine boards
- Wood screws
- Wall anchors
- Corner supports
- Drill
- Saw
- Sandpaper
- Primer and paint
DIY Tip
Because tall shelving can become heavy, secure it properly to the wall. Don’t rely only on the shelf’s weight to keep it stable.
3. Ladder-Style Corner Bookshelf
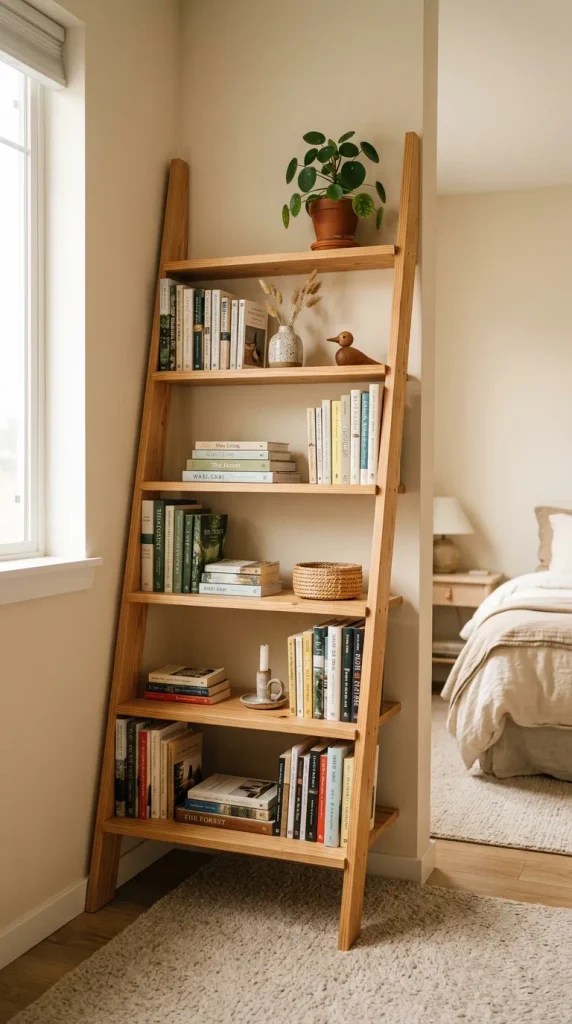
A ladder-style bookshelf is a simple and stylish DIY project that works particularly well in small spaces.
The bookshelf has vertical side rails with horizontal shelves that become wider toward the bottom. When positioned in a corner, the angled structure creates an attractive architectural feature.
You can build the frame from pine boards and use thinner wooden planks for the shelves.
Paint the entire unit white for a clean minimalist look or use a natural wood finish for a cozy rustic appearance.
The lower shelves can hold larger books and baskets, while the upper shelves can display smaller books, plants, and decorative objects.
Materials Used
- Pine boards
- Wooden shelves
- Wood screws
- Drill
- Saw
- Wood glue
- Sandpaper
- Paint or stain
DIY Tip
Use a level while installing each shelf to ensure the final structure looks straight and balanced.
4. Rustic Reclaimed Wood Corner Bookshelf
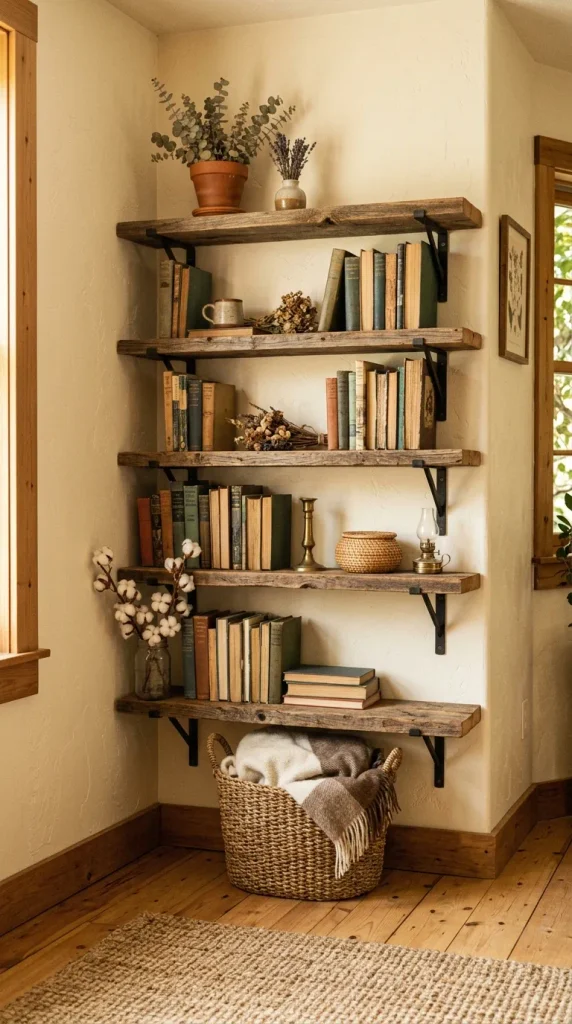
For a warm farmhouse or rustic interior, create your corner bookshelf from reclaimed wood.
Old wooden boards can give the project natural character through their knots, grain patterns, and slightly weathered appearance.
Cut the boards into shelves that fit your corner and mount them using black metal brackets or simple wooden supports.
You don’t need to make every shelf identical. Slight variations in wood texture can actually make the design more interesting.
Decorate the shelves with books, small ceramic pots, dried flowers, woven baskets, and vintage-inspired accessories.
Materials Used
- Reclaimed wood boards
- Metal brackets
- Screws
- Drill
- Sandpaper
- Wood conditioner
- Optional wood stain
DIY Tip
Sand reclaimed wood carefully and inspect it for loose nails, splinters, or damaged sections before using it indoors.
5. DIY Corner Bookshelf With Drawers
If you want both open storage and hidden storage, combine bookshelves with small drawers or cabinets.
The lower portion can contain one or two drawers for items that you don’t want on display. Open shelves above can hold books and decorative accessories.
This is especially useful in bedrooms, home offices, and living rooms where storage needs extend beyond books.
Use simple drawer fronts for a modern appearance or decorative handles for a more traditional style.
Paint the entire unit one color so the drawers and shelves feel like one cohesive piece.
Materials Used
- Wooden boards
- Plywood
- Drawer boxes
- Drawer slides
- Screws
- Handles
- Wood glue
- Paint
- Drill
DIY Tip
Keep the lower storage section deeper than the upper shelves if you want to store larger items.
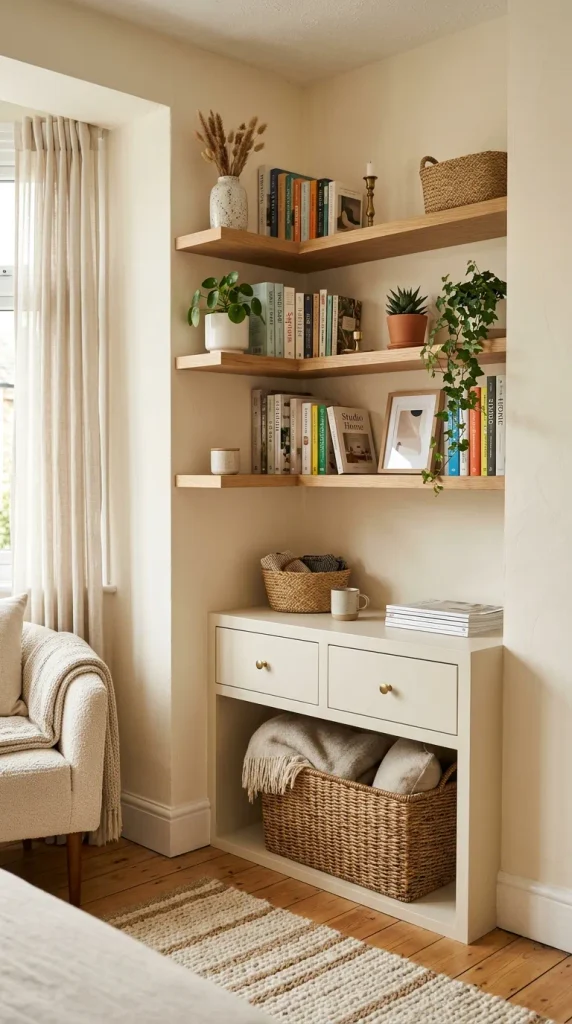
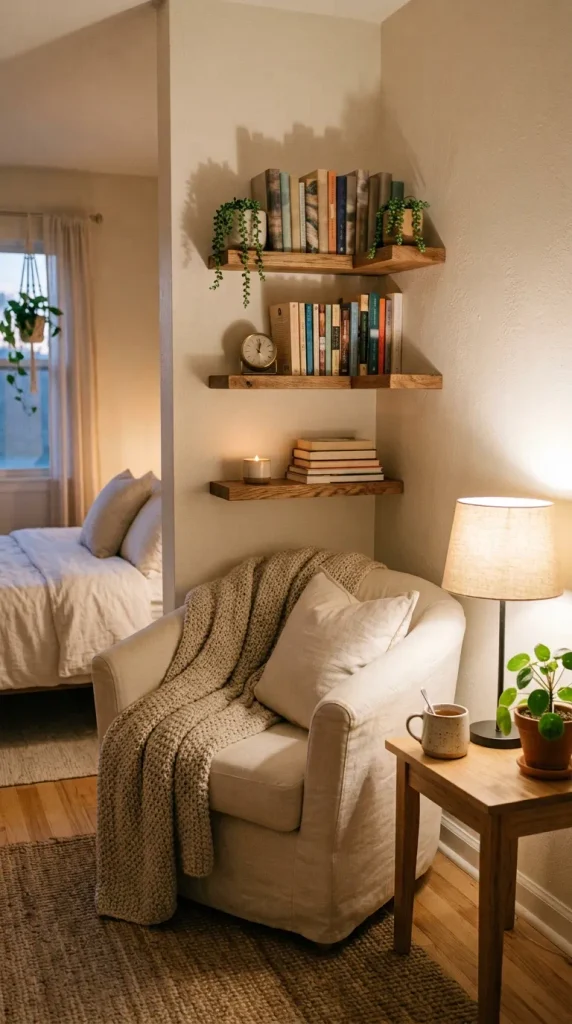
6. Small Corner Bookshelf for a Reading Nook
A small corner bookshelf can become the perfect companion to a cozy reading nook.
Instead of building a large unit, install three to five compact shelves beside a reading chair. Keep the shelves at a height that is easy to reach while sitting.
Place your favorite books on the shelves along with a small lamp, ceramic mug, candle, and tiny plant.
A soft rug underneath the chair can visually connect the bookshelf and seating area.
This idea is perfect for bedrooms, living rooms, children’s rooms, and small apartments.
Materials Used
- Small wooden shelves
- Brackets
- Screws
- Wall anchors
- Reading chair
- Small lamp
- Decorative accessories
DIY Tip
Leave some space between the chair and shelves so the area doesn’t feel cramped.
7. DIY Corner Bookshelf With Hidden Lighting
Add warm LED lighting underneath each shelf to create a cozy and sophisticated display.
You can use simple floating corner shelves and install thin LED strip lights underneath them.
The lighting will illuminate the books and decorative accessories while creating a warm glow on the wall.
This design looks particularly beautiful in bedrooms and living rooms during the evening.
Choose warm white LEDs rather than cool white lighting for a softer atmosphere.
Hide the wires along the back or underside of the shelves for a clean appearance.
Materials Used
- Wooden shelves
- Shelf brackets
- LED strip lights
- Screws
- Wall anchors
- Cable clips
- Drill
- Optional wood stain or paint
DIY Tip
Plan the lighting wiring before permanently attaching the shelves so you can keep cables hidden.
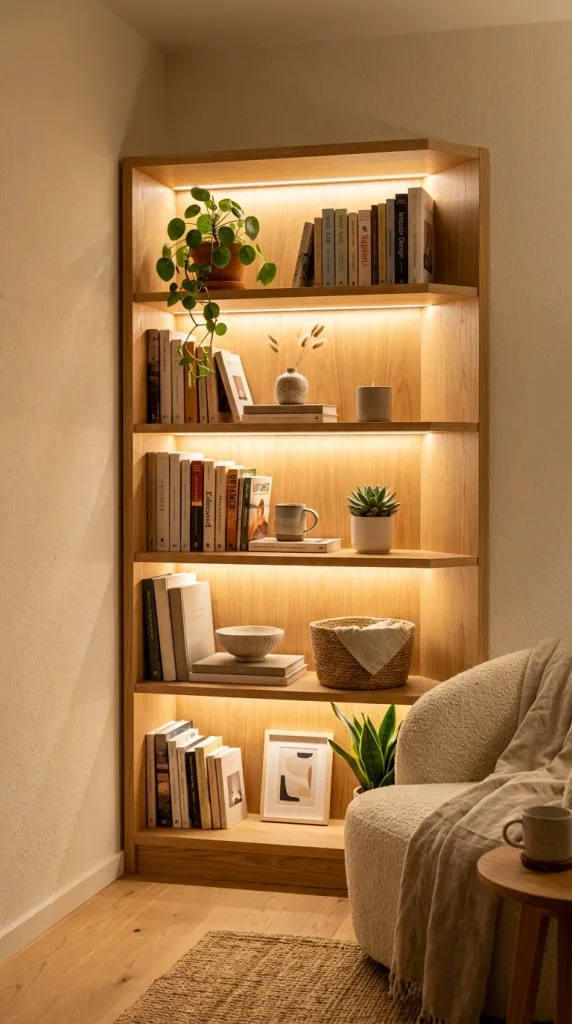
8. DIY Corner Bookshelf With Plant Display
Combine books and greenery to create a fresh botanical corner.
Build several wooden shelves into the corner and alternate books with small plants. Trailing plants can be positioned on upper shelves so their leaves fall naturally toward the lower levels.
Use terracotta pots for a rustic appearance, white ceramic planters for a minimalist style, or woven baskets for a boho look.
Keep the plant selection appropriate for the amount of natural light available in the room.
The combination of natural wood, green foliage, and books creates a warm and relaxing atmosphere.
Materials Used
- Wooden shelves
- Brackets
- Indoor plants
- Plant pots
- Books
- Small decorative objects
- Wall anchors
DIY Tip
Place plants that require more light closer to windows and use suitable low-light varieties in darker corners.
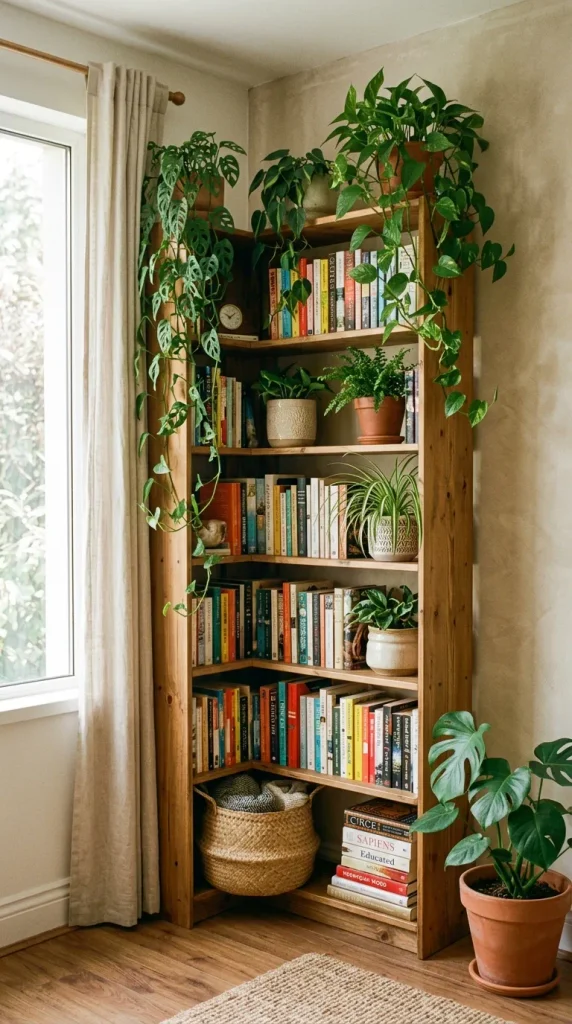
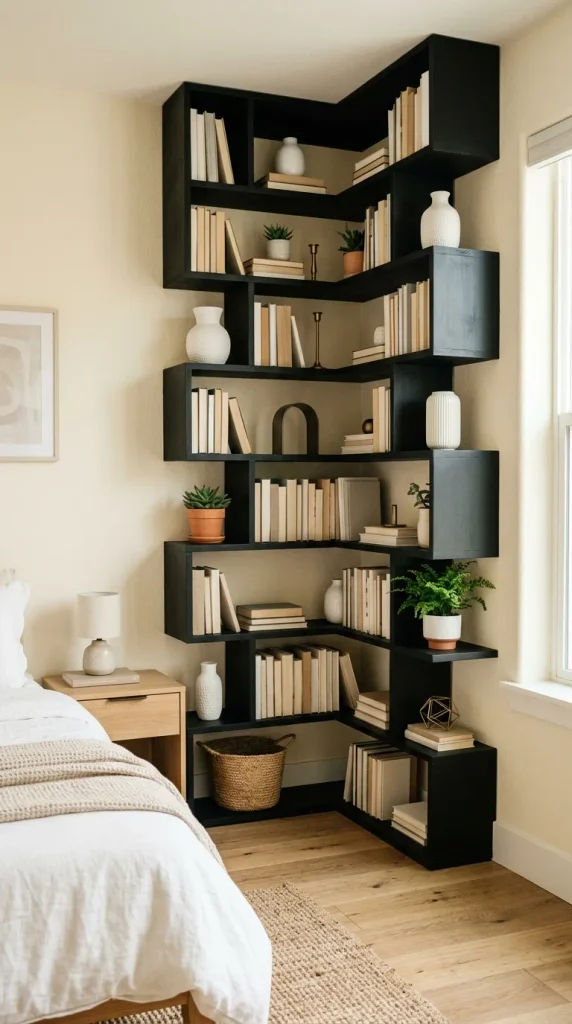
9. Modern Black Corner Bookshelf
For a dramatic contemporary look, create a corner bookshelf using black-painted wood.
Simple black shelves can create a striking contrast against white, cream, beige, or light gray walls.
Use clean lines and minimal brackets to maintain a modern appearance.
Decorate the shelves with books, white ceramics, small plants, metallic accessories, and simple artwork.
The black shelving becomes part of the room’s architecture while the lighter accessories prevent the corner from feeling too heavy.
Materials Used
- Wooden boards
- Black paint
- Primer
- Shelf brackets
- Screws
- Wall anchors
- Sandpaper
- Drill
DIY Tip
Use a matte or satin finish instead of a highly glossy paint if you want a more sophisticated modern look.
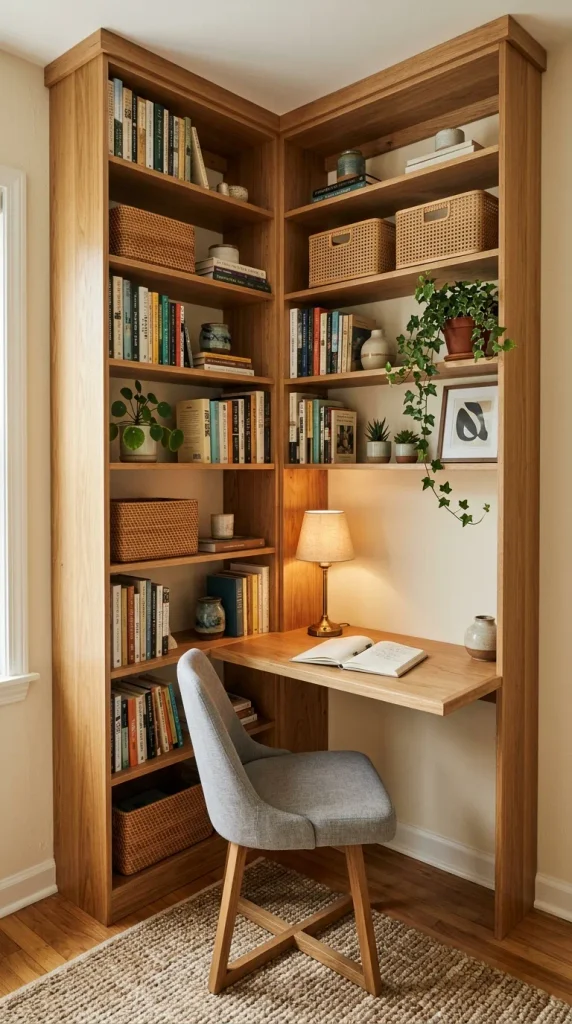
10. DIY Built-In Corner Bookshelf With Desk
For a multifunctional space, combine your corner bookshelf with a small built-in desk.
Install shelves vertically on both sides of the corner and add a wooden desktop between or underneath them.
This creates a compact home office and library in one area.
Use the shelves for books, baskets, plants, and office accessories. Keep the desk surface relatively clear so it remains practical.
Choose a consistent material and finish throughout the project so the desk and bookshelf feel like one custom-built unit.
This design is especially useful for bedrooms, study rooms, and small apartments.
Materials Used
- Plywood or pine boards
- Wooden desktop
- Shelf supports
- Screws
- Wall anchors
- Drill
- Saw
- Wood glue
- Paint or stain
- Desk accessories
DIY Tip
Before cutting the desktop, measure the corner carefully and make sure there is enough legroom underneath.
How to Build a DIY Corner Bookshelf Step by Step
Step 1: Measure the Corner
Measure both walls, available floor space, ceiling height, and the depth you want for your shelves.
Step 2: Choose Your Design
Decide whether you want floating shelves, a ladder design, a built-in unit, or a full floor-to-ceiling bookshelf.
Step 3: Select Your Materials
Pine, plywood, reclaimed wood, and MDF can all work depending on the design and finish.
Step 4: Create a Simple Plan
Sketch the shelf arrangement before cutting anything. Mark shelf heights and widths.
Step 5: Cut the Wood
Cut each shelf according to your measurements. Sand all exposed edges.
Step 6: Finish the Wood
Paint, stain, or seal the shelves before installation if that makes the project easier.
Step 7: Mark the Wall
Use a pencil and level to mark exactly where each bracket or support will go.
Step 8: Install the Supports
Secure brackets or mounting hardware into appropriate wall points. Use suitable anchors for your wall type.
Step 9: Install the Shelves
Place each shelf onto its supports and make sure it is level before securing it.
Step 10: Style the Bookshelf
Arrange books first, then add plants and decorative objects. Leave some empty space for a clean appearance.
Materials Guide for DIY Corner Bookshelves
Wood
Pine is affordable and easy to work with. Reclaimed wood provides rustic character, while plywood can work well for larger built-in designs.
Brackets
Metal brackets provide strong support and can become part of the design. Concealed brackets create a cleaner floating appearance.
Paint
White, cream, beige, black, and muted green are versatile options for home interiors.
Wood Stain
A natural wood stain can emphasize grain and create warmth without covering the material completely.
Lighting
Warm LED strips are useful for creating an atmospheric bookshelf display.
Decorative Accessories
Books, plants, baskets, ceramic objects, candles, framed artwork, and small sculptures can make your DIY shelf feel complete.
Proper Pinterest-Style Pattern for DIY Corner Bookshelves
A Pinterest-worthy corner bookshelf should balance function, texture, height, and negative space.
A simple styling formula is:
Books + Plant + Decorative Object + Empty Space
For example, place several books vertically on one shelf, add a small stack horizontally on another, and introduce a plant or ceramic vase nearby.
Avoid placing identical objects on every shelf. Variation makes the bookshelf look collected and natural.
You can also use a repeating color palette such as:
Natural Wood + Cream + Green
or
White + Beige + Gold
or
Black + White + Green
This creates visual consistency without making the shelf look overly coordinated.
Tips for Making a DIY Corner Bookshelf Look Expensive
- Sand all visible wood edges carefully.
- Choose one high-quality paint or stain finish.
- Use consistent hardware.
- Hide unnecessary cables.
- Keep shelf spacing visually balanced.
- Mix vertical and horizontal books.
- Add one or two plants.
- Include a few high-quality ceramic or glass pieces.
- Avoid filling every shelf.
- Match the shelf finish with existing furniture.
- Use warm lighting for evening ambiance.
- Secure tall shelving properly to the wall.
Final Thoughts
A DIY corner bookshelf is a practical way to transform an unused corner into a beautiful storage and display area. Whether you choose simple floating shelves, reclaimed wood, a ladder design, hidden lighting, or a full built-in library, the project can be adapted to fit your space and personal style.
The most important part is careful planning. Measure the corner accurately, choose materials that suit the project, and make sure the shelving is properly secured before adding books.
Once the structure is complete, styling becomes the fun part. Combine books with plants, ceramics, baskets, artwork, and warm lighting to create a corner that feels personal and inviting.
With a thoughtful design and a little DIY creativity, even the smallest corner can become a functional and Pinterest-worthy feature in your home.





Leave a Reply