
Introduction
A well-organized closet can make your daily routine easier while adding beauty and style to your bedroom. Whether you have a small wardrobe, a walk-in closet, or a simple built-in storage space, a few creative DIY projects can completely transform its appearance. You don’t need expensive custom cabinets or professional help to create a closet that looks organized, elegant, and functional. With affordable materials and smart storage ideas, you can design a space that suits your needs and personal style.
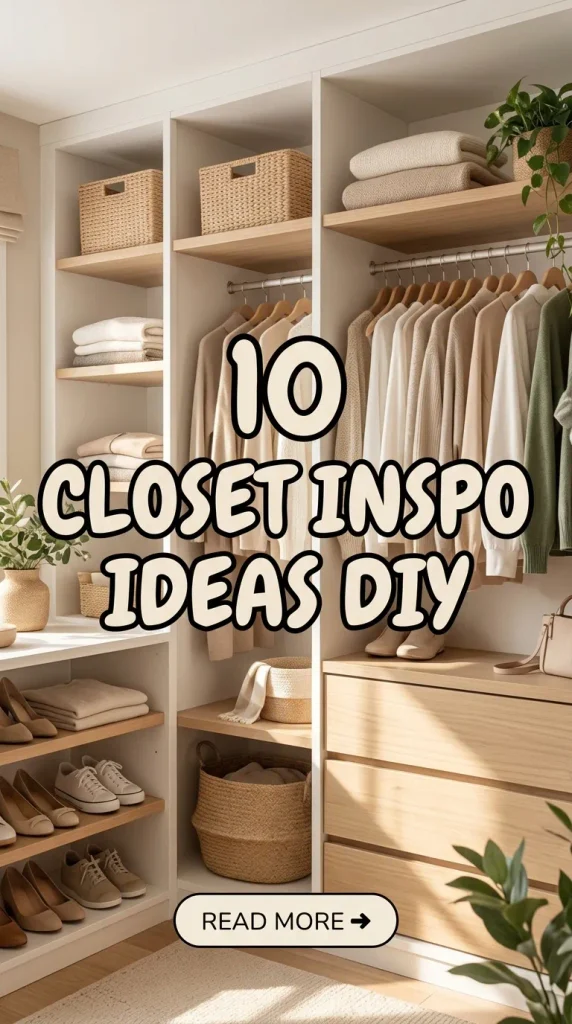
DIY closet makeovers are perfect for anyone who wants to improve storage without spending too much money. Simple changes, such as adding shelves, installing hooks, organizing drawers, or replacing old handles, can make a noticeable difference. You can also use matching hangers, decorative baskets, and practical organizers to create a coordinated look. These projects allow you to customize your closet according to the available space, the clothes you own, and the accessories you use every day.
In this article, you’ll discover 10 closet inspo ideas DIY projects that combine style, creativity, and functionality. From minimalist closet makeovers and budget-friendly walk-in closets to clever shoe storage and aesthetic lighting, these ideas will help you make the most of your available space. Whether you’re decorating a rental, upgrading a small wardrobe, or creating your dream closet on a budget, you’ll find practical inspiration to help you get started.
1. DIY Minimalist Closet Makeover
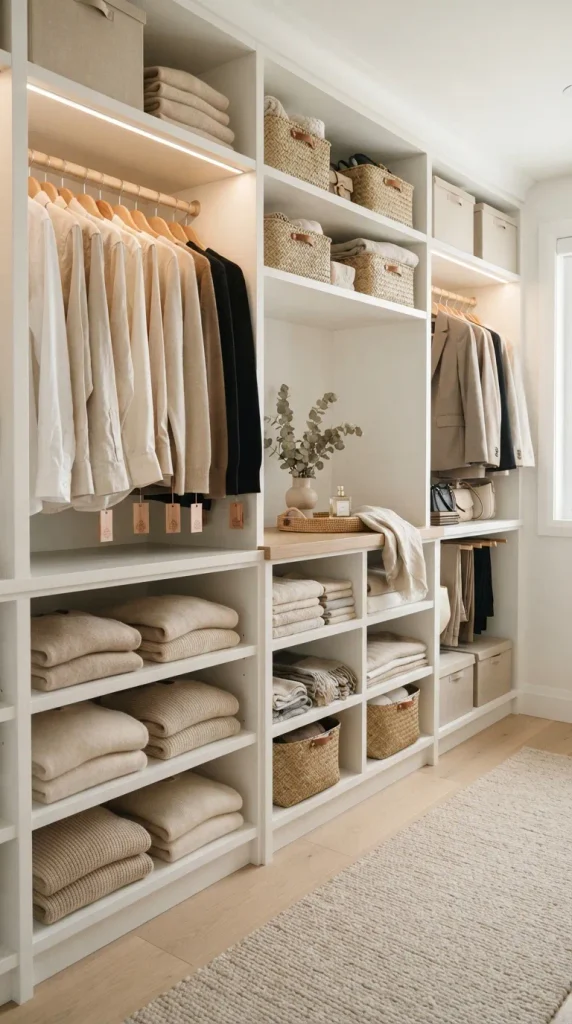
A minimalist closet is an excellent choice if you love clean lines, neutral colors, and clutter-free spaces. This DIY project focuses on keeping your closet simple while making every item easy to find. You can transform an ordinary wardrobe by removing unnecessary belongings, organizing clothes by category, and using coordinated storage accessories.
Start by taking everything out of your closet and sorting your clothing into categories such as shirts, trousers, dresses, jackets, and everyday essentials. Donate or pass along items you no longer wear, and keep the clothing you genuinely need. Once your closet is decluttered, arrange everything neatly so similar items are grouped together.
To create a minimalist appearance, choose slim hangers in matching colors and use neutral storage baskets in shades such as white, beige, cream, or light gray. If your shelves look worn or outdated, consider painting them in a light, coordinating color. Small labels can also help you identify storage containers without creating visual clutter.
Materials needed: Matching hangers, storage baskets, labels, paint, a paintbrush, and shelf organizers.
DIY tip: Stick to two or three main colors to create a calm, cohesive look. Avoid filling every shelf with decorative accessories because open space is part of the minimalist aesthetic.
2. DIY Small Closet Organization
Small closets can quickly become crowded, especially when you have limited hanging space and several types of clothing to store. The key to improving a small closet is to use vertical space, organize items efficiently, and make the most of areas that are often overlooked.
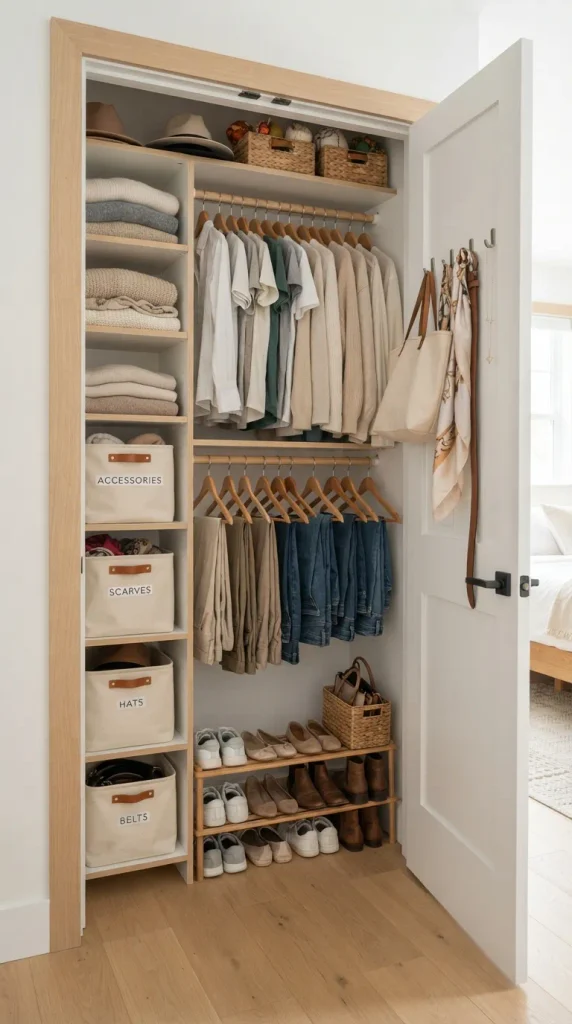
Begin by measuring the inside of your closet to determine where you can add storage. If you have enough vertical clearance, install a second hanging rod beneath shorter garments. This creates two levels for shirts, skirts, trousers, and other clothing that doesn’t require the full height of the closet.
Use shelf dividers to keep folded sweaters and jeans in neat stacks. Hanging organizers can provide additional space for shoes, bags, and accessories, while hooks attached to the inside of the door can hold belts, scarves, and everyday items. Clear storage boxes are useful for small accessories because you can see what’s inside without opening each container.
Try to keep frequently used clothing at eye level and move seasonal items to higher shelves. This makes your closet easier to use and prevents everyday essentials from getting buried behind less frequently worn belongings.
Materials needed: Hanging rods, shelf dividers, door hooks, hanging organizers, and storage boxes.
DIY tip: Measure everything before purchasing organizers. Even a few centimeters can determine whether a storage accessory fits comfortably inside a small closet.
3. DIY Walk-In Closet on a Budget
A walk-in closet can feel luxurious without requiring expensive custom cabinetry. With affordable clothing rails, freestanding shelves, and attractive storage baskets, you can create a boutique-inspired dressing area that is both stylish and practical.
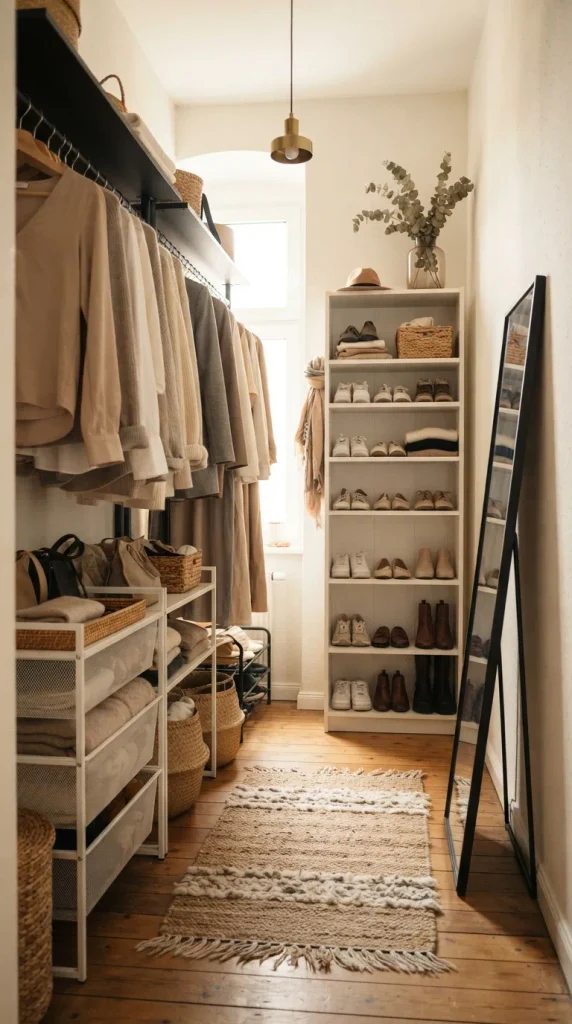
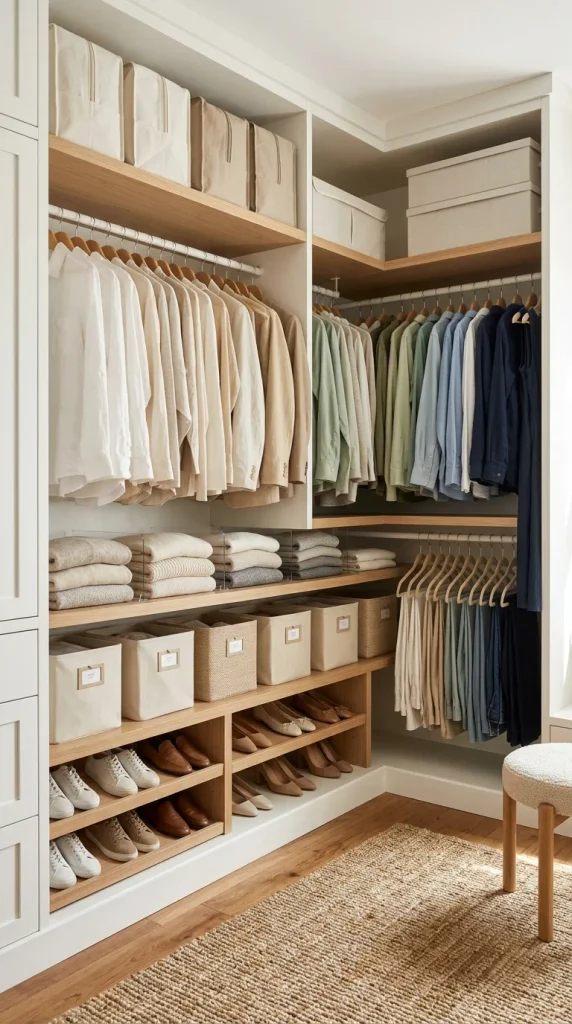
Start by planning separate zones for hanging clothes, folded garments, shoes, handbags, and accessories. Use a clothing rail for dresses, shirts, jackets, and trousers that need to remain wrinkle-free. Add shelving units beside or beneath the rail to create storage for folded clothing and shoes.
Matching baskets can hide smaller items and make open shelves look more organized. If you have enough floor space, add a small rug and a full-length mirror to create a comfortable dressing area. A compact stool can also be useful if the layout allows it without obstructing access.
Lighting plays an important role in making a budget closet look polished. Battery-powered lights or suitable LED fixtures can brighten darker corners and help you see your clothing clearly. Choose warm or neutral lighting to complement the colors of your storage furniture.
Materials needed: Clothing rails, freestanding shelves, baskets, a full-length mirror, LED lighting, and a small rug.
DIY tip: Plan your layout before buying anything. Measure the floor, wall height, and walking space to avoid overcrowding the room.
4. DIY Closet Shoe Organizer
Shoes often take up valuable closet space, particularly when they are left in random piles on the floor. A dedicated shoe organizer can make your closet look tidier while helping you find the right pair quickly.
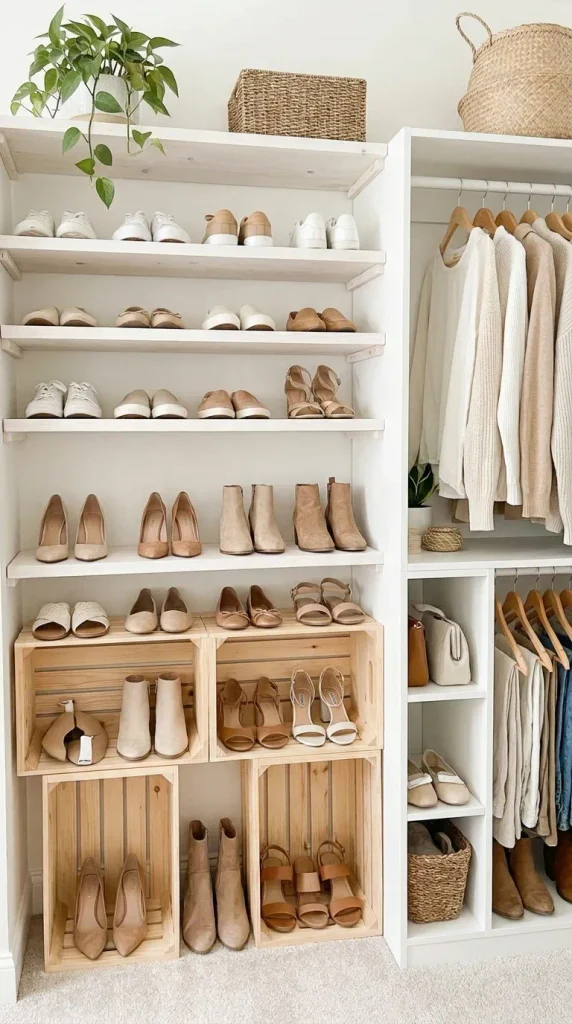
One simple DIY solution is to install a series of shelves beneath your hanging clothes. Measure the available space and choose shelf heights that suit the shoes you own. Flat shoes and sneakers may fit on shorter shelves, while boots and taller footwear require additional clearance.
If you prefer a more creative approach, sturdy wooden crates can be repurposed as shoe cubbies. Sand rough edges and finish the wood with a suitable paint or protective coating. Arrange the crates securely so they remain stable during everyday use.
For closets with limited floor space, use a vertical shoe organizer or clear shoe boxes that can be stacked safely. Keep your most frequently worn shoes on the lowest, easiest-to-reach shelves and place occasional footwear higher up.
Materials needed: Wooden shelves or crates, measuring tape, screws, shelf liners, and storage boxes.
DIY tip: Clean and dry shoes before putting them away. Grouping footwear by type or color can also make the arrangement look more intentional.
5. DIY Aesthetic Closet with LED Lighting
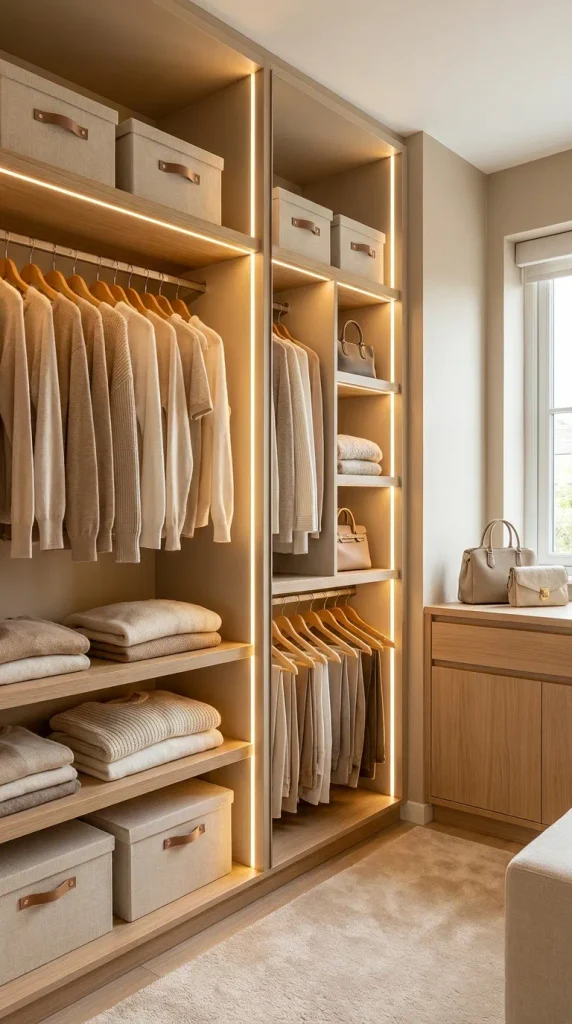
Lighting can transform a basic closet into a stylish, inviting space. Even if your wardrobe has plain shelves and simple hanging rods, adding well-placed lighting can make the entire area feel more polished.
Start by identifying the darkest parts of your closet. The underside of shelves, the back corners, and areas near hanging rails are often good places for additional illumination. LED strip lights or battery-powered puck lights can be practical options, depending on the closet’s layout and available power sources.
Choose warm-white lighting for a cozy atmosphere or neutral-white lighting for a bright, modern appearance. Coordinate the lighting with matching hangers, neatly arranged clothing, and simple storage boxes to create a cohesive design.
Before installing any lights, clean the mounting surface and follow the manufacturer’s instructions. Use products intended for the installation environment, keep wiring organized, and avoid placing lights where they could overheat or come into contact with clothing.
Materials needed: Suitable LED strip lights or puck lights, mounting clips, matching hangers, and storage boxes.
DIY tip: Test the light placement before attaching anything permanently. This helps you avoid dark spots and ensures the light reaches the areas you use most.
6. DIY Closet Built-In Shelves
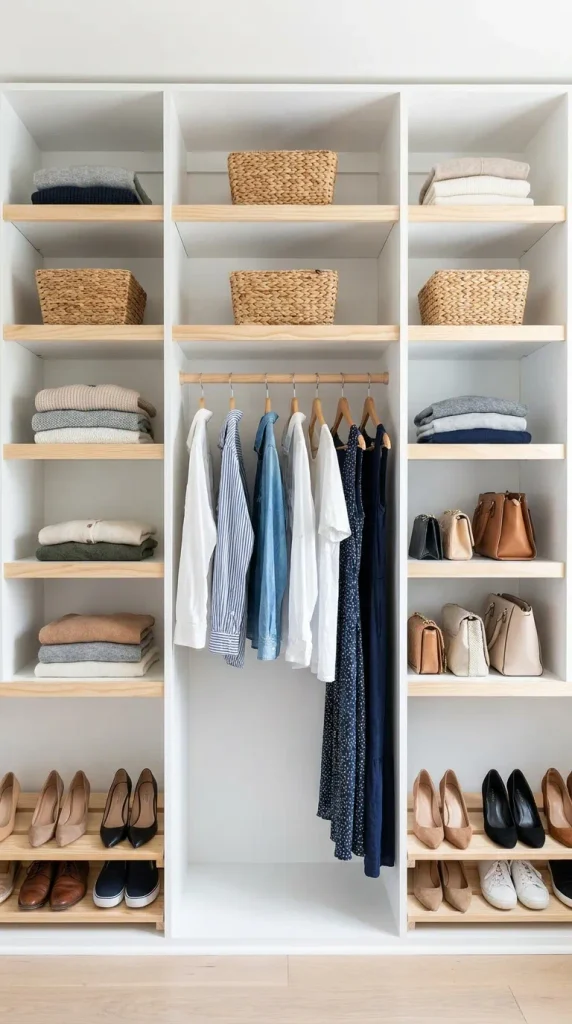
Built-in-style shelving can make an ordinary closet look custom-designed while providing more room for clothes and accessories. This project works particularly well if your current closet has unused wall space or a single hanging rod with little room for folded garments.
Begin by measuring the width, height, and depth of the available area. Decide how much space you need for folded clothing, handbags, shoes, and storage baskets. Sketch a basic layout before purchasing shelf boards or a ready-made shelving system.
Install shelves at practical heights so you can reach everyday items comfortably. Use the upper shelves for seasonal clothing or belongings you rarely need, and keep frequently used items within easy reach. If you want a seamless appearance, paint the shelves to match the closet walls. Natural wood finishes can create a warmer, more decorative look.
If you’re renting or don’t want to drill into the walls, a freestanding shelving unit can provide a similar effect. For wall-mounted shelves, use appropriate fixings for the wall type and expected weight. Tall freestanding units should also be secured against tipping.
Materials needed: Shelf boards, brackets, screws, measuring tape, a level, and paint if desired.
DIY tip: Check measurements twice before cutting boards or installing brackets. Evenly spaced shelves create a more professional finish and help prevent wasted space.
7. DIY Closet Drawer Organization
Closet drawers can become cluttered when different types of clothing are stored together. DIY drawer organization helps you separate smaller items, use available space efficiently, and make your daily routine less stressful.
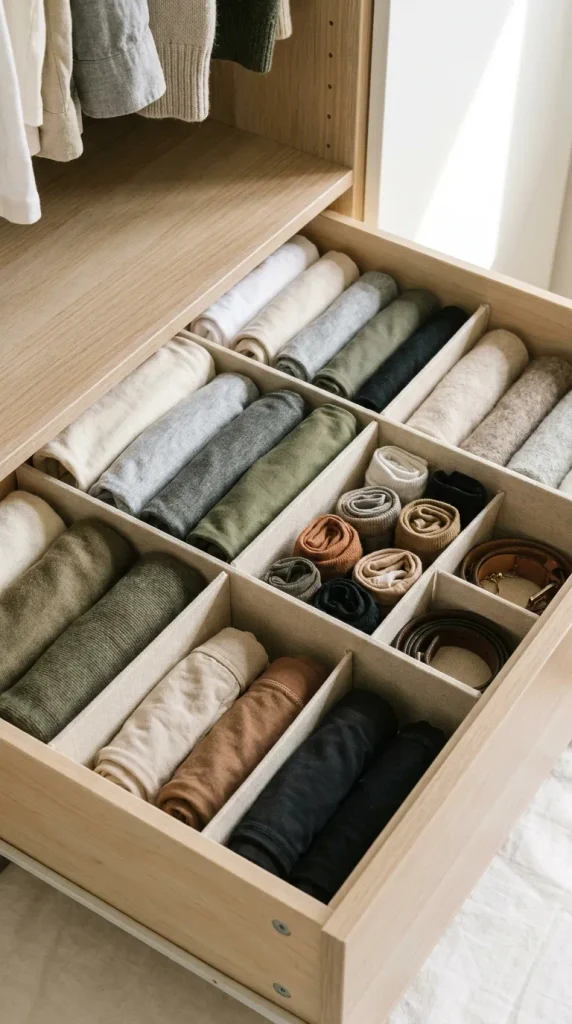
Start by emptying one drawer at a time. Remove items you no longer use, then group the remaining clothing by category. Socks, underwear, pajamas, workout clothes, and accessories can each have their own designated section.
You can make inexpensive drawer dividers using sturdy cardboard covered with decorative paper, or choose adjustable dividers that can be rearranged whenever your storage needs change. Small fabric boxes also work well for separating delicate items and accessories.
Fold clothing in a way that allows you to see each item easily. Vertical folding can work especially well for T-shirts, leggings, and lightweight clothing because it reduces the need to move one pile to reach another.
Materials needed: Drawer dividers, small fabric boxes, sturdy cardboard, decorative paper, scissors, and a measuring tape.
DIY tip: Measure the inside of each drawer before making dividers. Leave enough room to open and close drawers smoothly without catching the fabric or clothing.
8. DIY Closet Door Makeover
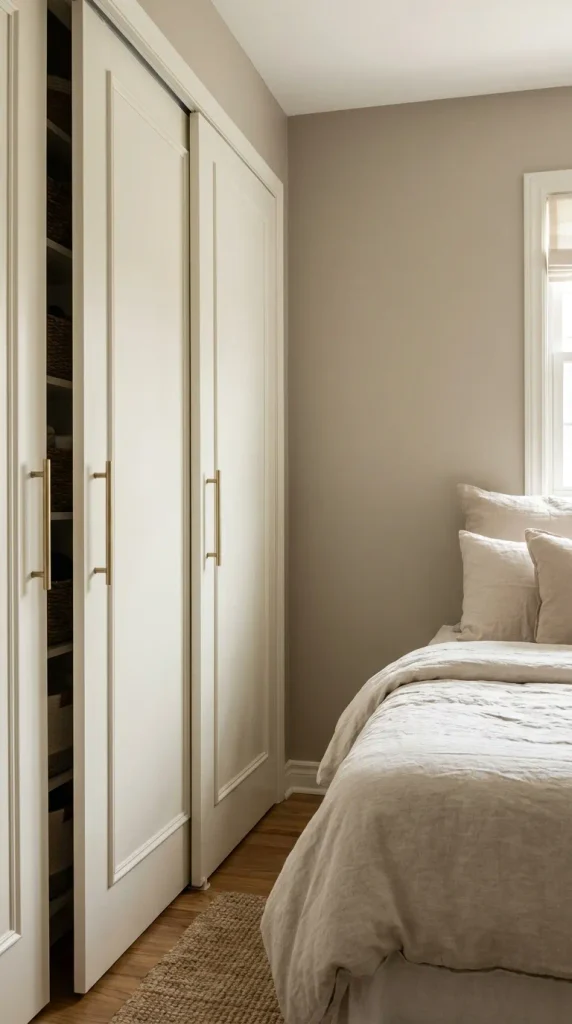
Closet doors can have a surprisingly big impact on the appearance of a bedroom. If your doors look outdated, scratched, or plain, a simple makeover can refresh the entire space without replacing the wardrobe.
One option is to paint the doors in a color that complements your bedroom. Soft white, warm beige, muted green, and pale gray can create a clean, modern appearance. If you prefer a more decorative style, add trim to create the look of classic paneled doors.
Replacing old handles with new hardware is another easy upgrade. Brushed brass can create a warm, elegant effect, while matte black works well in modern or industrial-inspired interiors. Choose handles that fit the existing holes whenever possible to reduce the amount of work required.
For renters, removable wallpaper or peel-and-stick panels may provide a temporary alternative. Test a small area first to make sure the material can be removed without damaging the surface.
Materials needed: Paint, paintbrushes, painter’s tape, decorative trim, replacement handles, or removable wallpaper.
DIY tip: Clean the doors thoroughly before painting or applying adhesive products. Proper surface preparation helps the finished makeover look smoother and last longer.
9. DIY Handbag and Accessory Display
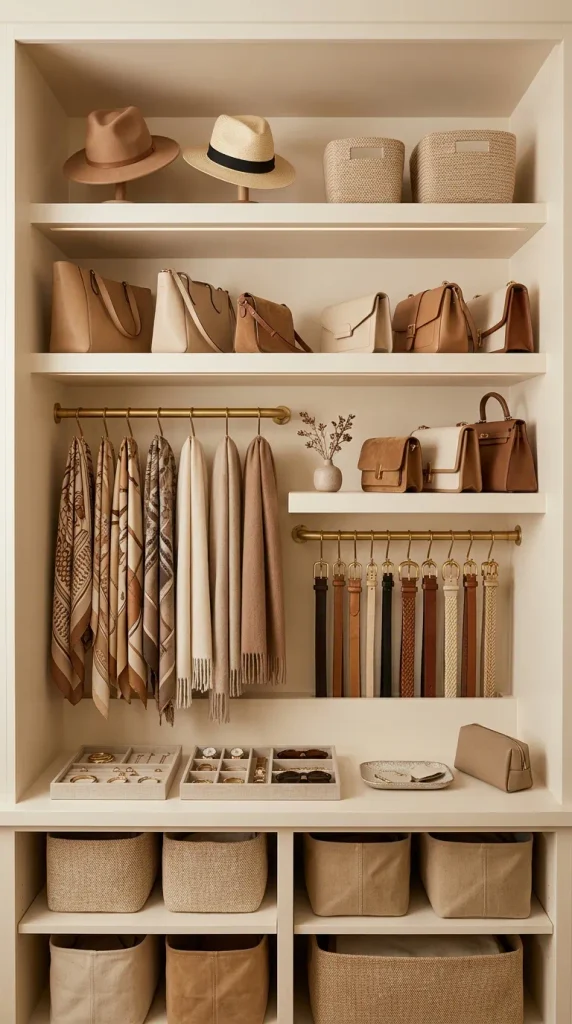
Handbags, scarves, belts, hats, and jewelry can easily become tangled or difficult to find when stored without a system. Creating a dedicated accessory area keeps these items organized while adding a boutique-inspired touch to your closet.
Start by choosing a section of wall, shelf, or closet door that can accommodate your accessories. Install sturdy hooks for belts and scarves, and use small shelves or cubbies for handbags. Make sure hooks are suitable for the weight of the items and that the mounting method is appropriate for the surface.
Small trays and divided organizers can keep jewelry, hair accessories, and other compact belongings separated. Arrange items by type or color so you can quickly identify what you need. If your handbags are valuable or made from delicate materials, store them away from direct sunlight and use suitable supports to help them maintain their shape.
Avoid overcrowding the display. Leaving a little space between accessories makes the area look more organized and prevents items from becoming difficult to remove.
Materials needed: Wall hooks, small shelves, divided trays, drawer organizers, and handbag supports.
DIY tip: Keep your everyday accessories in the most accessible area. Store special-occasion items separately so your daily routine stays simple.
10. DIY Seasonal Closet Refresh
A seasonal closet refresh is an easy DIY project that helps you make better use of your existing storage. Instead of allowing every item to compete for space, organize your closet around the clothing you currently need.
Begin by removing garments that are unsuitable for the current season. Sort them into categories and check for stains, damage, or repairs before storing them. Clothing should be clean and completely dry before being packed away to help prevent unpleasant odors and moisture-related problems.
Use labeled containers for off-season garments and place them on higher shelves or in another suitable storage area. Breathable garment bags can help protect appropriate clothing, while sturdy boxes are useful for accessories and items that can be folded safely. Follow care instructions for delicate fabrics and avoid compressing garments that may lose their shape.
Once you’ve stored seasonal items, rearrange the remaining clothing so everyday essentials are easy to reach. Take the opportunity to donate wearable items you no longer use and make a short list of genuine wardrobe gaps before purchasing anything new.
Materials needed: Storage containers, garment bags, labels, shelf organizers, and laundry supplies.
DIY tip: Label each container clearly with its contents and season. This makes the next wardrobe change quicker and prevents unnecessary searching.
Conclusion
Creating a beautiful, organized closet doesn’t require a large budget or a complete renovation. With these 10 closet inspo ideas DIY projects, you can improve your storage, refresh your closet’s appearance, and make everyday dressing more convenient.
Start with a project that addresses your biggest challenge, whether that’s limited hanging space, cluttered drawers, messy shoes, or poor lighting. As you make improvements, focus on practical storage, coordinated colors, and solutions that fit your available space.
The best DIY closet is one that reflects your personal style while making your daily routine easier. With a little planning and creativity, even a small, simple wardrobe can become a functional and attractive part of your home.


Leave a Reply