
A beautiful mirror can do much more than provide a place to check your reflection. With the right frame, it can become an elegant decorative feature that adds personality, texture, and charm to an entire room. If you love feminine, romantic, vintage, coastal, or glamorous interiors, a pearl mirror frame can be an especially beautiful choice. Even better, you do not need to purchase an expensive designer mirror to achieve the look. With a simple mirror and a few affordable craft materials, you can create your own stunning DIY pearl mirror frame.
Pearls bring a soft, luminous quality to decor. Their rounded shapes and subtle shine can make an ordinary mirror look delicate and luxurious. Depending on how you arrange them, pearl frames can feel sophisticated, vintage-inspired, whimsical, coastal, or modern. You can use traditional white faux pearls, ivory pearls, champagne pearls, pastel beads, or a combination of different sizes to create a completely personalized design.
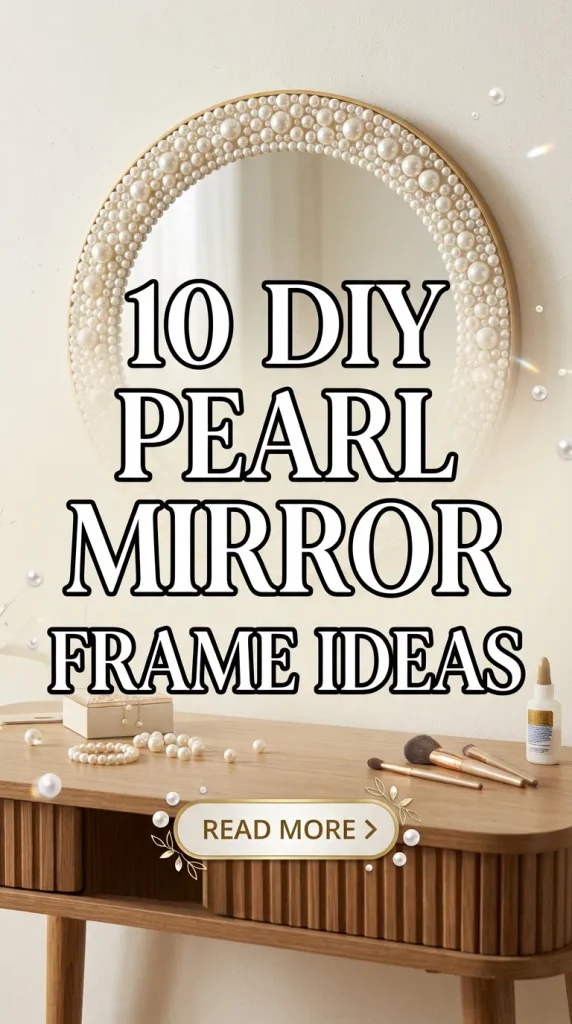
DIY pearl mirror frames are also incredibly versatile. A pearl-framed mirror can work beautifully in a bedroom, bathroom, vanity area, dressing room, entryway, nursery, living room, or creative studio. A small pearl mirror can become a charming accent, while a large framed mirror can serve as the main focal point of a room.
The following 10 DIY pearl mirror frame ideas explore different ways to create this elegant look. Some designs focus on simplicity, while others use layered pearls, floral details, beads, ribbons, shells, or metallic accents. Each idea can be adapted according to your budget, existing decor, and preferred style.
1. Classic White Pearl Mirror Frame
A classic white pearl mirror frame is one of the easiest and most timeless ways to create this look. It works particularly well if you want your DIY project to feel elegant rather than overly decorative. The beauty of this design comes from using one consistent pearl color and arranging the beads neatly around the entire frame.
Start with a plain mirror that already has a simple flat frame, or create a frame using a smooth wooden or MDF base. Paint the base white, ivory, or a very pale neutral shade so that any tiny spaces between the pearls are less noticeable. Allow the paint to dry completely before attaching the pearls.
For the pearl design, choose medium-sized faux pearls with a consistent finish. Apply them in a single row around the outside edge of the mirror. You can place them closely together for a full, luxurious appearance or leave tiny spaces between them for a lighter effect.
A strong craft adhesive is important because the frame will be handled and potentially moved. Apply the adhesive in small sections instead of covering the entire frame at once. This allows you to work gradually and keep the pearls evenly positioned.
This classic style looks beautiful above a bedroom dresser, vanity table, bathroom sink, or entryway console. Pair it with white, cream, beige, blush, or soft gray decor.
For a Pinterest-worthy appearance, style the mirror with a small ceramic vase, perfume bottles, a jewelry dish, candles, or a few delicate flowers. Keep the surrounding accessories minimal so the pearl frame remains the main feature.
The finished mirror should look polished, delicate, and timeless, making this an excellent starting point for anyone creating a pearl mirror for the first time.
2. Double-Layer Pearl Mirror Frame
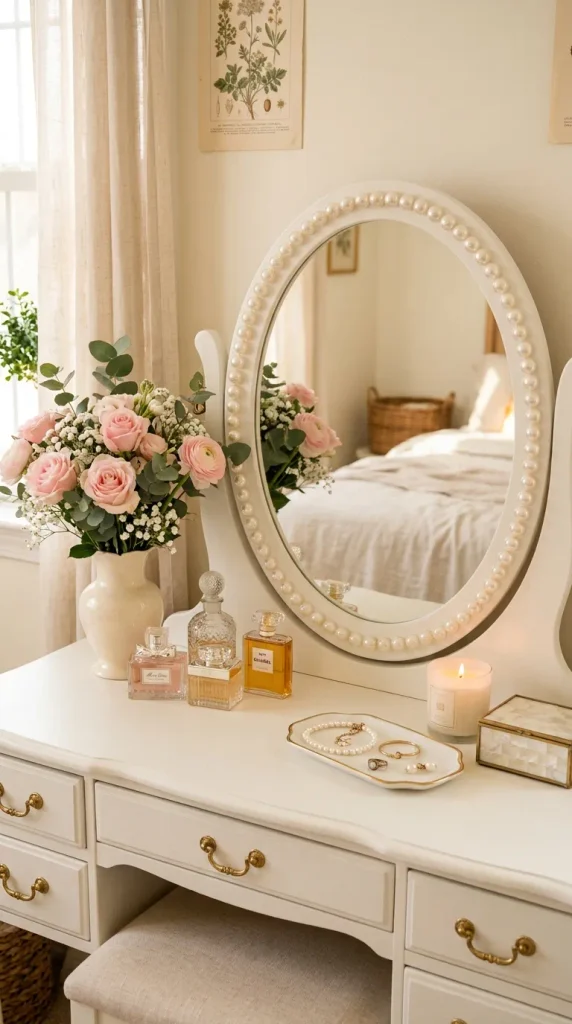
If you want your mirror to make a stronger statement, a double-layer pearl frame can create a fuller and more luxurious appearance. Instead of using only one row of pearls, this design uses two or more layers arranged around the mirror.
Begin with a flat mirror frame or a suitable DIY backing surface. Paint the base in white, cream, champagne, or another color that complements your room.
Choose two different pearl sizes. For example, use medium pearls for the inner row and slightly larger pearls for the outer row. This variation creates depth and prevents the frame from looking completely flat.
Start by attaching the smaller pearls around the edge closest to the mirror. Work slowly around the entire perimeter, checking the spacing as you go. Once the first row is secure, add the larger pearls around the outer edge.
You can arrange the second row directly beside the first or stagger the pearls slightly. A staggered pattern can resemble a delicate beaded border and create more visual movement.
This design works especially well with large rectangular, oval, or arched mirrors. The additional layers give the frame enough presence to work as a focal point in a larger room.
For a glamorous bedroom, pair the mirror with velvet furniture, soft bedding, metallic accents, and warm lighting. In a bathroom, combine it with marble, brushed brass, and white cabinetry.
If you prefer a softer appearance, use ivory and cream pearls rather than bright white. For a more glamorous result, introduce a few champagne or silver pearls into the outer row.
The finished frame should feel dimensional and luxurious while still maintaining the delicate character that makes pearl decor so attractive.
3. Pearl and Gold Mirror Frame
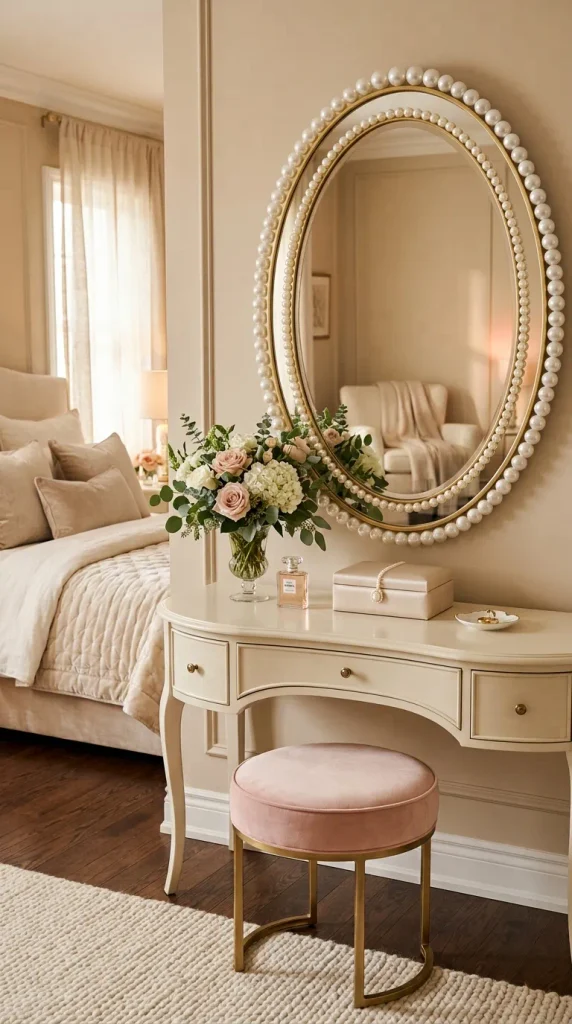
Combining pearls with gold is an excellent way to create a glamorous yet elegant DIY mirror. The warm metallic finish provides contrast against the soft, luminous pearls and gives the frame a more sophisticated appearance.
Begin with a simple mirror frame made from wood, MDF, foam board, or another suitable material. Paint the base with a high-quality gold paint. Brushed gold, champagne gold, or antique gold can all work beautifully depending on your decorating style.
Once the paint has completely dried, begin attaching the pearls. Instead of covering the entire frame with pearls, consider leaving narrow gold sections visible between the rows. This allows the metallic finish to become part of the design.
One effective arrangement is to create a central row of medium-sized white pearls with a thin gold border on either side. Another option is to alternate small gold beads and white pearls around the frame.
This style looks especially beautiful in bedrooms and vanity spaces. Place the mirror above a white or cream dresser and add gold candle holders, a jewelry tray, perfume bottles, and a small floral arrangement.
You can also use this design in an elegant bathroom with marble countertops and gold fixtures. The pearl-and-gold combination works naturally with white stone and warm lighting.
Avoid using too many competing metallic finishes. If gold is the main accent on the mirror, repeat it subtly elsewhere in the room for visual consistency.
Warm lighting is particularly effective because it enhances both the gold and the soft glow of the pearls.
The result is a mirror that feels luxurious without requiring expensive materials. It is an excellent project for anyone who wants a glamorous statement piece with a handmade touch.
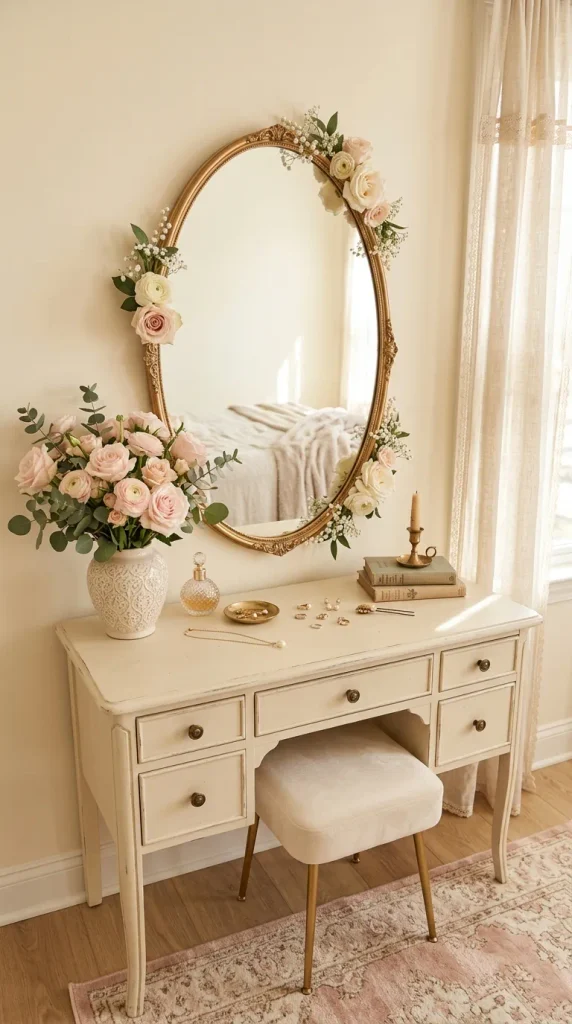
4. Pearl Flower Mirror Frame
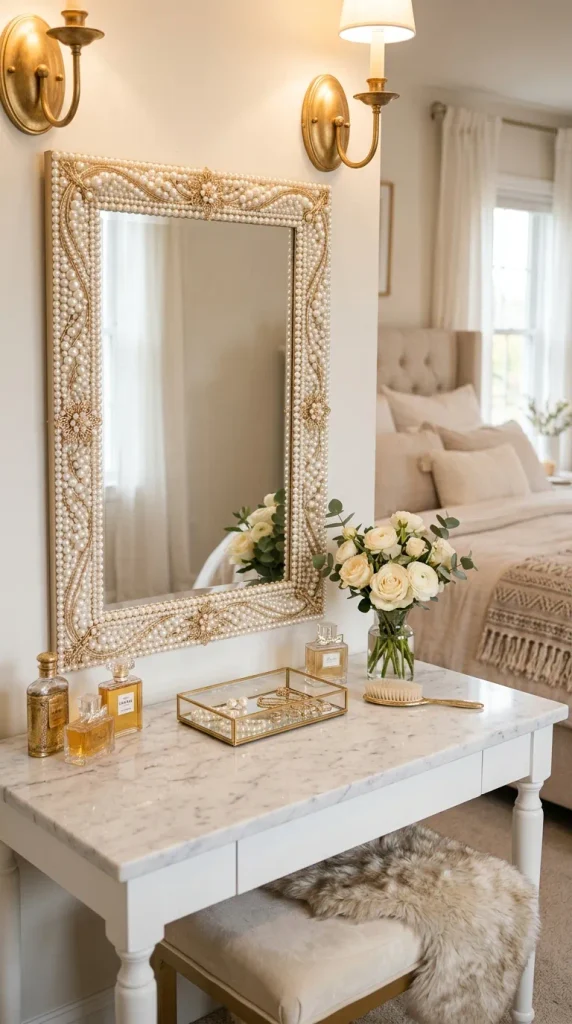
A pearl flower frame adds a romantic and feminine element to a basic mirror by combining pearl beads with delicate floral shapes. This design can be customized to suit bedrooms, nurseries, dressing rooms, or elegant vanity areas.
Begin with a plain mirror frame painted in white, ivory, pale pink, or another soft neutral color. Choose faux pearls in one or two sizes and lightweight decorative flowers or floral embellishments.
Instead of covering the entire frame evenly, create small floral clusters at selected points. For example, place one flower in each corner and surround it with several pearls.
You can also create your own pearl flowers by arranging five or six small pearls in a circular pattern around a central bead. Attach these pearl flowers directly to the frame.
For a more sophisticated design, combine white pearls with tiny blush, champagne, or ivory flowers. Keep the colors soft and coordinated.
An oval or arched mirror is particularly attractive for this style because the curved shape complements the organic appearance of the floral decorations.
This frame can become a beautiful focal point above a bedroom vanity. Add a soft upholstered stool, delicate perfume bottles, a ceramic jewelry dish, and a vase of pale flowers to complete the arrangement.
For a nursery, choose fewer decorative elements and use soft white or pastel colors.
The key is to avoid covering every inch of the frame with flowers. Leaving some plain pearl sections visible will create balance and keep the design elegant.
This idea is perfect if you want a mirror that feels romantic and handmade rather than overly formal.
With careful placement, the combination of pearls and flowers can make even an inexpensive mirror look like a custom decorative piece.
5. Vintage-Inspired Pearl Mirror Frame
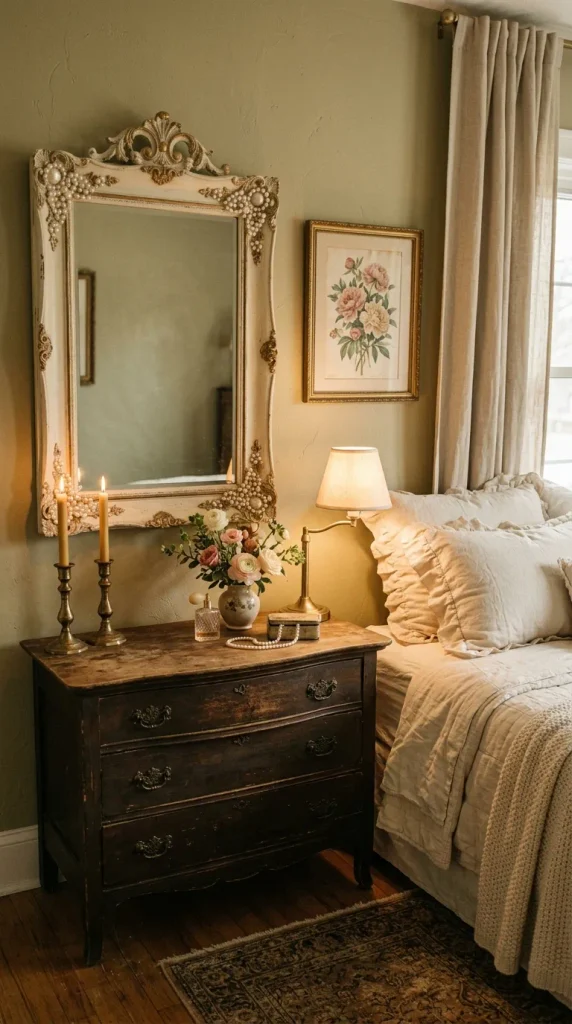
A vintage-inspired pearl mirror frame can bring old-fashioned elegance and character into a room. This design works especially well with antique-style furniture, traditional bedrooms, romantic interiors, and French-inspired decorating.
Start with a mirror that has a decorative wooden or molded frame. If the existing frame is plain, you can add lightweight decorative molding before beginning the pearl work.
Paint the frame in an aged ivory, creamy white, soft beige, or muted champagne shade. For a more authentic vintage appearance, lightly distress selected edges after the paint has dried.
Choose pearls in slightly varied sizes rather than perfectly identical beads. Vintage-inspired designs often look more natural when there is subtle variation.
Attach the pearls around the frame in small clusters rather than one perfectly uniform line. Add a few small decorative beads or antique-style embellishments between selected clusters.
Aged gold or antique brass accents can also be incorporated sparingly.
This mirror looks particularly beautiful above a vintage dresser, console table, or antique vanity. Pair it with linen textiles, floral artwork, brass candlesticks, ceramic vases, and softly colored flowers.
For the lighting, warm lamps or wall sconces can enhance the nostalgic atmosphere.
The goal is not to make the mirror look perfectly new. A slightly aged finish can give the project character and make it feel as though it belongs in a collected, timeless interior.
This design is particularly useful if you enjoy mixing old and new furniture. The pearl details provide softness while the aged frame adds visual history.
A vintage pearl mirror can become a statement piece that feels elegant, personal, and full of character.
6. Coastal Pearl and Shell Mirror Frame
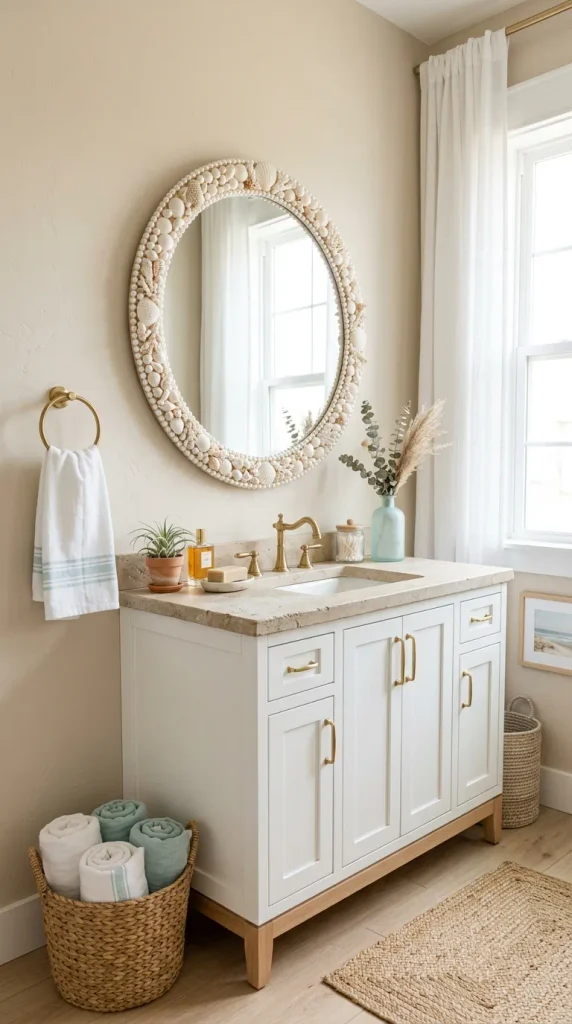
For a beach-inspired interpretation, combine pearls with seashells and natural textures. This design can bring a subtle coastal feeling into a bathroom, bedroom, entryway, or vacation-inspired interior.
Start with a simple wooden mirror frame. Paint it white, sandy beige, pale blue, or leave the wood natural depending on the look you want.
Choose small lightweight shells that can be securely attached to the frame. Avoid using excessively heavy shells, especially if the mirror will be mounted on a wall.
Arrange the shells in small groups and fill the spaces between them with faux pearls. You can create a repeating pattern around the frame or use an intentionally irregular arrangement for a more organic appearance.
White pearls work beautifully with ivory and natural shell colors. You can also introduce pale aqua beads for a subtle ocean-inspired accent.
This mirror pairs naturally with rattan furniture, woven baskets, linen curtains, pale wood, natural stone, and soft blue accessories.
In a bathroom, place it above a white vanity with brushed brass or chrome fixtures. In a bedroom, pair it with white bedding and textured neutral fabrics.
Avoid adding too many obvious beach-themed accessories. A few shells and pearls are enough to communicate the coastal inspiration while keeping the design sophisticated.
For an extra decorative touch, add a narrow rope border around the outer edge of the frame.
The combination of smooth pearls, organic shells, and natural materials creates an interesting contrast.
This DIY idea is especially suitable for anyone who wants coastal decor that feels elegant rather than overly themed.
The finished mirror can provide a soft seaside character while remaining versatile enough to work with neutral everyday interiors.
7. Pink and Blush Pearl Mirror Frame
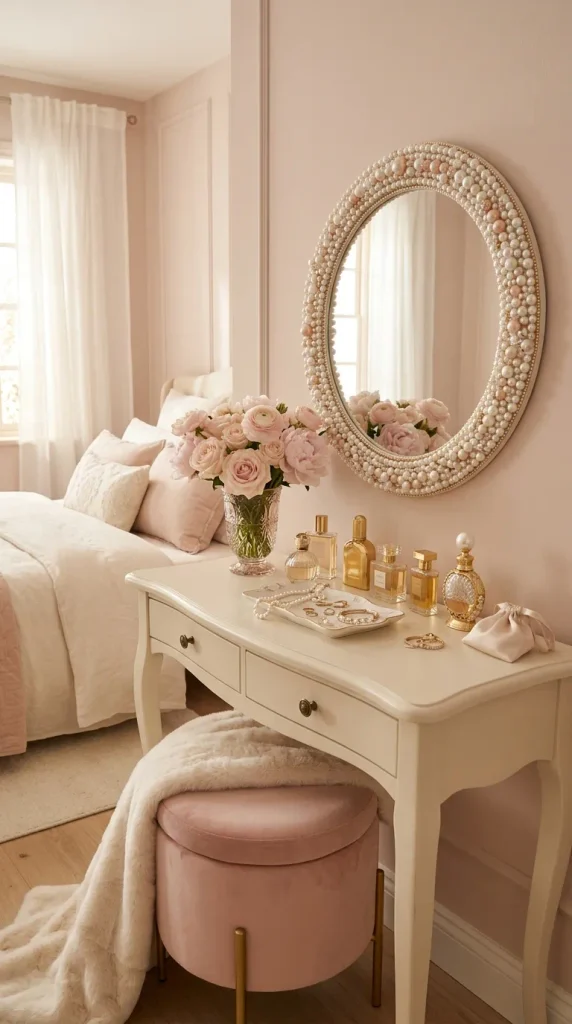
A blush pearl mirror can create a soft, romantic focal point in a bedroom, dressing room, nursery, or feminine vanity area. The key is to combine pink tones with neutral pearls so the finished design feels sophisticated rather than overly colorful.
Begin with a plain mirror frame painted in white, cream, blush, or pale champagne. Choose a combination of white, ivory, blush pink, and very pale rose pearls.
One arrangement is to create a white pearl border around the mirror and add small clusters of blush pearls at the corners. Another option is to alternate white and blush pearls around the entire frame.
For a more delicate design, use mostly white pearls and add only a few pink beads as accents.
This mirror looks beautiful with soft pink textiles, cream upholstery, gold hardware, and warm neutral walls.
Place it above a bedroom dresser or makeup vanity and style the surface with a ceramic tray, perfume bottles, jewelry, candles, and a small vase of flowers.
A round or oval mirror can emphasize the romantic quality of this design, while a rectangular mirror can create a more structured appearance.
Lighting should be soft and warm. A pair of small wall sconces can enhance the pearl surfaces and create gentle reflections.
If you are decorating a nursery, keep the design simple and use securely attached decorations.
The pink-and-pearl combination works especially well when the rest of the room remains relatively neutral.
The finished mirror can add color without requiring a complete room makeover.
It is a charming option for anyone who wants a feminine decorative accent while maintaining a polished Pinterest-style aesthetic.
8. Oversized Pearl Statement Mirror
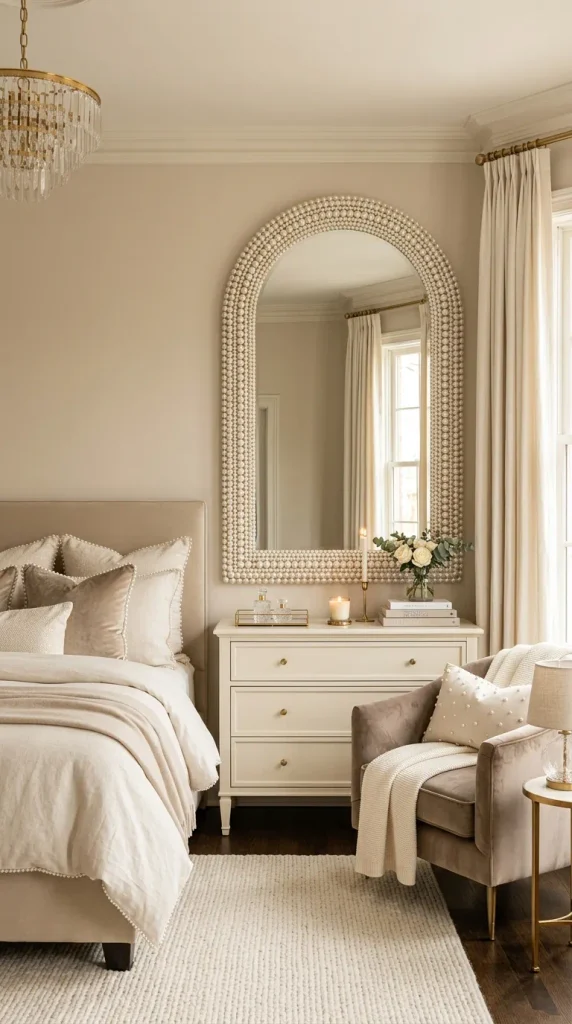
If you want to create a dramatic focal point, consider making an oversized pearl-framed mirror. The larger scale allows the pearl detailing to become an architectural feature rather than simply a decorative accent.
Start with a large rectangular, arched, or oval mirror. Because the frame will already be visually substantial, choose a relatively simple base.
Paint the base in white, ivory, champagne, or another soft neutral color. Use medium and large faux pearls to create a bold border.
You can use several concentric rows around the mirror. Keep the arrangement symmetrical to give the large piece a polished appearance.
An oversized pearl mirror works particularly well above a large bedroom dresser, bathroom vanity, console table, or fireplace.
If you are placing it above furniture, make sure the mirror is appropriately proportioned. A large mirror should feel intentional rather than crowded.
Keep the surrounding decor restrained. One or two decorative objects on the furniture beneath the mirror may be enough.
For a glamorous bedroom, combine the mirror with velvet furniture, soft neutral bedding, crystal lighting, and champagne accents.
For a more contemporary room, pair it with clean-lined furniture and neutral colors so the pearl texture becomes the main decorative element.
Large mirrors can also help reflect light and make a room feel more open.
Because an oversized mirror can be heavy, use suitable mounting hardware and ensure the wall can support the completed piece.
The finished design can look remarkably luxurious while still being created as a personalized DIY project.
9. Minimalist Single-Row Pearl Mirror
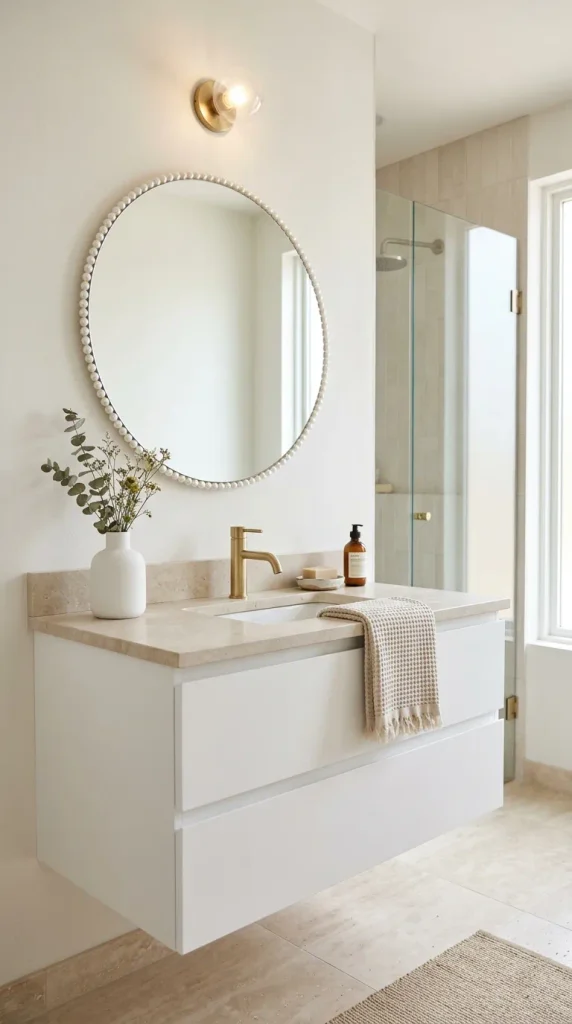
If you love pearl decor but prefer a clean modern aesthetic, a minimalist single-row pearl frame may be the perfect solution. Instead of creating a heavily decorated border, this design uses one carefully placed row of pearls.
Choose a simple mirror with a thin flat frame. Paint it white, cream, beige, or soft gray.
Select small or medium pearls with a consistent size and finish. Attach them closely together around the frame, creating a clean continuous border.
The simplicity of this design allows the pearls to provide texture without overwhelming the mirror.
This idea works especially well in modern bedrooms, bathrooms, dressing rooms, entryways, and minimalist vanity areas.
Pair the mirror with simple furniture and neutral materials such as light wood, white stone, linen, glass, and ceramic.
You can introduce one subtle metallic accent, such as a brushed gold faucet or small brass accessory, but avoid filling the area with competing decorative details.
For a contemporary appearance, choose cool white pearls. For a warmer room, ivory or champagne pearls may look better.
A round mirror with a single pearl border can feel especially elegant because the circular shape creates a continuous visual rhythm.
This design is also one of the easiest DIY options because it requires fewer materials and less time.
It is a great choice if you are making your first pearl mirror or want a decoration that can transition easily if your interior style changes.
The finished result is delicate, refined, and understated while still offering the special handmade quality of a DIY project.
10. Layered Pearl and Beaded Mirror Frame
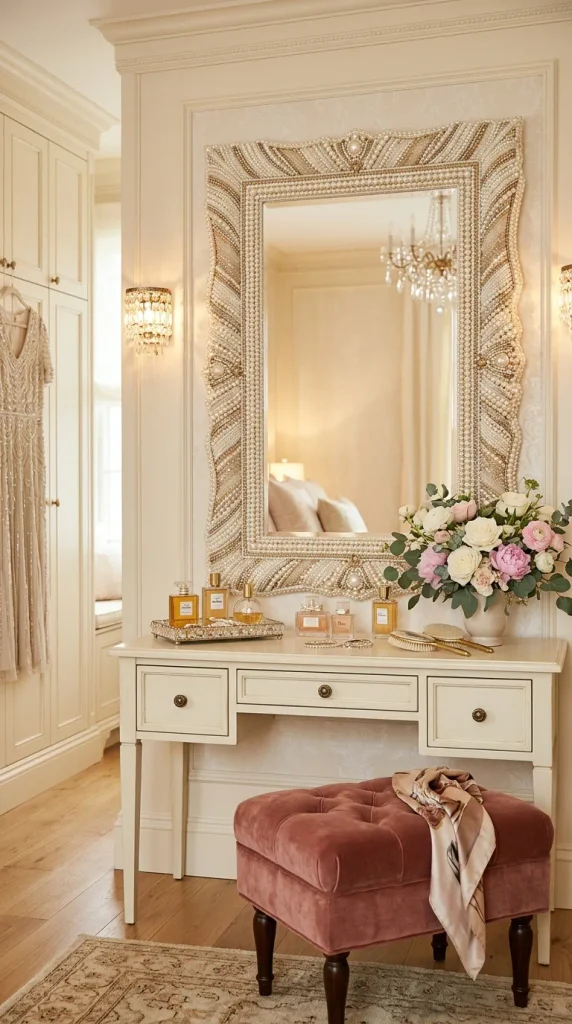
For the most detailed and decorative option, create a layered frame combining pearls with different types of beads. This approach allows you to create a highly customized statement mirror.
Begin with a sturdy flat frame and paint it in a neutral color. Choose several complementary materials, such as white pearls, ivory pearls, clear crystal beads, small gold beads, and decorative glass beads.
Plan your pattern before attaching anything. You might create an inner row of small pearls, a middle row of larger pearls, and an outer border of tiny gold or crystal beads.
Another option is to create small repeating clusters throughout the frame. Keeping the pattern consistent will prevent the finished piece from looking random.
This design works particularly well with glamorous bedrooms, dressing rooms, luxury bathrooms, and decorative entryways.
Because the frame already contains multiple textures, keep the surrounding room relatively simple.
A velvet stool, marble surface, glass accessories, and warm lighting can complement the luxurious appearance.
When working with multiple bead types, choose materials that share a similar color palette. White, ivory, clear, champagne, and soft gold create a cohesive combination.
Avoid using too many bright colors because they can distract from the natural elegance of the pearls.
Take your time with the arrangement. The success of a detailed frame depends heavily on even spacing and careful attachment.
The finished mirror can look like a custom boutique piece and become the main decorative feature of the room.
This is an excellent project for experienced DIY decorators who want to create something elaborate, personalized, and highly photogenic.
Materials Used for DIY Pearl Mirror Frames
The exact supplies will depend on the design, but most projects can be created with affordable craft materials.
Basic Materials
- Plain mirror
- Wooden, MDF, or foam-board frame
- Faux pearls
- Pearl beads in different sizes
- Strong craft adhesive
- Paint
- Paintbrushes
- Measuring tape
- Pencil
- Scissors
- Protective gloves
- Clean cloth
Optional Decorative Materials
- Gold beads
- Crystal beads
- Glass beads
- Decorative flowers
- Seashells
- Ribbon
- Rope
- Wooden beads
- Metallic paint
- Jewelry-style embellishments
- Small ceramic decorations
Always choose an adhesive appropriate for the materials and intended use. Allow the adhesive and paint to cure fully before moving or mounting the mirror.
How to Make a DIY Pearl Mirror Frame
The basic process is straightforward, but careful preparation will produce a much more polished result.
Step 1: Choose Your Mirror
Start with a mirror that suits the size and shape of your room. Round, oval, rectangular, and arched mirrors can all work beautifully.
Step 2: Prepare the Frame
Clean the frame thoroughly and remove dust or grease. If you are creating a new frame, measure the mirror carefully before cutting or assembling the backing.
Step 3: Paint the Base
Paint the frame in a color that complements your pearls. White, ivory, cream, champagne, and pale pink are versatile choices.
Step 4: Plan the Pearl Pattern
Before using adhesive, arrange a small section of pearls without attaching them. This lets you test spacing and decide whether you prefer a single row, double row, clusters, or a more elaborate design.
Step 5: Attach the Pearls
Work in small sections. Apply adhesive carefully and place each pearl according to your chosen pattern.
Step 6: Check the Spacing
Regularly step back from the mirror and check the overall design. Small spacing differences can become more noticeable as you move around the frame.
Step 7: Allow Everything to Dry
Do not move the mirror until the adhesive has fully cured according to its instructions.
Step 8: Mount and Style
Secure the finished mirror using appropriate wall hardware. Style the area with a few complementary accessories rather than overcrowding the frame.
How to Choose the Right Pearl Style
Pearls come in many finishes and sizes, so choosing the right ones can significantly change the final appearance.
White pearls create a classic, clean appearance.
Ivory pearls feel warmer and work beautifully with cream and beige interiors.
Champagne pearls add a subtle glamorous quality.
Pink pearls are ideal for romantic and feminine spaces.
Mixed-size pearls create depth and texture.
Small pearls are better for minimalist borders and delicate designs.
Large pearls work well for dramatic statement mirrors.
Choose the finish according to the existing color palette of your room.
Pinterest Styling Tips for Pearl Mirror Decor
For a Pinterest-worthy result, focus on composition rather than simply adding as many decorations as possible.
Place the mirror where it can reflect natural light or an attractive part of the room.
Keep the area surrounding the mirror uncluttered.
Use a small number of beautiful accessories such as flowers, candles, perfume bottles, jewelry trays, ceramic vases, or folded towels.
Neutral backgrounds allow pearl frames to stand out particularly well.
Soft lighting can emphasize the subtle shine of the pearls.
For photography, use a clean composition with coordinated colors and natural textures.
The most attractive pearl mirror displays usually combine soft colors, elegant materials, gentle lighting, and intentional styling.
Common DIY Pearl Mirror Mistakes to Avoid
One common mistake is using too many different pearl colors. Unless the design is intentionally colorful, keeping the palette limited will create a more sophisticated result.
Another mistake is uneven spacing. Take time to plan your arrangement before permanently attaching the pearls.
Using too much adhesive can also create visible marks around the beads. Apply only the amount needed to secure each piece.
Do not forget the weight of the finished frame. Multiple layers of beads can make a mirror considerably heavier.
Finally, avoid overcrowding the surrounding area. The pearl frame should remain the visual focal point.
Final Thoughts
These 10 DIY pearl mirror frame ideas show how a simple mirror can become a beautiful decorative statement with relatively affordable materials. Whether you prefer a classic single-row design, a glamorous pearl-and-gold frame, a romantic floral arrangement, a coastal shell-and-pearl border, or a dramatic layered statement mirror, there is plenty of room to customize the project.
Pearls work especially well because they provide texture and shine without being visually harsh. They can make a room feel feminine, elegant, romantic, glamorous, or even coastal depending on the colors and materials you combine with them.
For a timeless look, stick with white or ivory pearls. For a more luxurious design, introduce champagne and gold. If you love romantic interiors, combine pearls with blush tones and flowers. For coastal decor, add shells and natural textures.
The most important part of a successful DIY pearl mirror is patience. Plan your pattern, maintain consistent spacing, use suitable adhesive, and allow everything to dry properly.
With thoughtful styling, even a simple inexpensive mirror can become a beautiful handmade focal point that looks perfectly at home in a Pinterest-worthy bedroom, bathroom, vanity area, or entryway.





Leave a Reply